How to Set Up a CI/CD Workflow, Part Two: Deploying Docker Images in AWS Using ECS
==
There are huge benefits to having a continuous deployment (CD) strategy. Automated deployments mean your team can pursue faster release cycles and experiment with live features more frequently. Automated processes mean fewer people have to worry about how to do something manually. A good CD setup is also essential when teams reach a certain size: having a clear process to release helps to avoid miscommunication.
In a [previous article](https://monadical.com/posts/set-up-ci-workflow.html), I explained how to set up a pipeline to send images from GitHub to AWS ECR. In this article, I will focus on implementing the missing steps required for a fully functional CD pipeline.
<center>
</center>
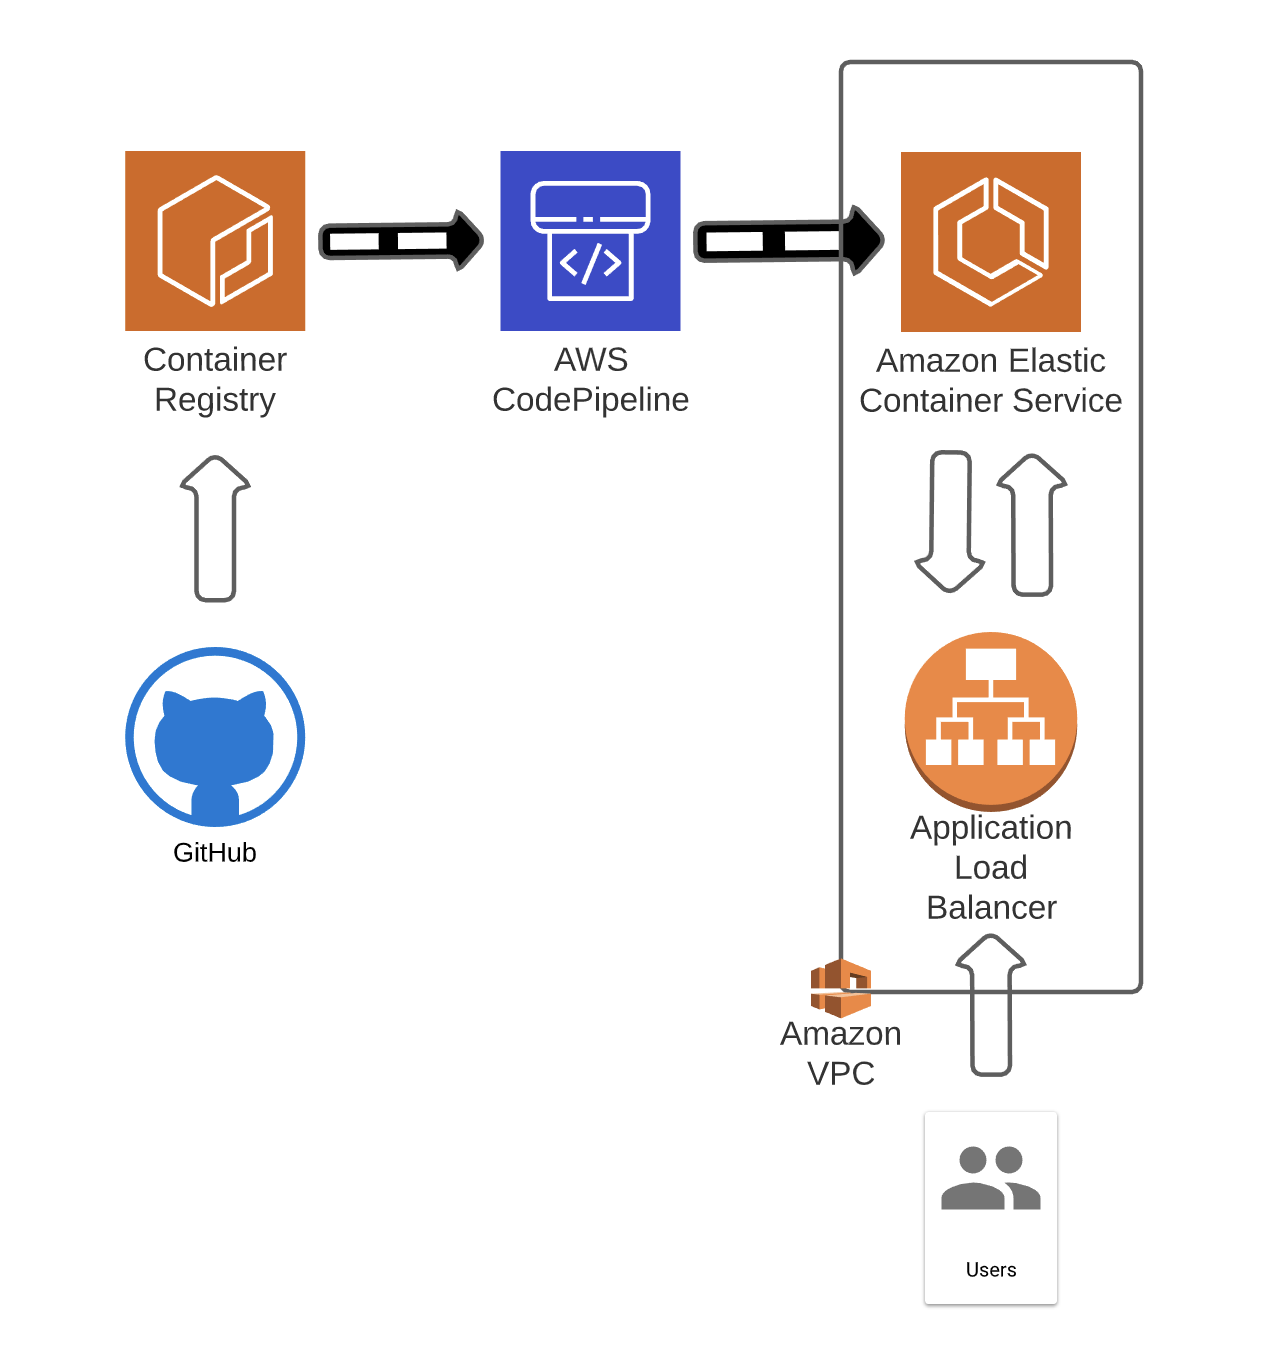
There are several services for deploying images to production environments in the AWS ecosystem. I will explore a pipeline that takes the images received at AWS ECR and deploys them to AWS ECS using AWS CodePipeline. At a very high level, the AWS services that I will use to set up the pipeline are:
- AWS ECR (Elastic Container Registry): Repository where you upload your images.
- AWS ECS (Elastic Container Service): The service that will serve as the deployment target for your images. This could be replaced by EBS (Elastic Beanstalk) or EKS (Elastic Kubernetes Service) with some modifications.
- AWS CodePipeline: This service listens to events and reacts to them. It can be configured to serve a wide range of use cases. In this case, it will listen to AWS ECR image uploads.
- AWS ELB (Elastic Load Balancer): This balances the load between the available instances. This demonstration will only use a single container, but AWS ELB is still needed to enable a public interface for the service.
<center>
Target Architecture
</center>
The first thing you need is a functioning ECR repository. If you don’t know how to set one up, have a look at my article, [From GitHub Actions to AWS ECR](https://monadical.com/posts/set-up-ci-workflow.html).
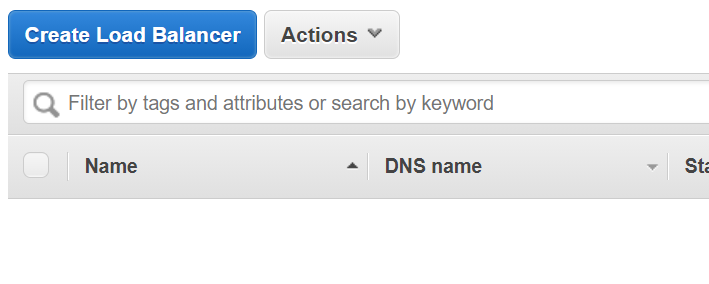
To create the load balancer, go to the EC2 console and select 'Create Load Balancer' in the Load Balancers section:
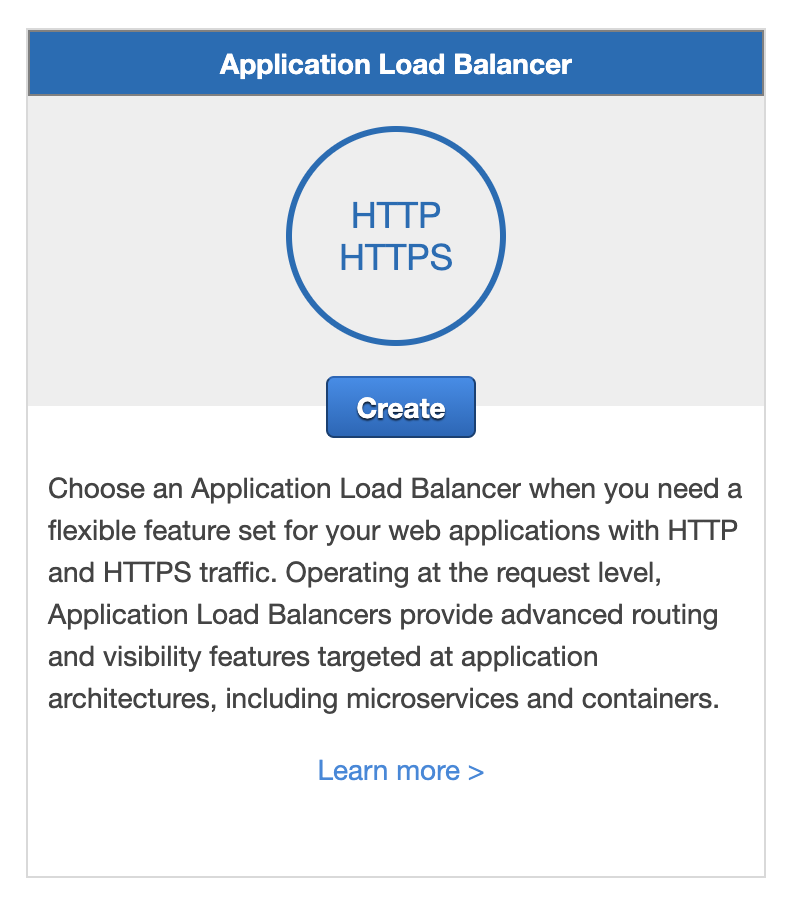
Create a new Application Load Balancer:
<center>
</center>
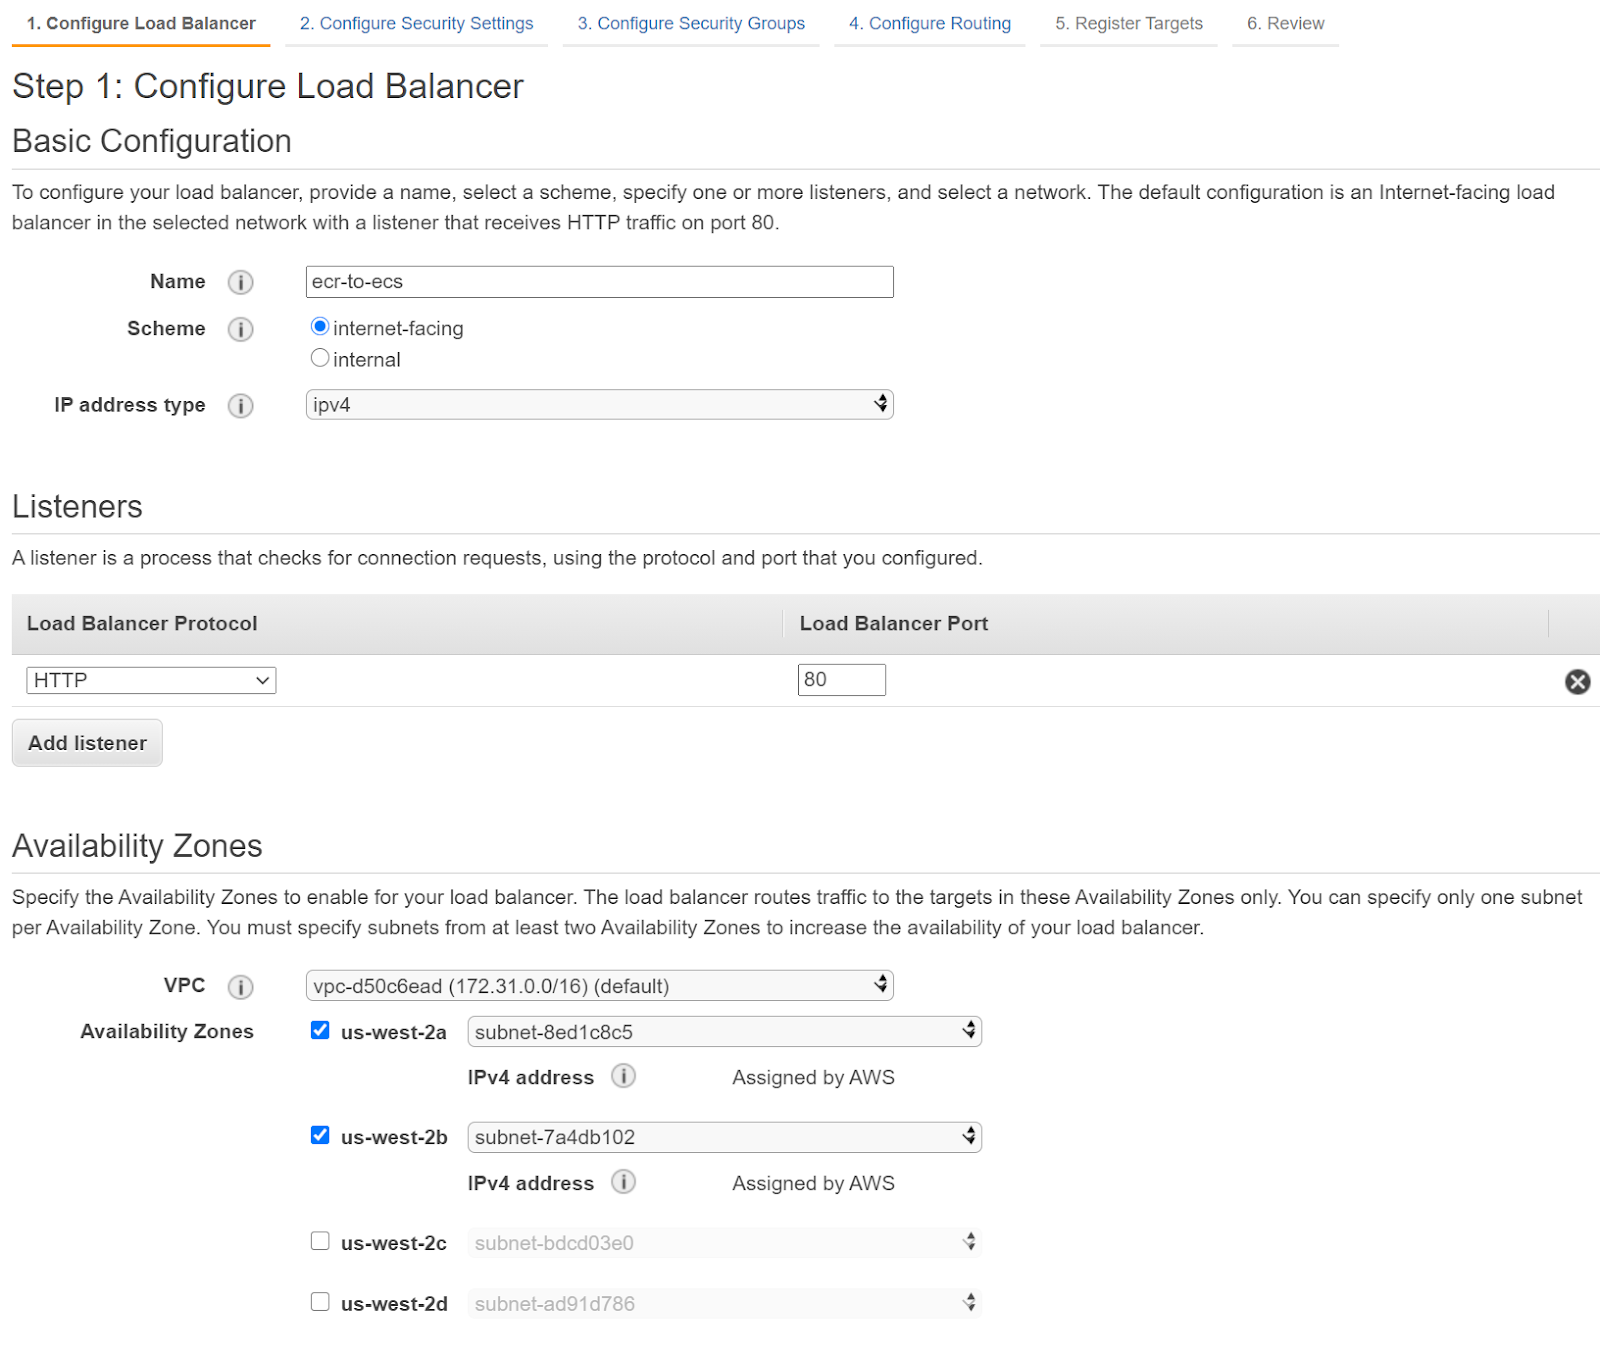
Enter a name and enable a couple of availability zones:
<center>
</center>
Leave the defaults for the next step. Take note of the subnets you use, as they will need to match the ones you assign to the cluster service later on. (If you don’t do this, you might have issues with health checks.)
You will get a warning about not using a secure endpoint (HTTPS). This can be explored later, but it will require an additional service to manage a SSL certificate and, depending on the setup, there may be a significant amount of work to do. How to set up a secure connection is out of the scope of this blog post, but if you’re interested in how to do that, check out [the official documentation](https://docs.aws.amazon.com/elasticloadbalancing/latest/application/listener-update-certificates.html).
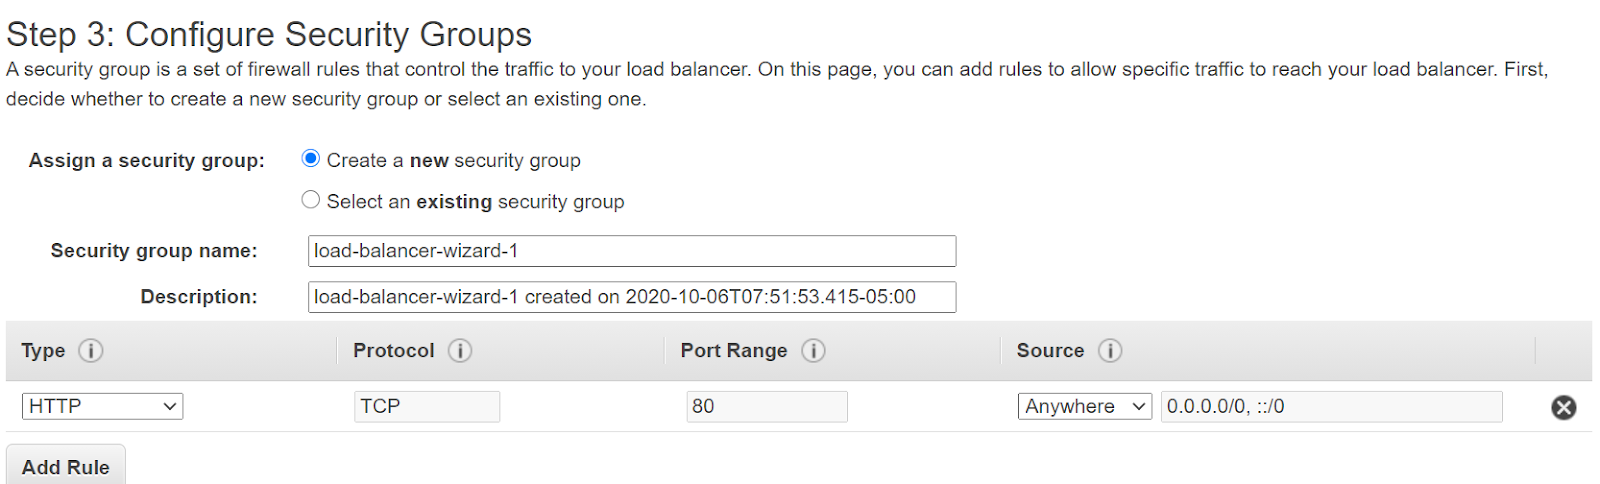
For the security group, just enable anything that allows traffic from anywhere to port 80. If there aren’t any available, you can create a new one with these requirements:
In the `Configure Routing` section, create a new group, assign a name, and leave the rest as is (http in port 80 with target type Instance).
Leave the rest of the steps with the defaults and create the load balancer.
The next resource you will need is a cluster to deploy to. However, this requires a task definition, which you will need to create first. Go to AWS Elastic Container Service in the AWS console:
<center>

</center>
The task definition will dictate how your task will be deployed and which strategy and resources you will use:
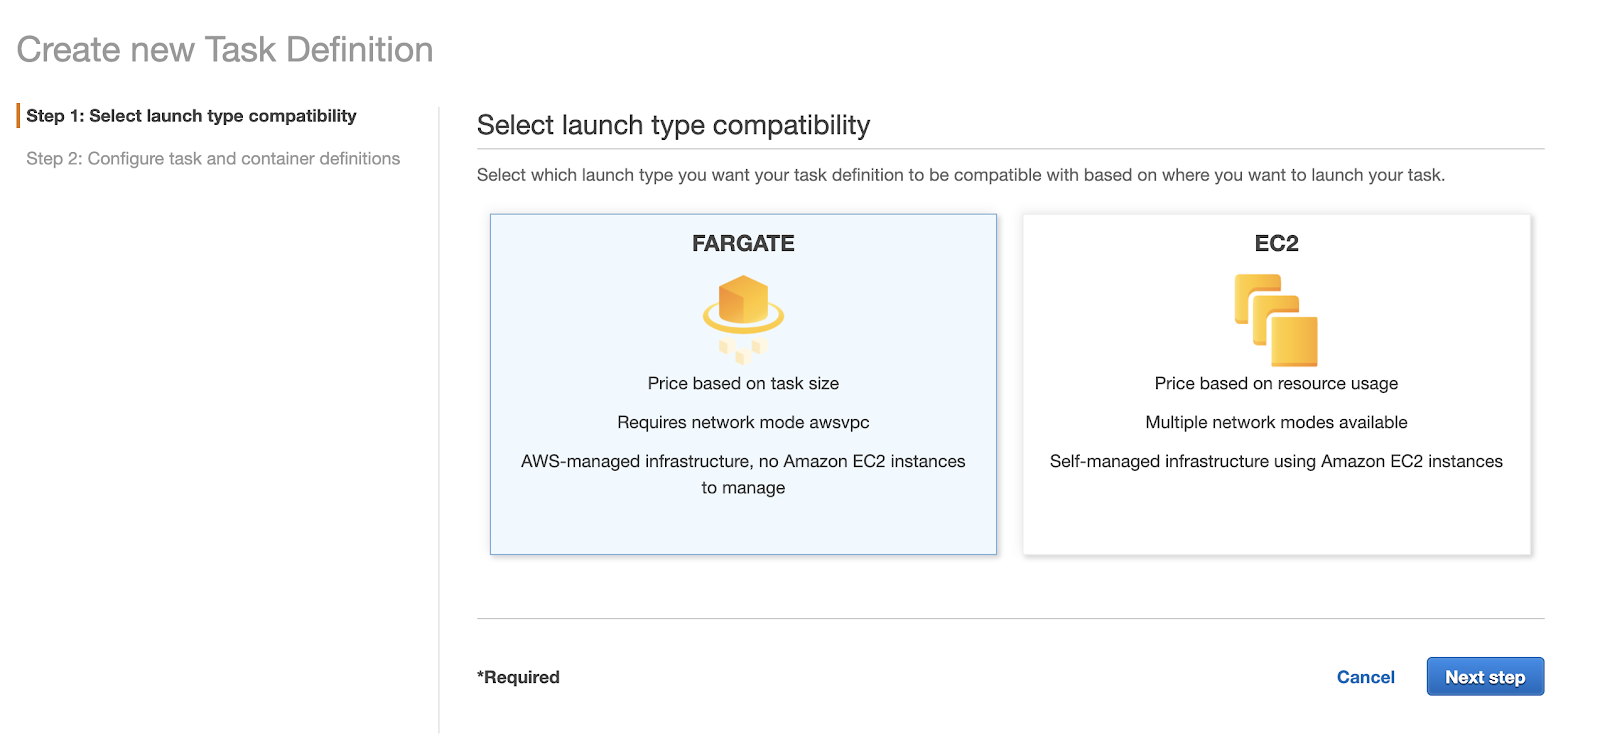
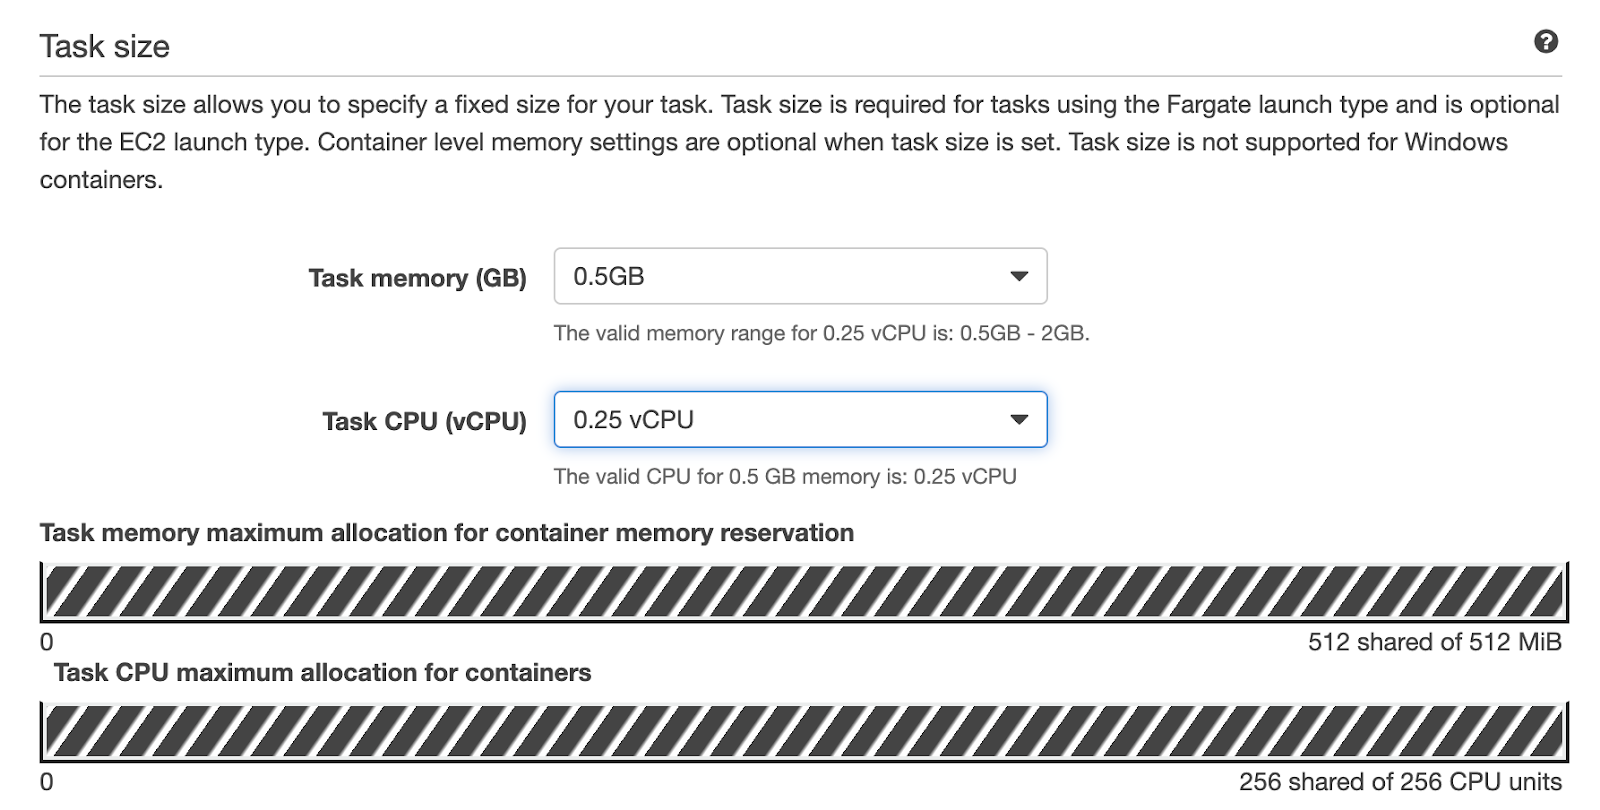
Use FARGATE and click continue. In the next step, pick a name for your task definition, and select your preferred task size:
<center>
</center>
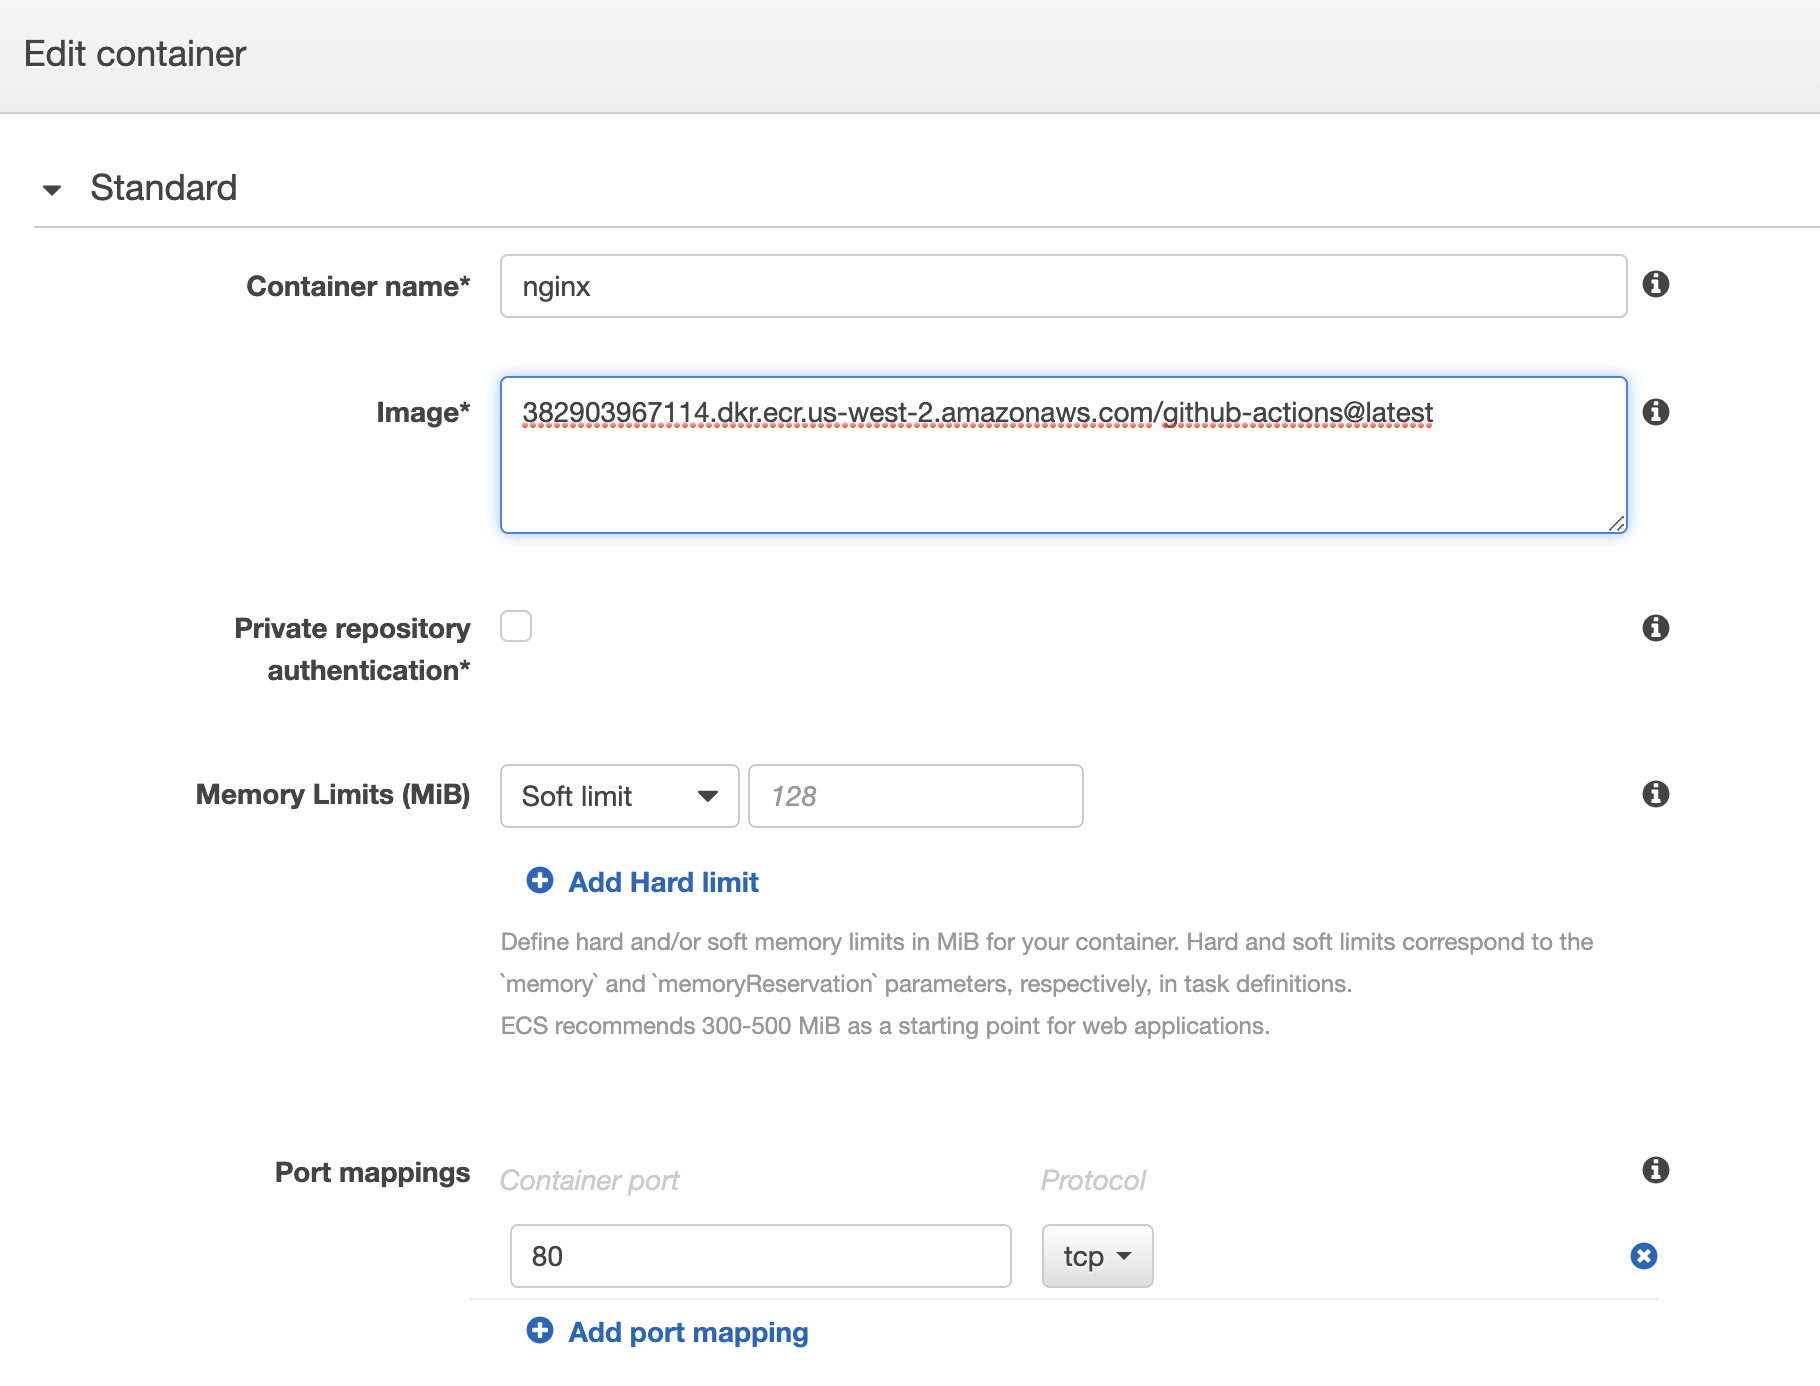
For the next step you will need your ECR repository URL. Remember it has the following structure: `(aws_account_id.dkr.ecr.region.amazonaws.com)`. You can also find this information by going to the ECR service and checking it. If you prefer, you can use images from Docker Hub. Whatever name you use in this step (nginx in this case) will be needed later, so make a note of it.
As mentioned in the [documentation](https://docs.aws.amazon.com/AmazonECS/latest/developerguide/task_definition_parameters.html#standard_container_definition_params), after you create your cluster, it will use these container definitions to pull the latest image and tag from the repository. However, subsequent updates to the images will not be propagated to running instances. You will need to follow some additional steps to prevent stale containers.
In the case of the nginx image, you will need a port mapping to port 80, to allow the service to forward the traffic in that port to the container. Also, in the health check you can add `/docker-entrypoint.sh` in the command field. This is the command that this container uses to start and is what the task definition will use to check it is still running.
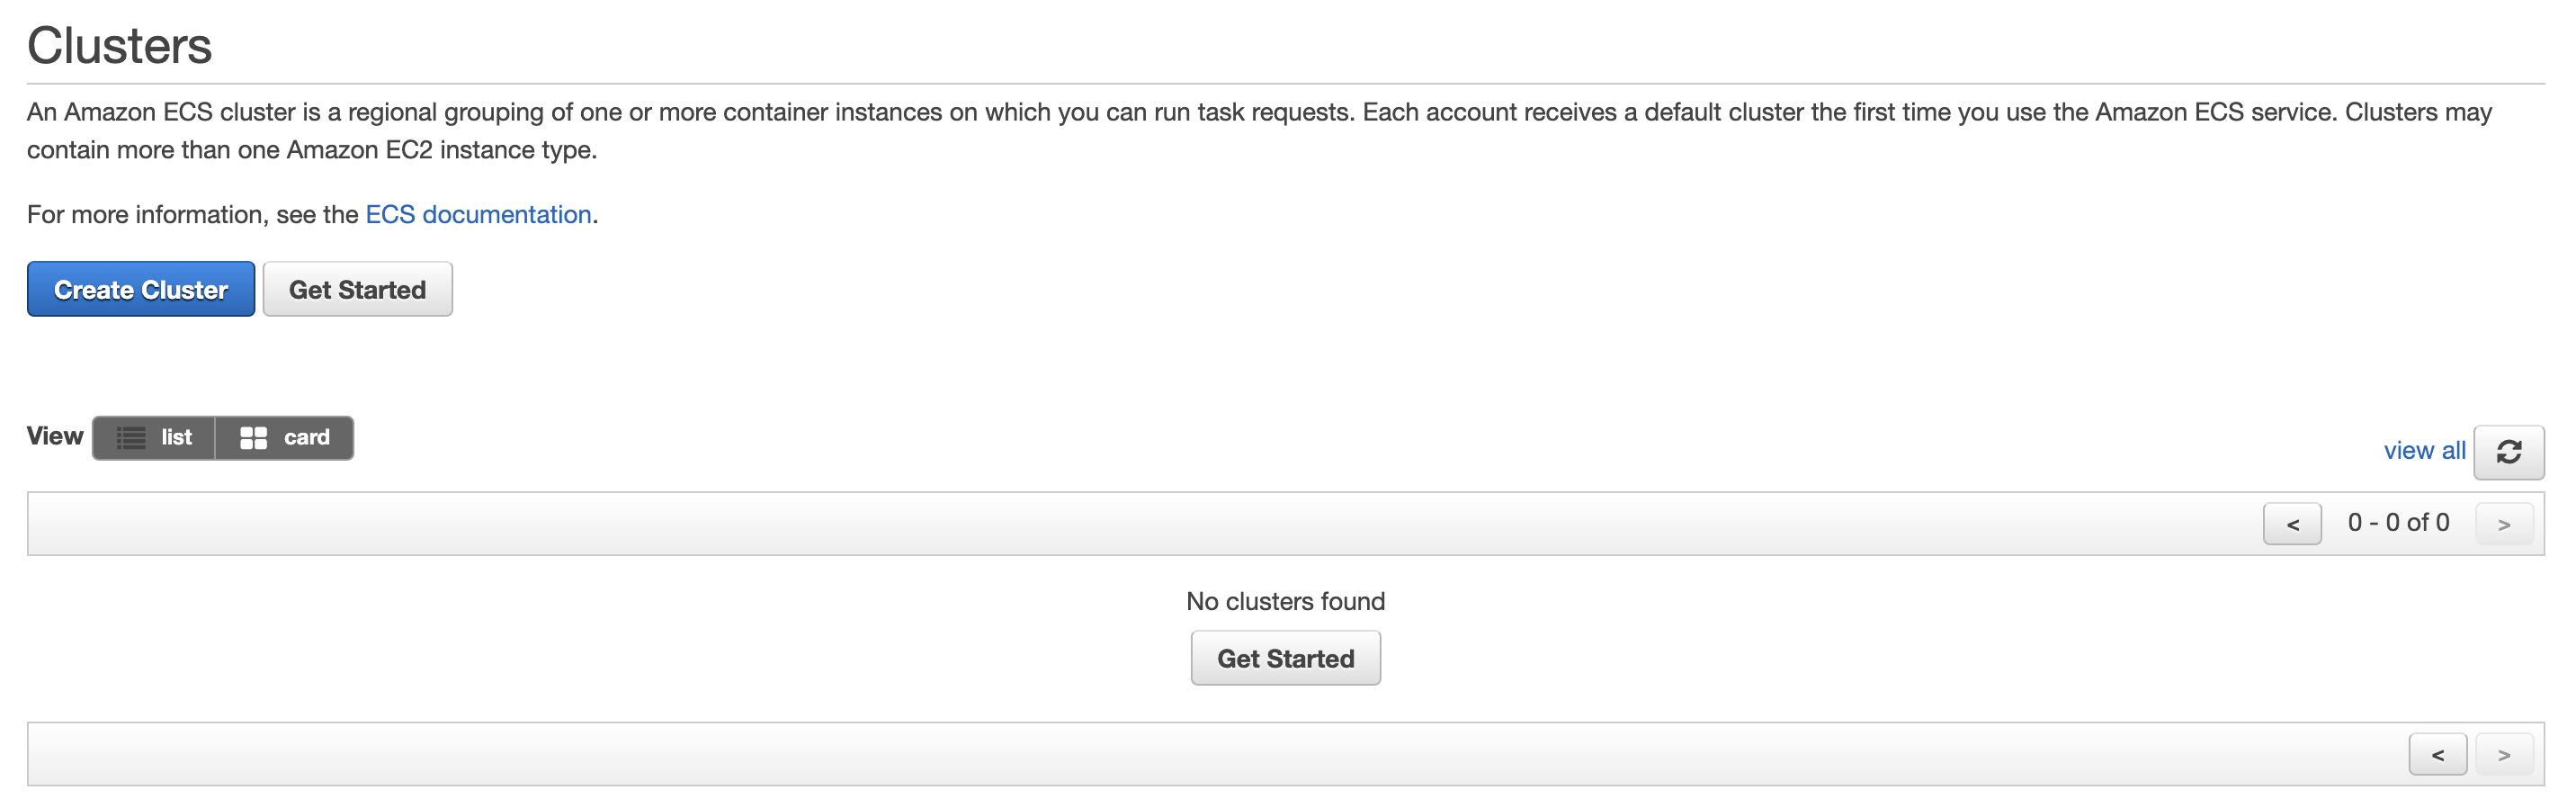
If everything has been entered correctly, you can now create the cluster. Click on ‘Clusters’, and then create a cluster:
<center>
</center>
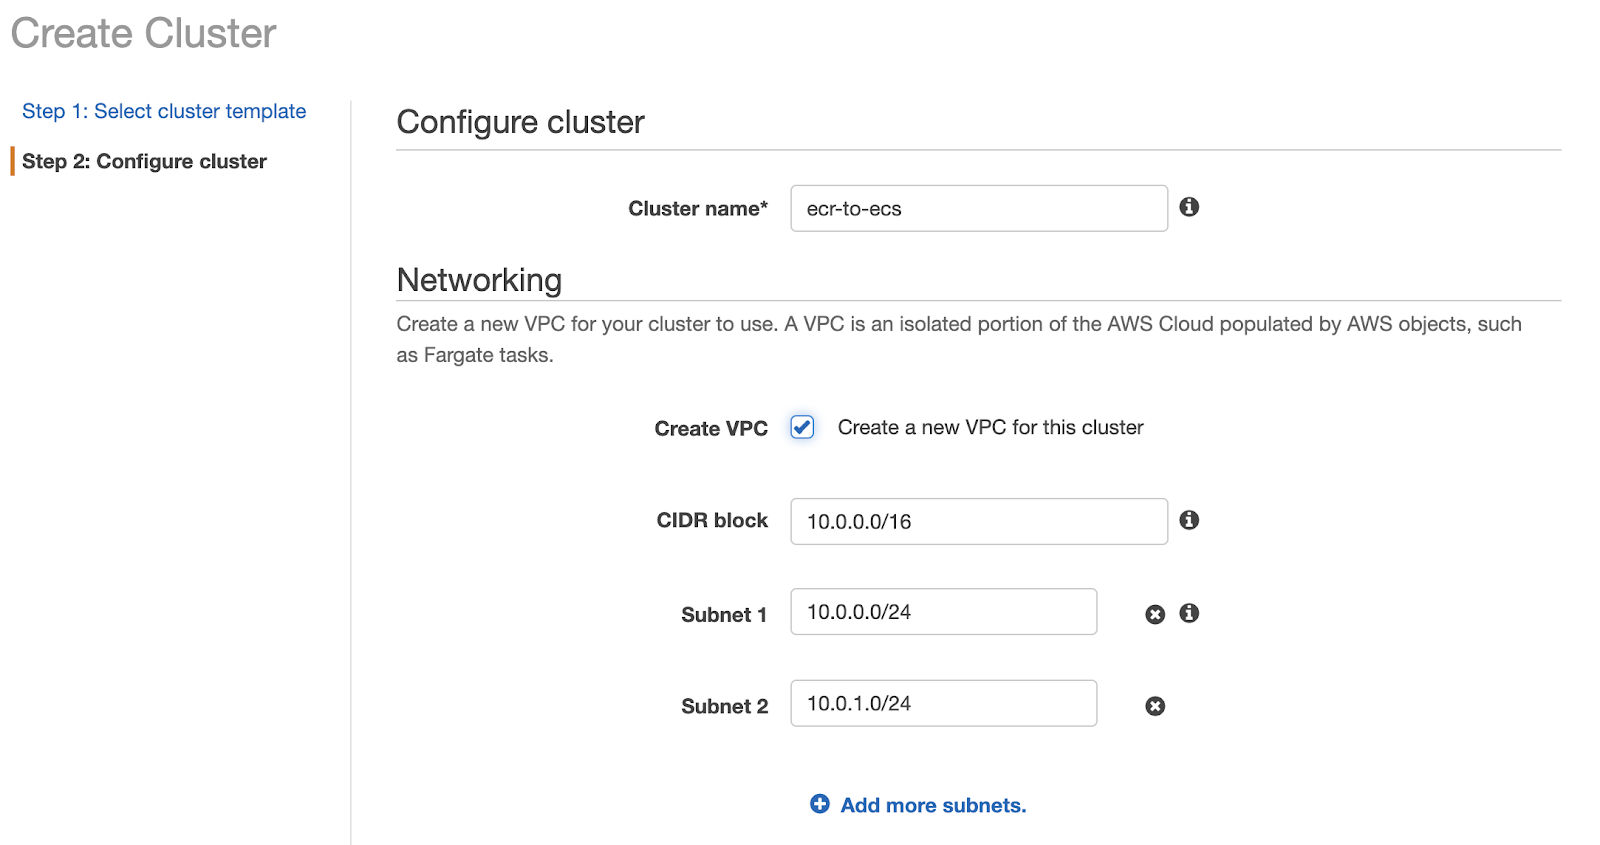
You can leave the first template as it is:
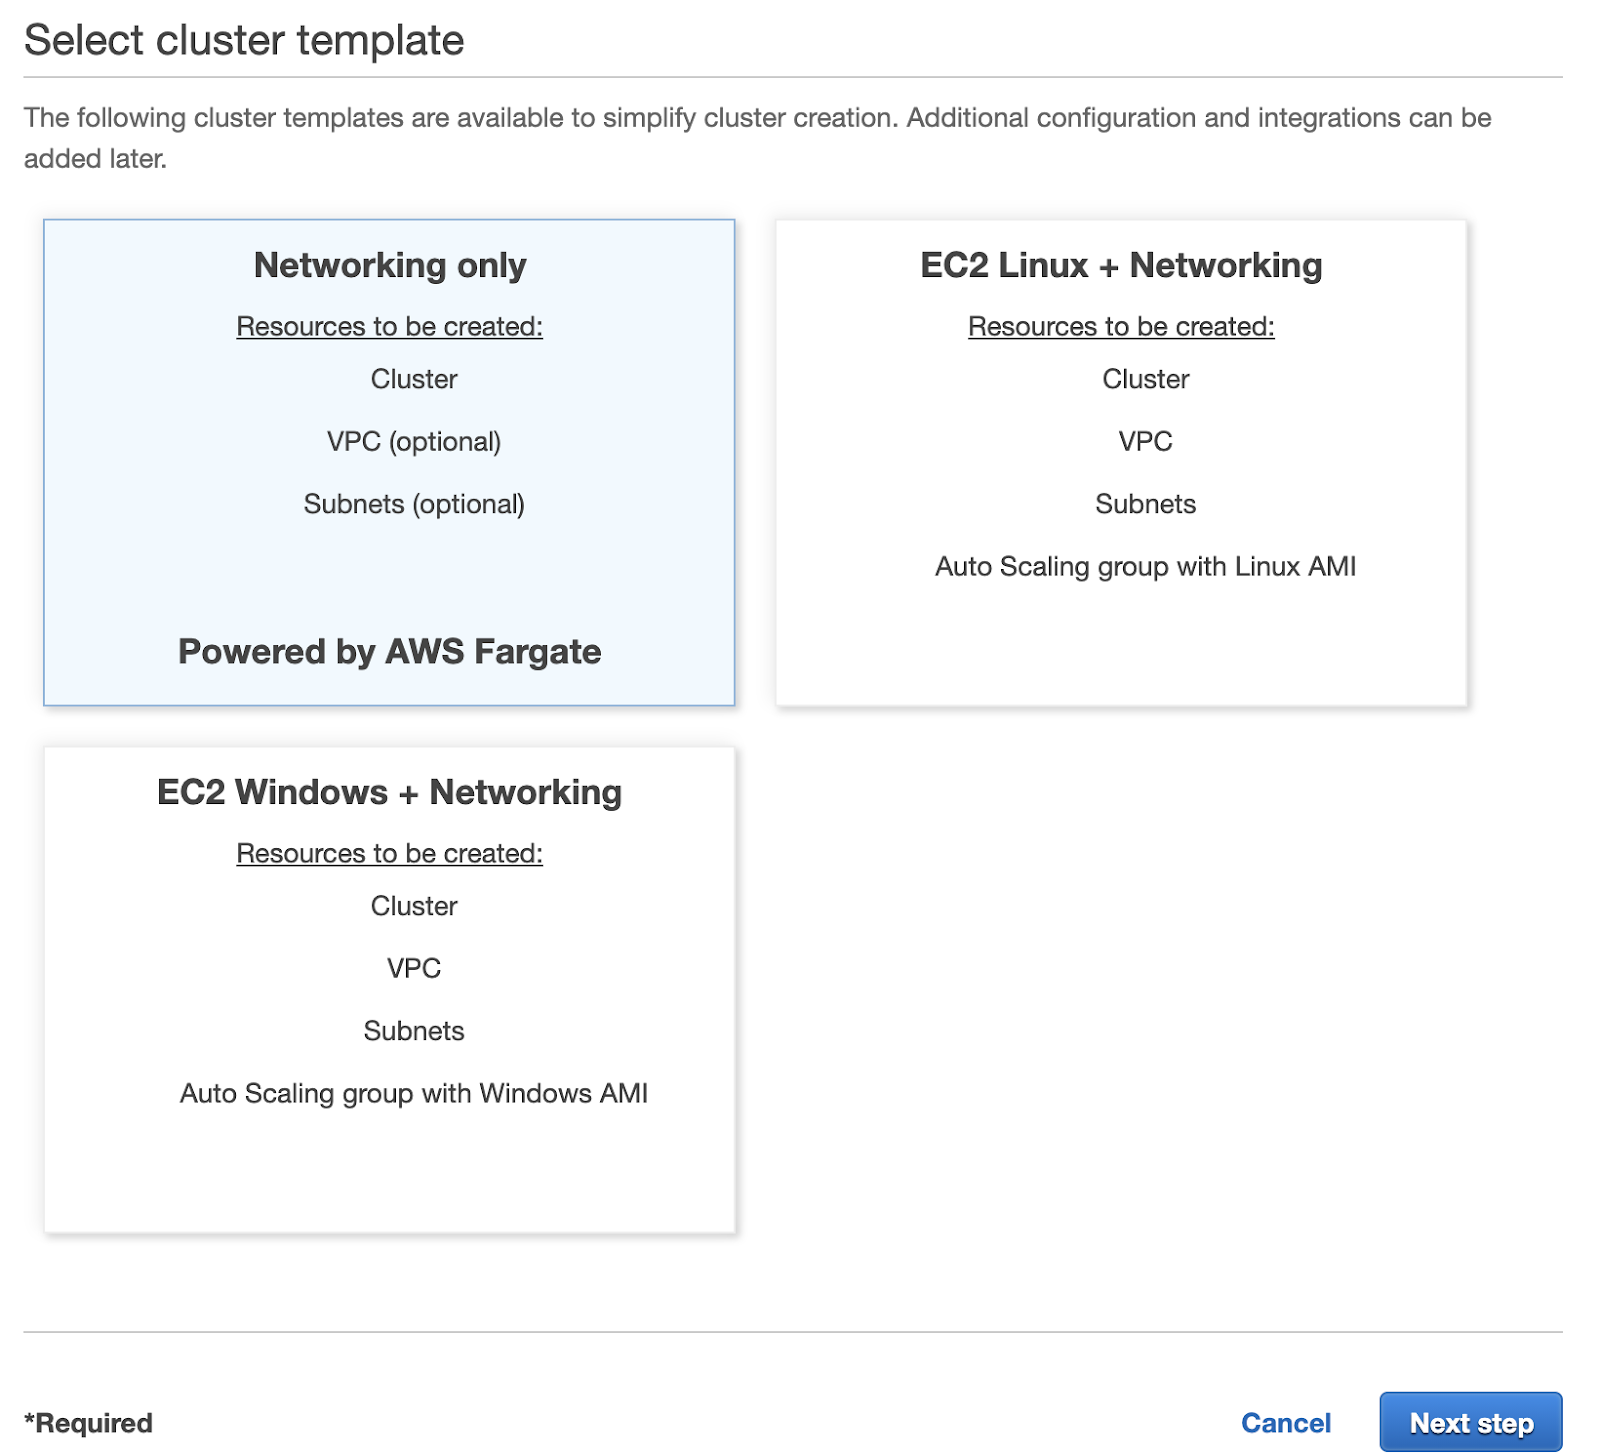
Pick a name for your cluster. You may want to create a new VPC if you want to keep it isolated from the rest of your services, however, this is optional. If you create a new VPC, remember to update your load balancer, or it will be unable to find your cluster.
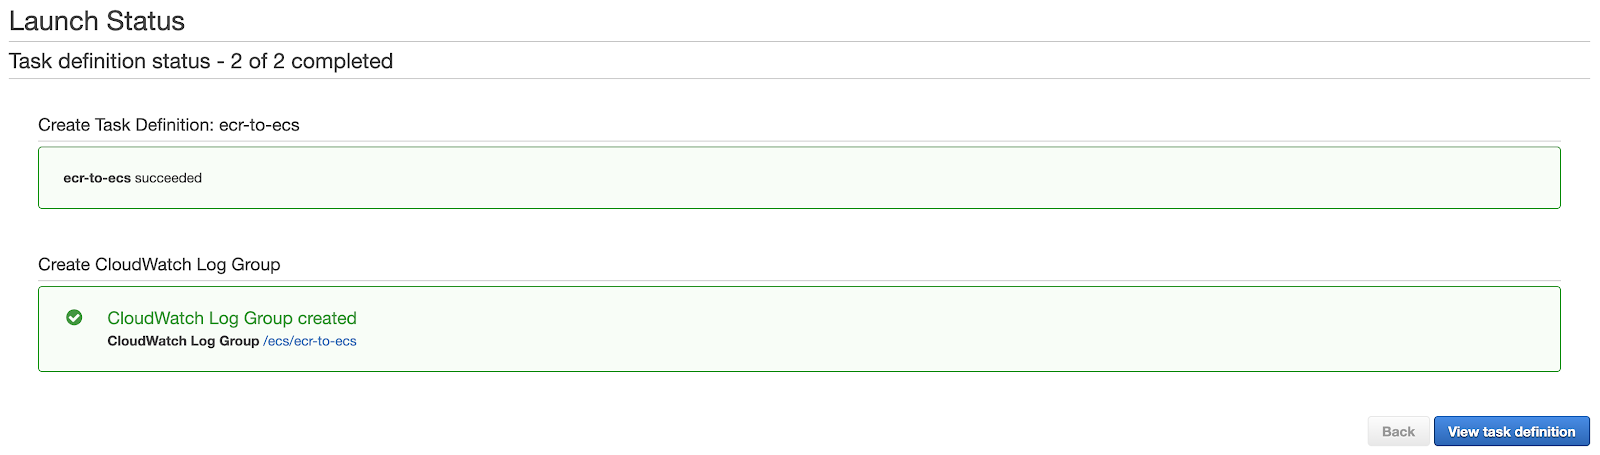
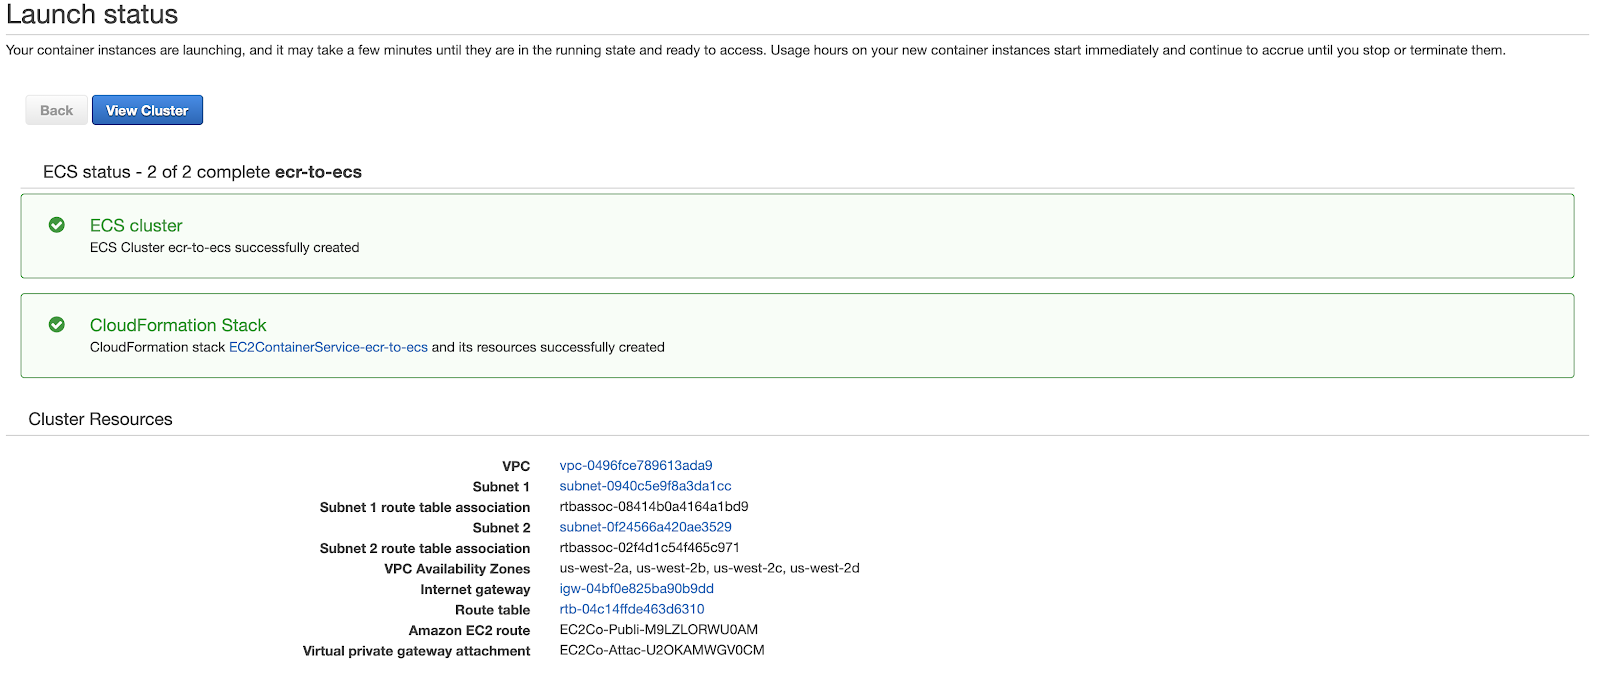
You should see a screen like this:
If you click ‘View Cluster’, you should see something similar to this:
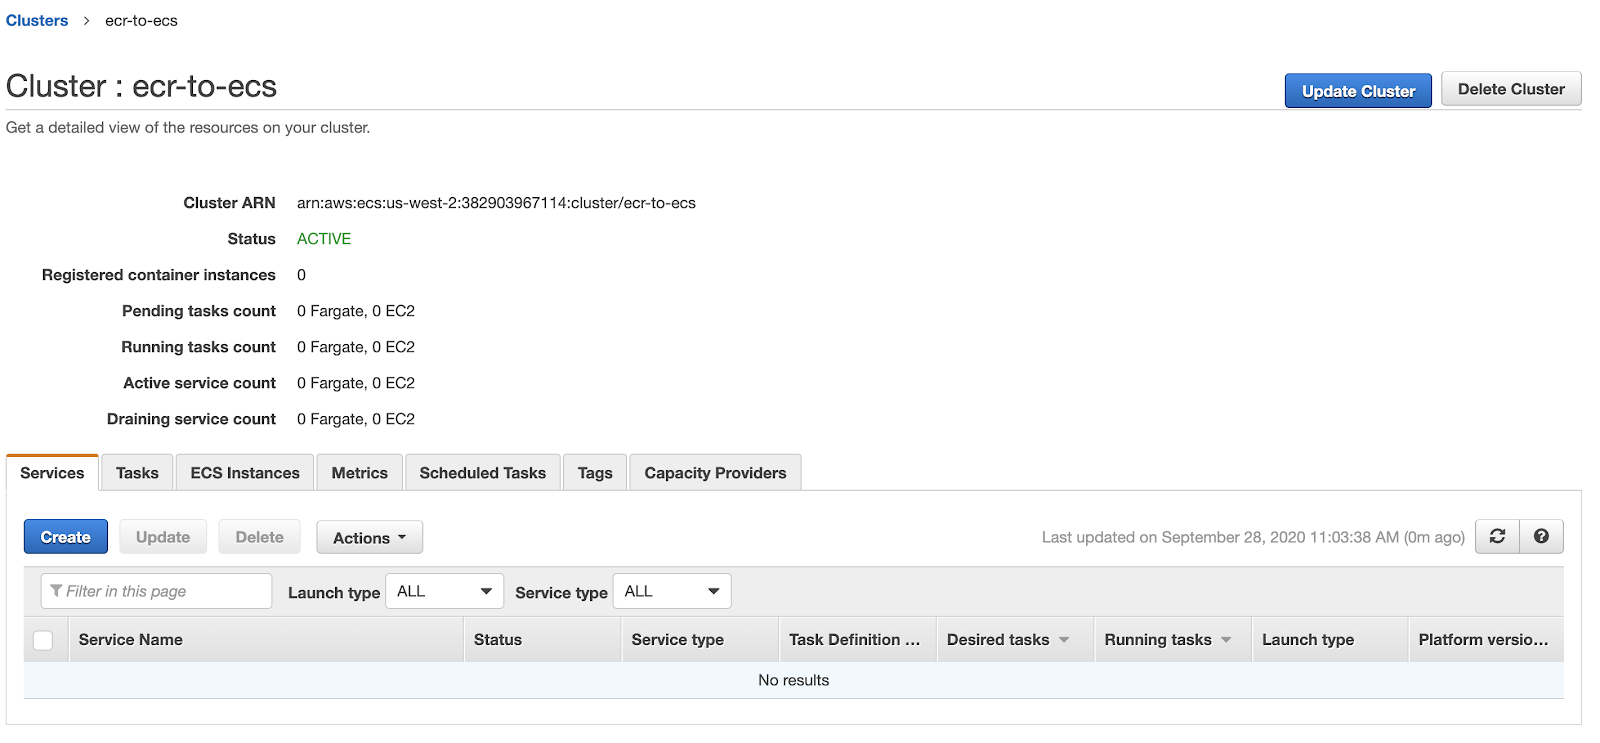
In the services tab, click ‘Create’:
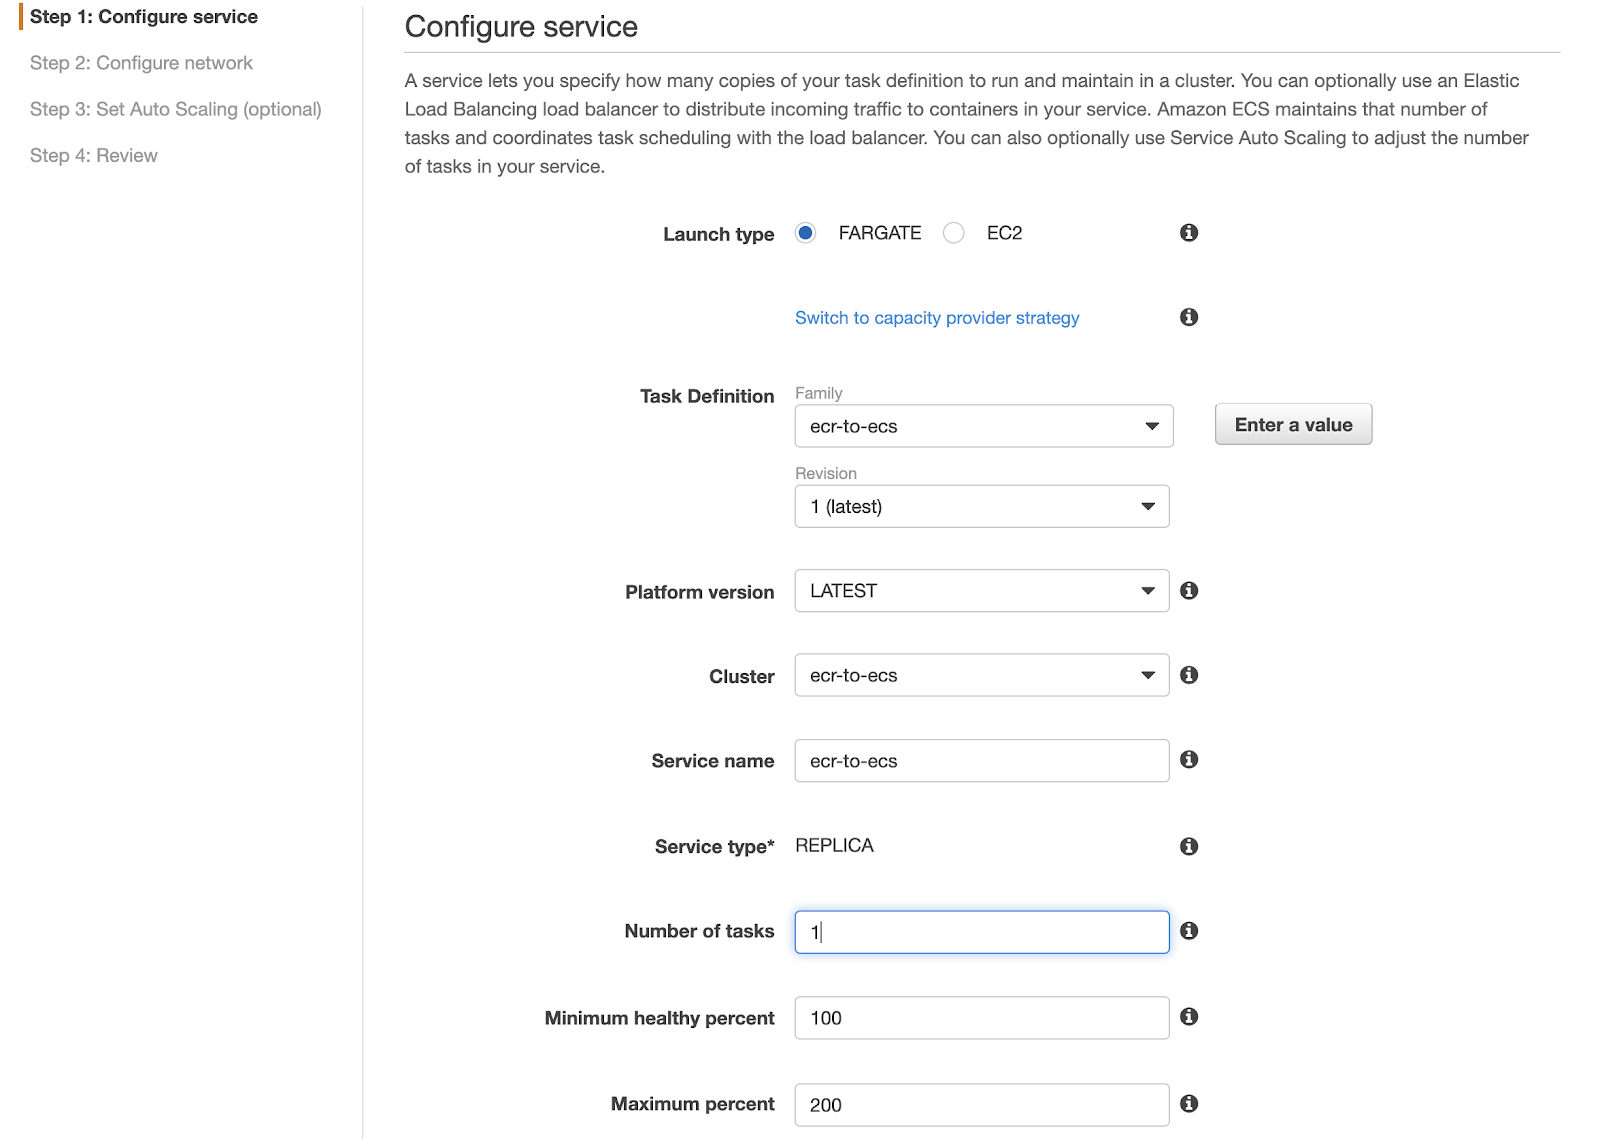
Pick FARGATE, and set the number of tasks to 1 (you will need to change this in a production setup, because replication is important for availability). You can use the service name of your choice. For task definition, pick the one you just created a couple of steps back.
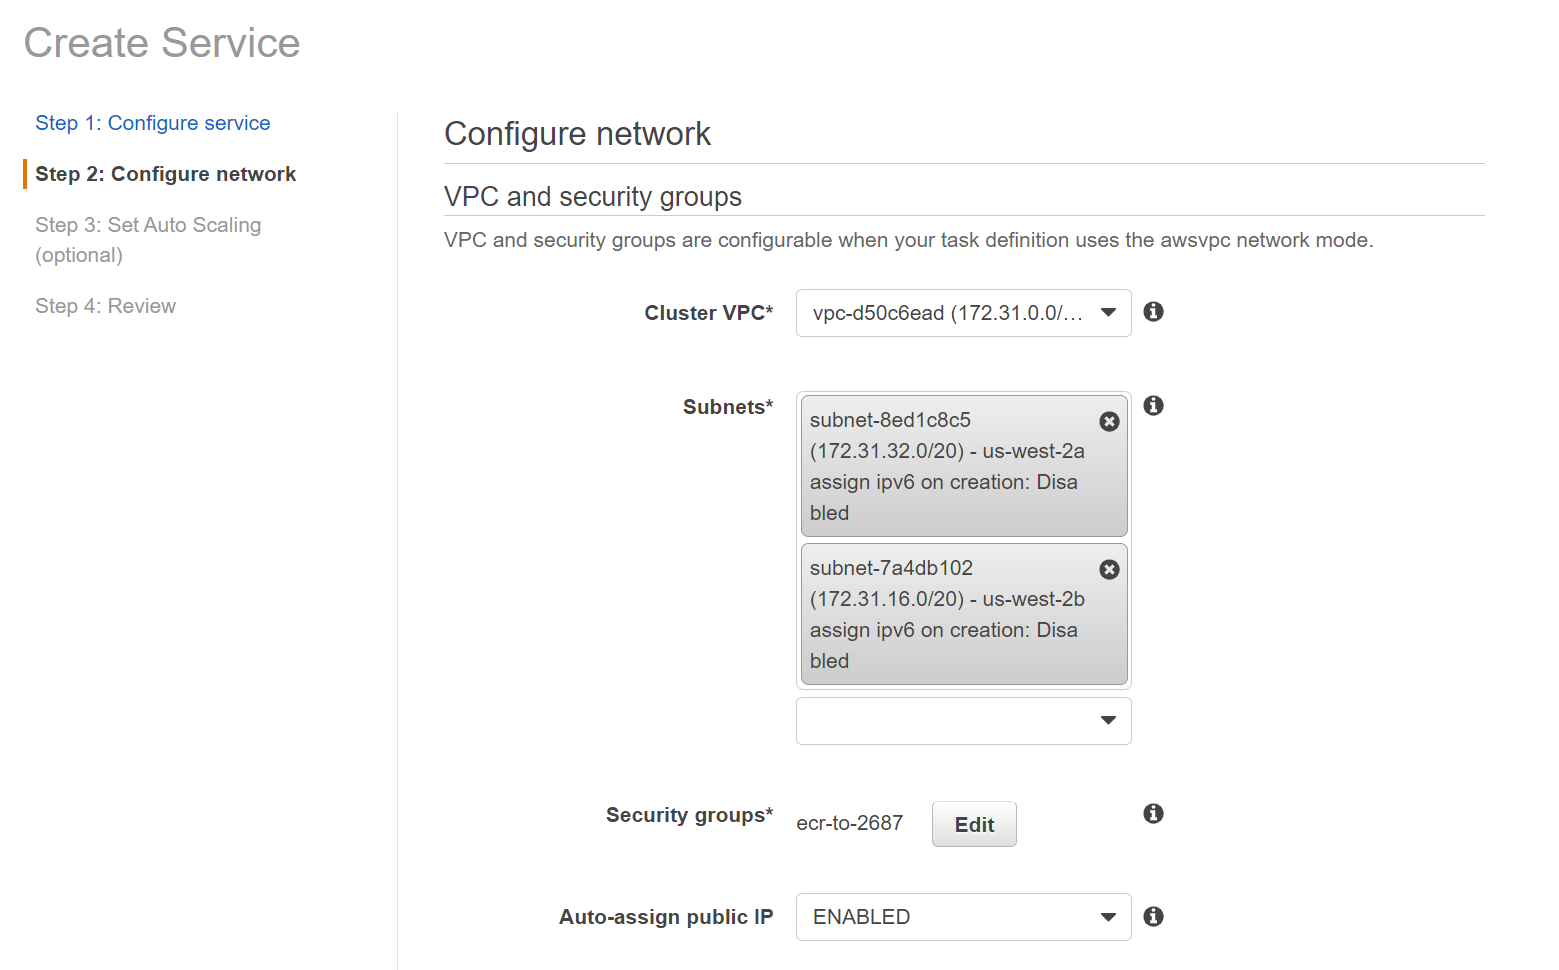
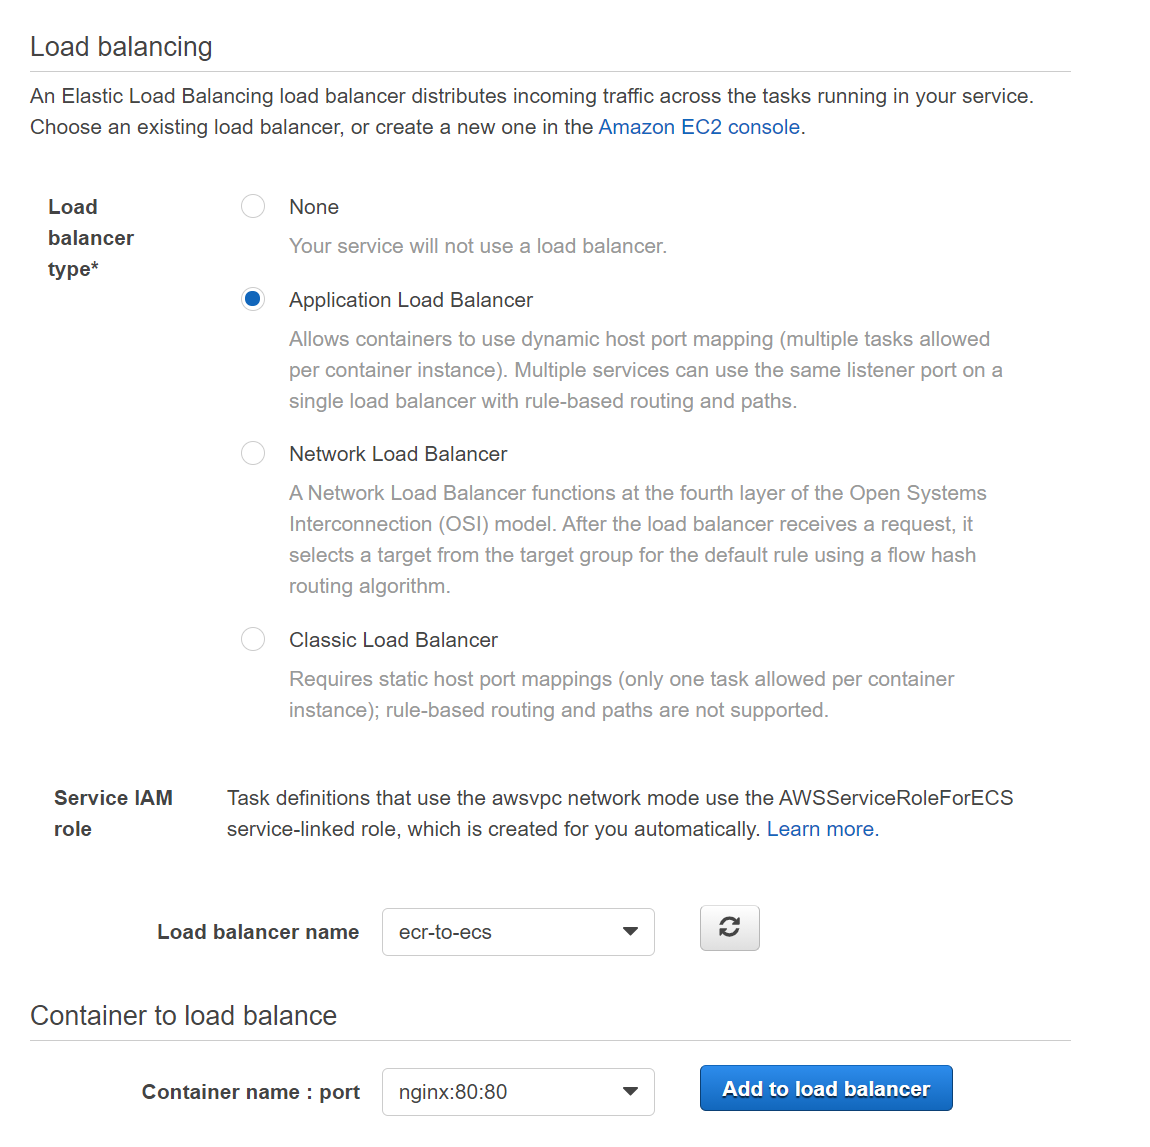
For the next step, you will set up the load balancer you created earlier. Use the same subnets in the networking section and select the proper application load balancer:
In the load balancing section, you will see that our `nginx` container is listed as available to load balance. Click on ‘Add to Load Balancer’:
You will need to modify the settings according to your container after you click ‘Add to load balancer’:
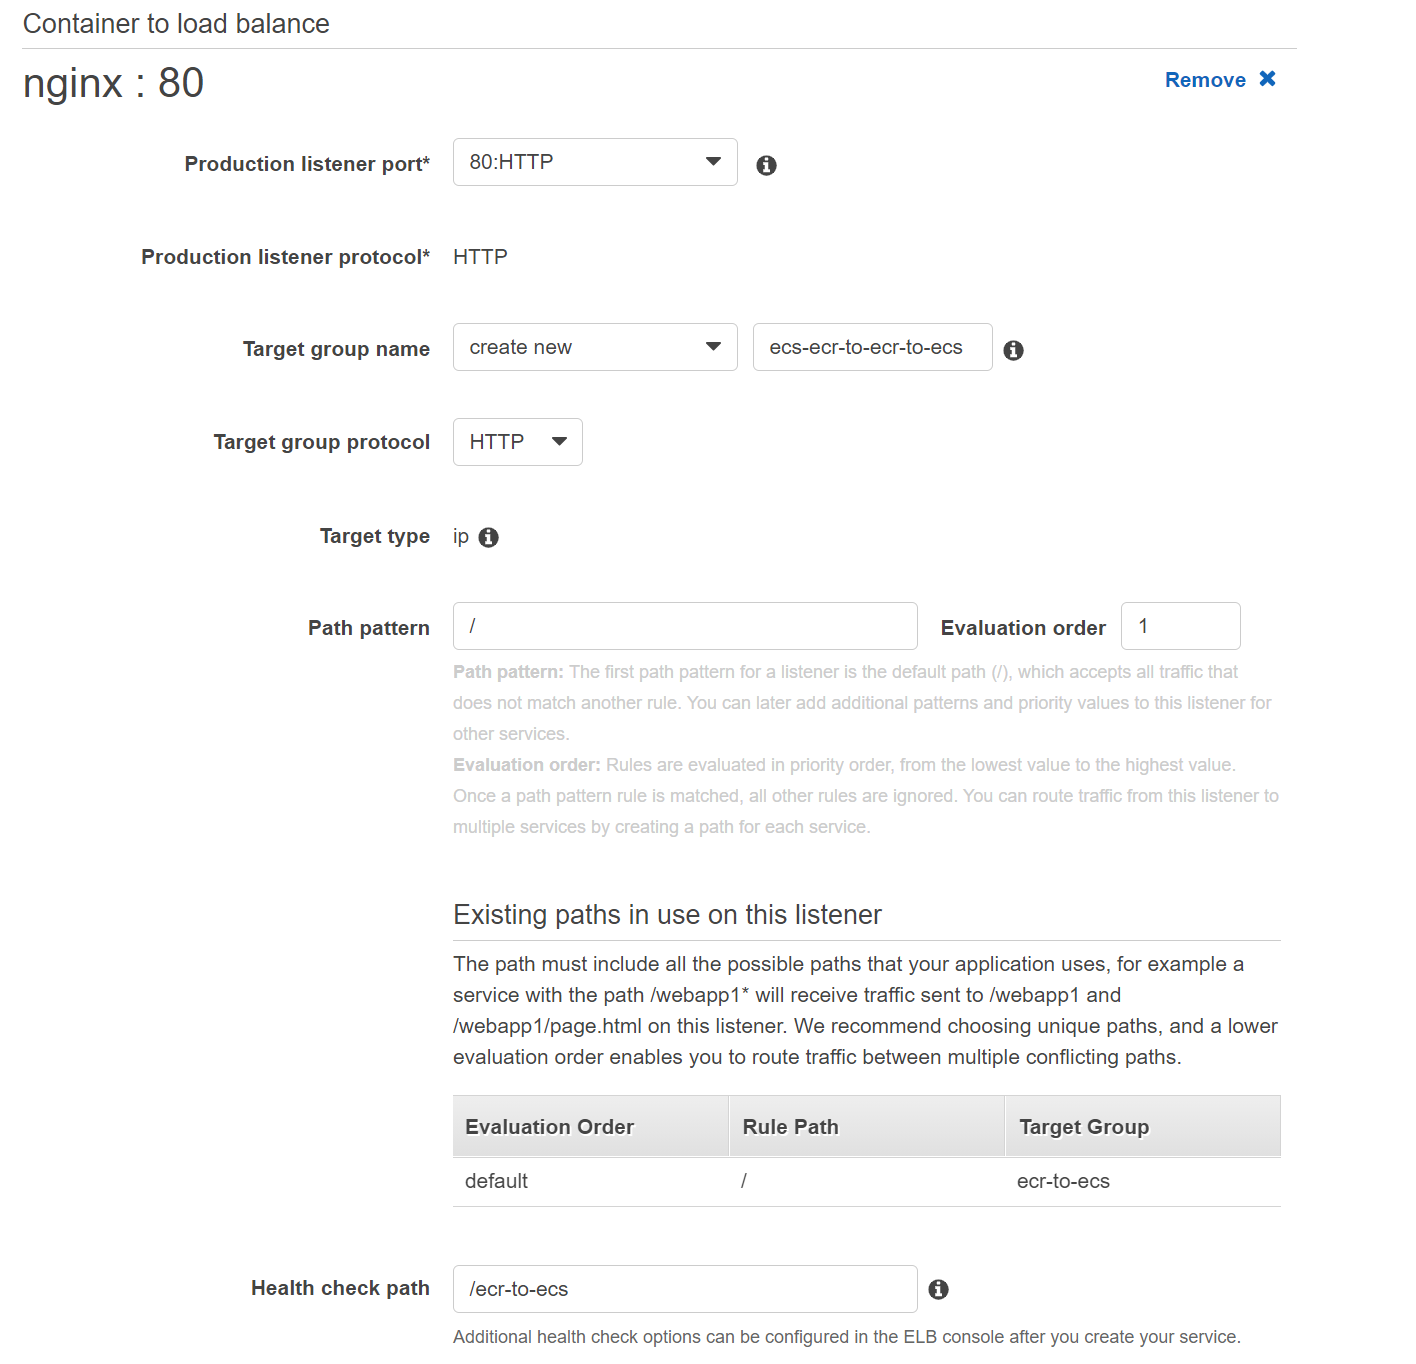
Notice that the `Path pattern` is not empty by default. Set it to `/`.
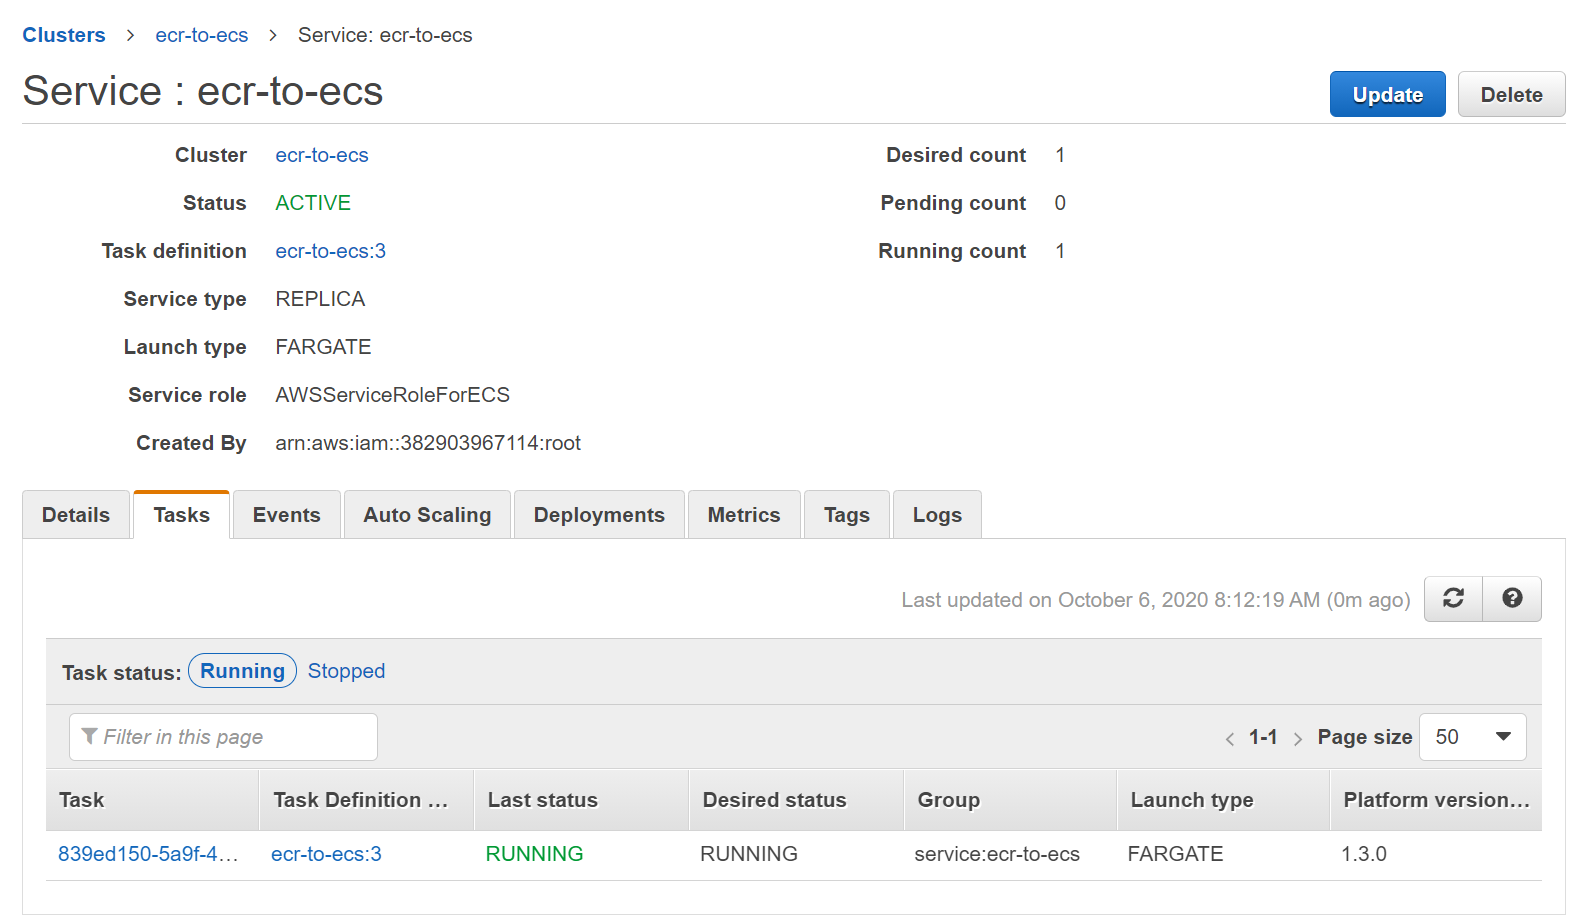
Proceed with the defaults for the last step, and create the service. You will eventually have the task running in your service:
Go back to the EC2 console and check the load balancer. Once the health check is blue, we are ready to go:
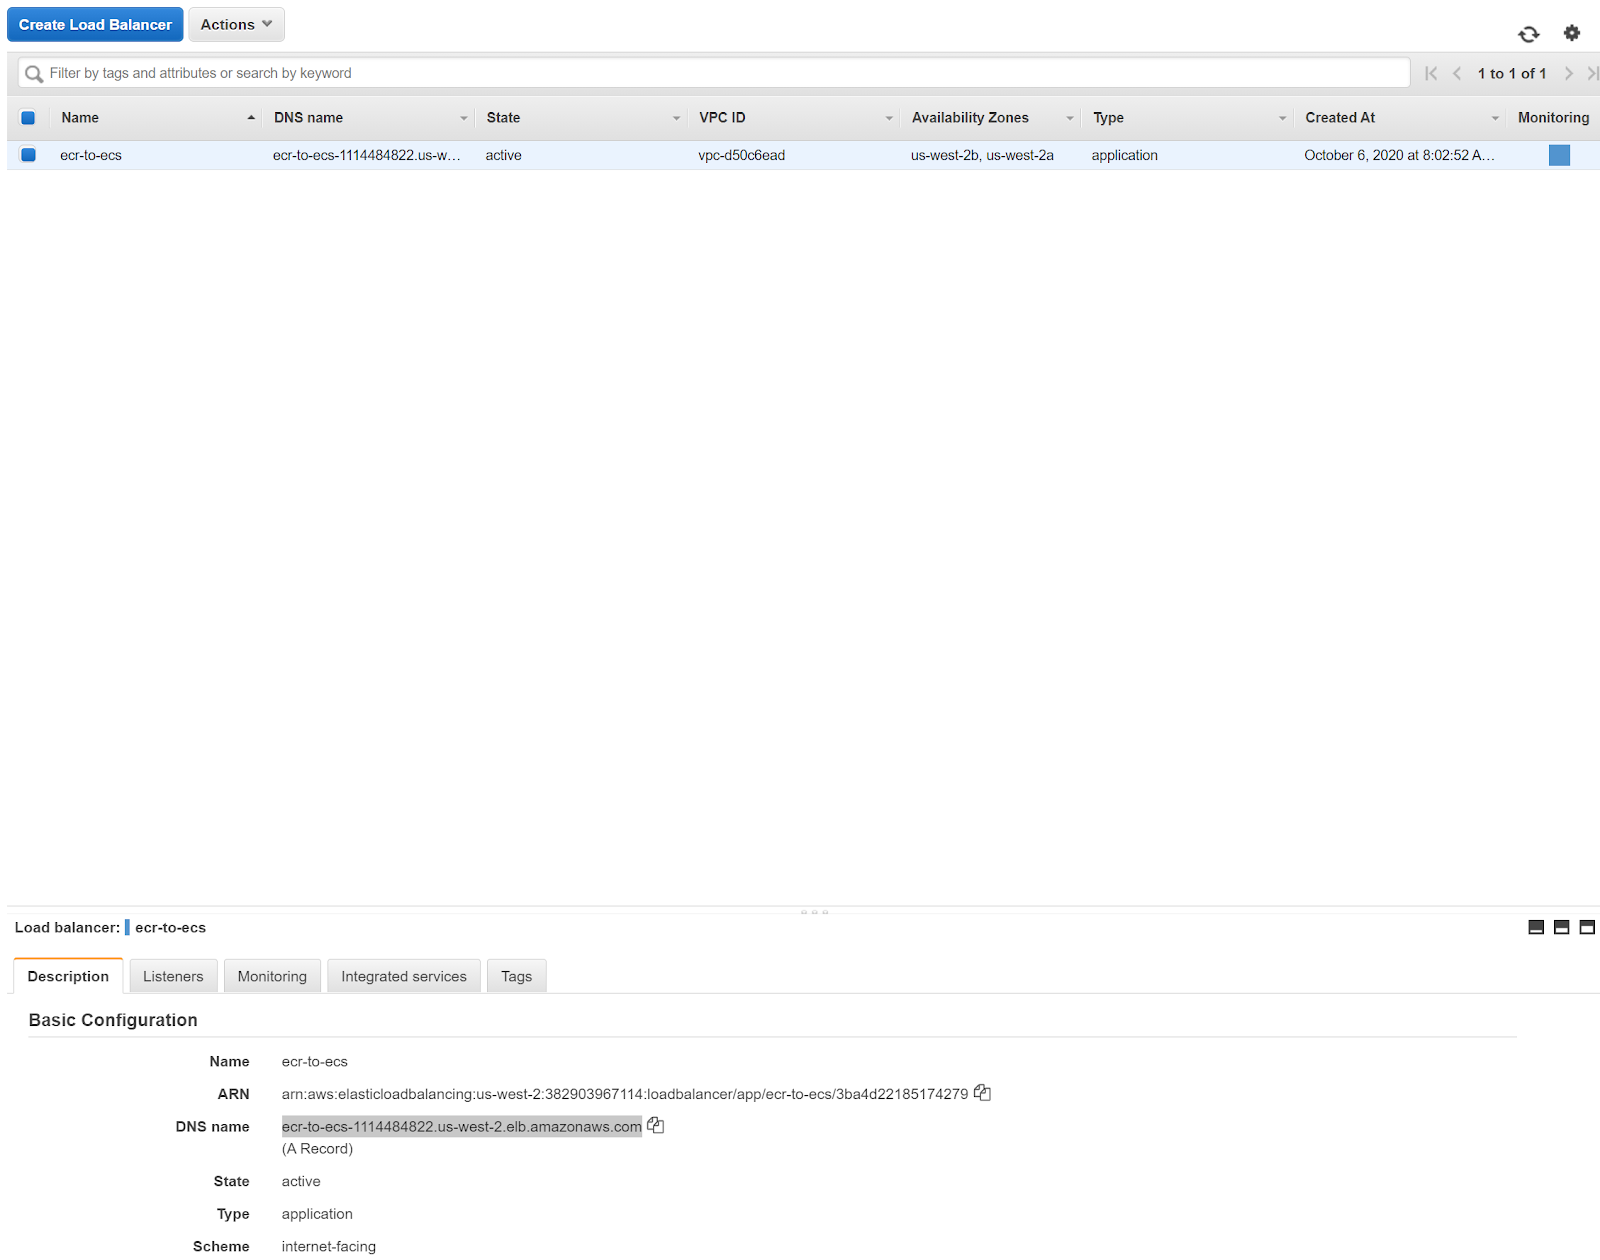
You can copy the DNS name to your browser. It should work properly now:

Now you are ready for the next step: you need to set up a pipeline in AWS CodePipeline. To do this, go to the AWS console and click on ‘CodePipeline’:
<center>
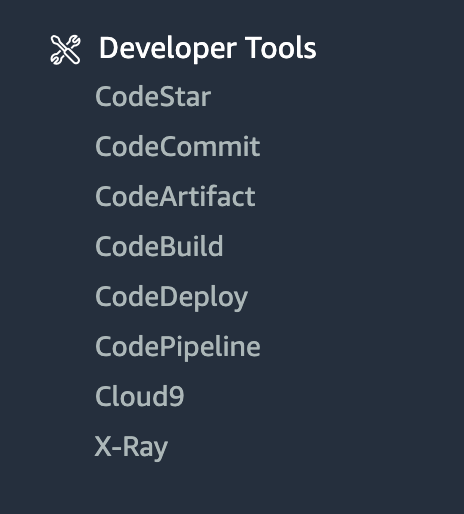
</center>
Once there, you should see this screen:
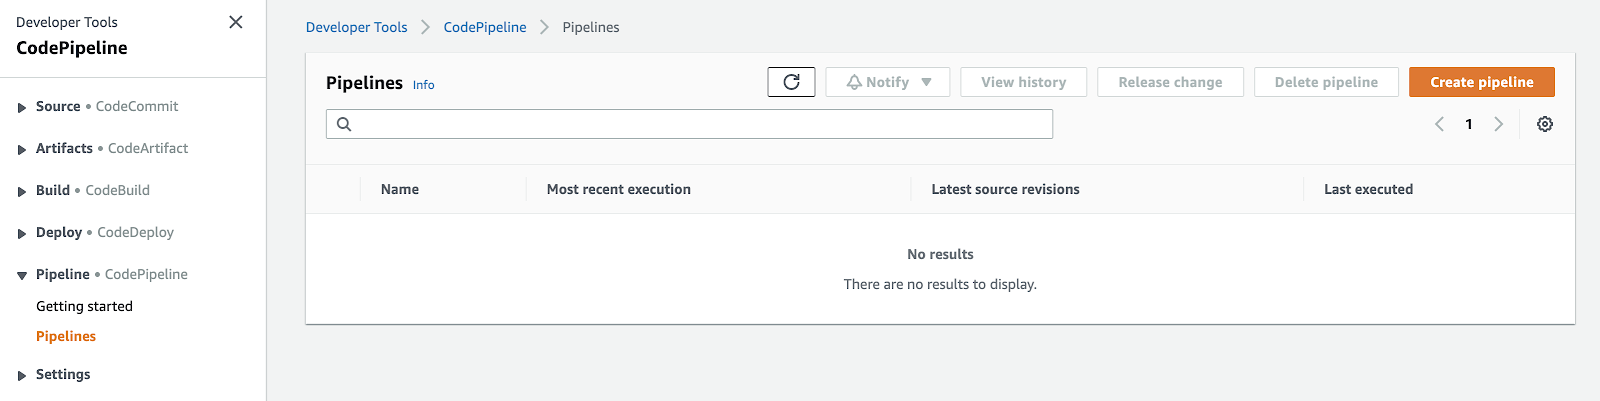
To get started, click `Create pipeline`:
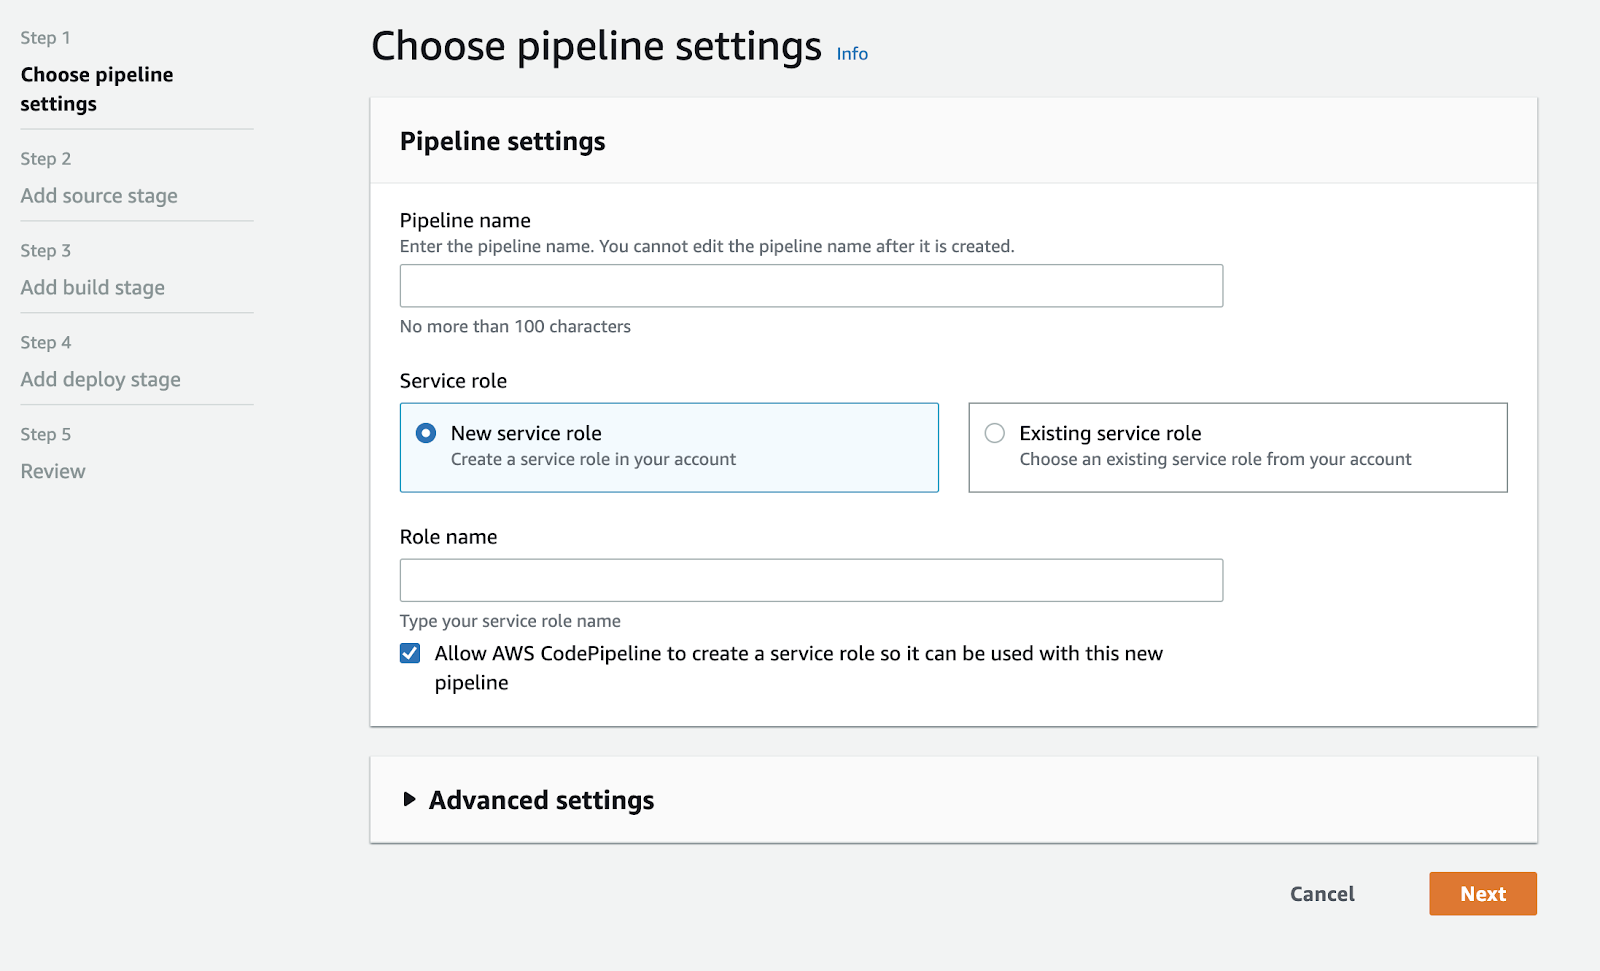
Input a name, and leave the rest as it is by default. On the next screen, select AWS ECR as the source:
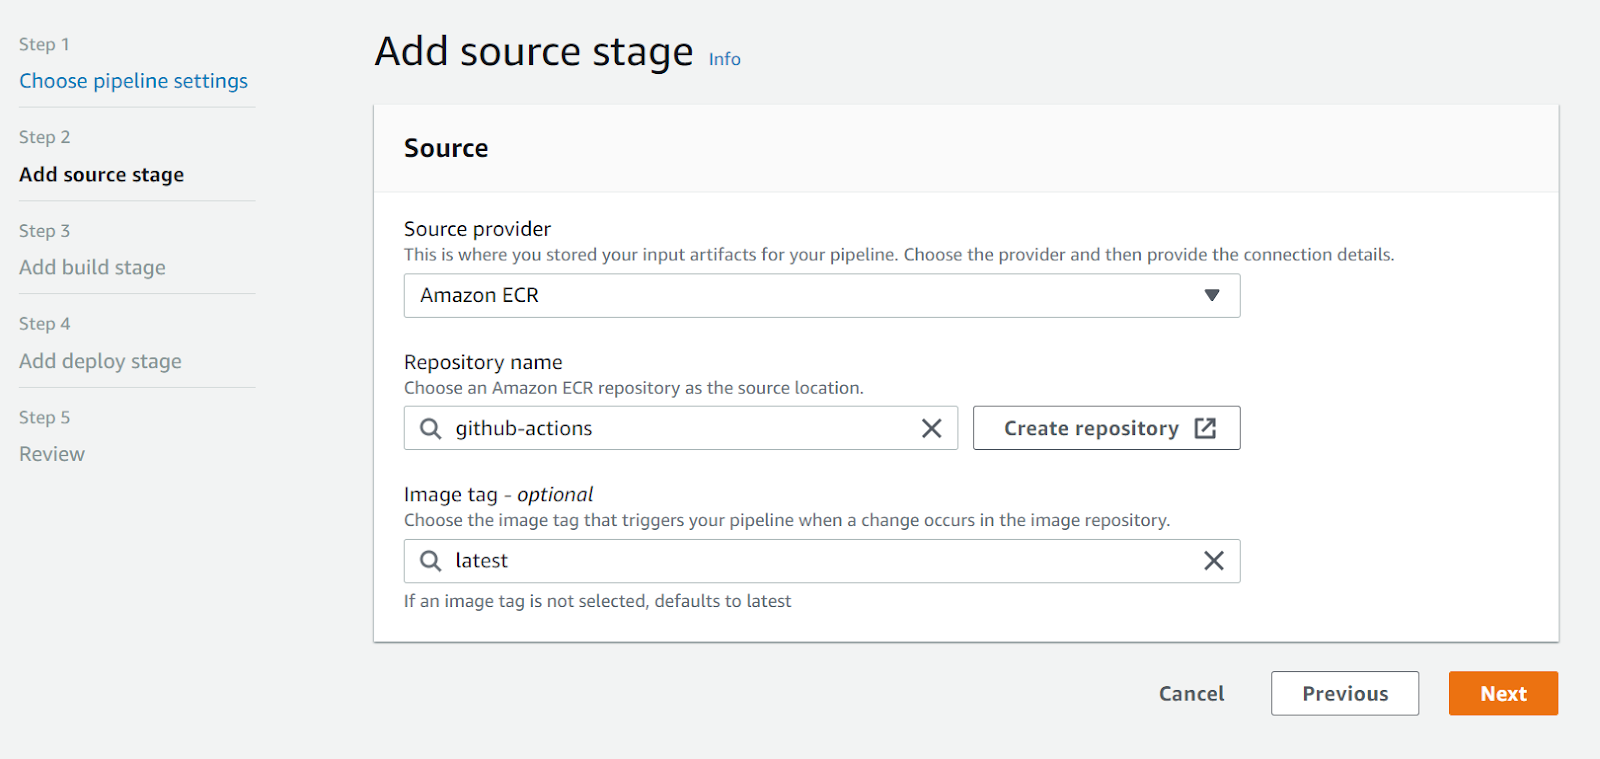
This pipeline must listen to your ECR repository so that it’s triggered every time a new image is uploaded with the `latest` tag. In my case, I’ll be using the ECR repository I created for the previous blog post.
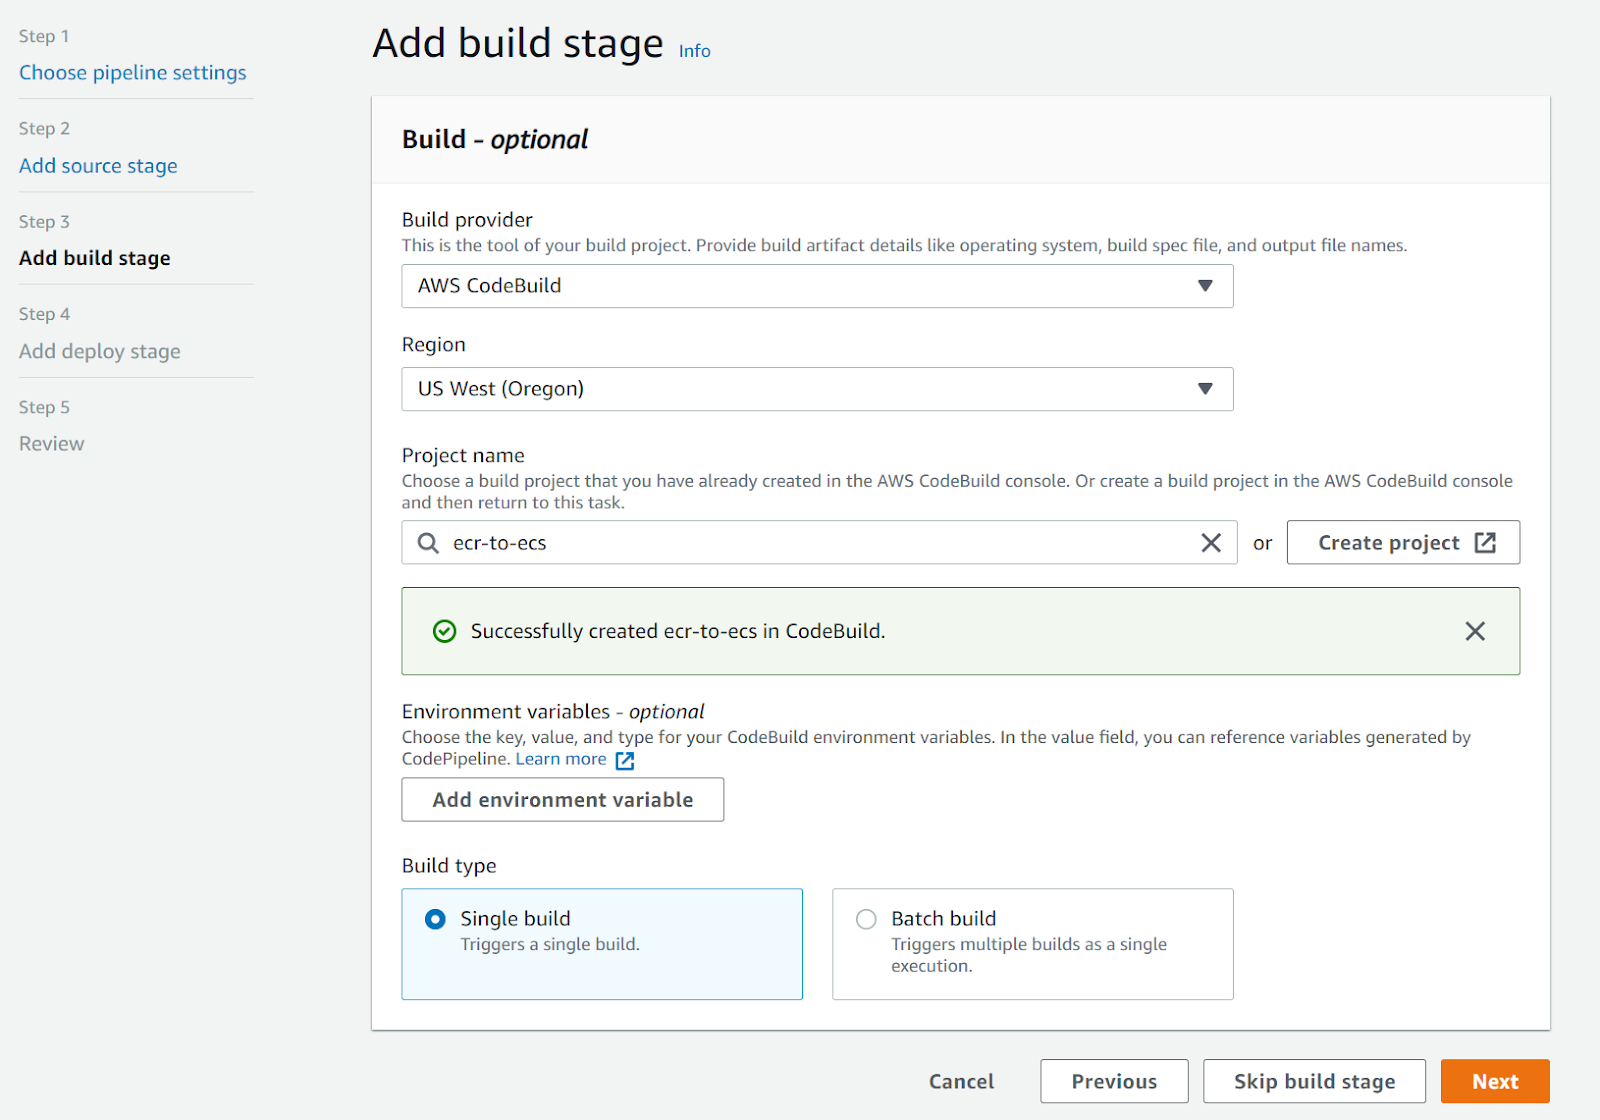
For the build step, select AWS CodeBuild as build provider and create a new project:
<center>

</center>
This is necessary because the source step does not return an artifact compatible with the deploy stage requirements. We need to generate a file: `imagedefinitions.json`.
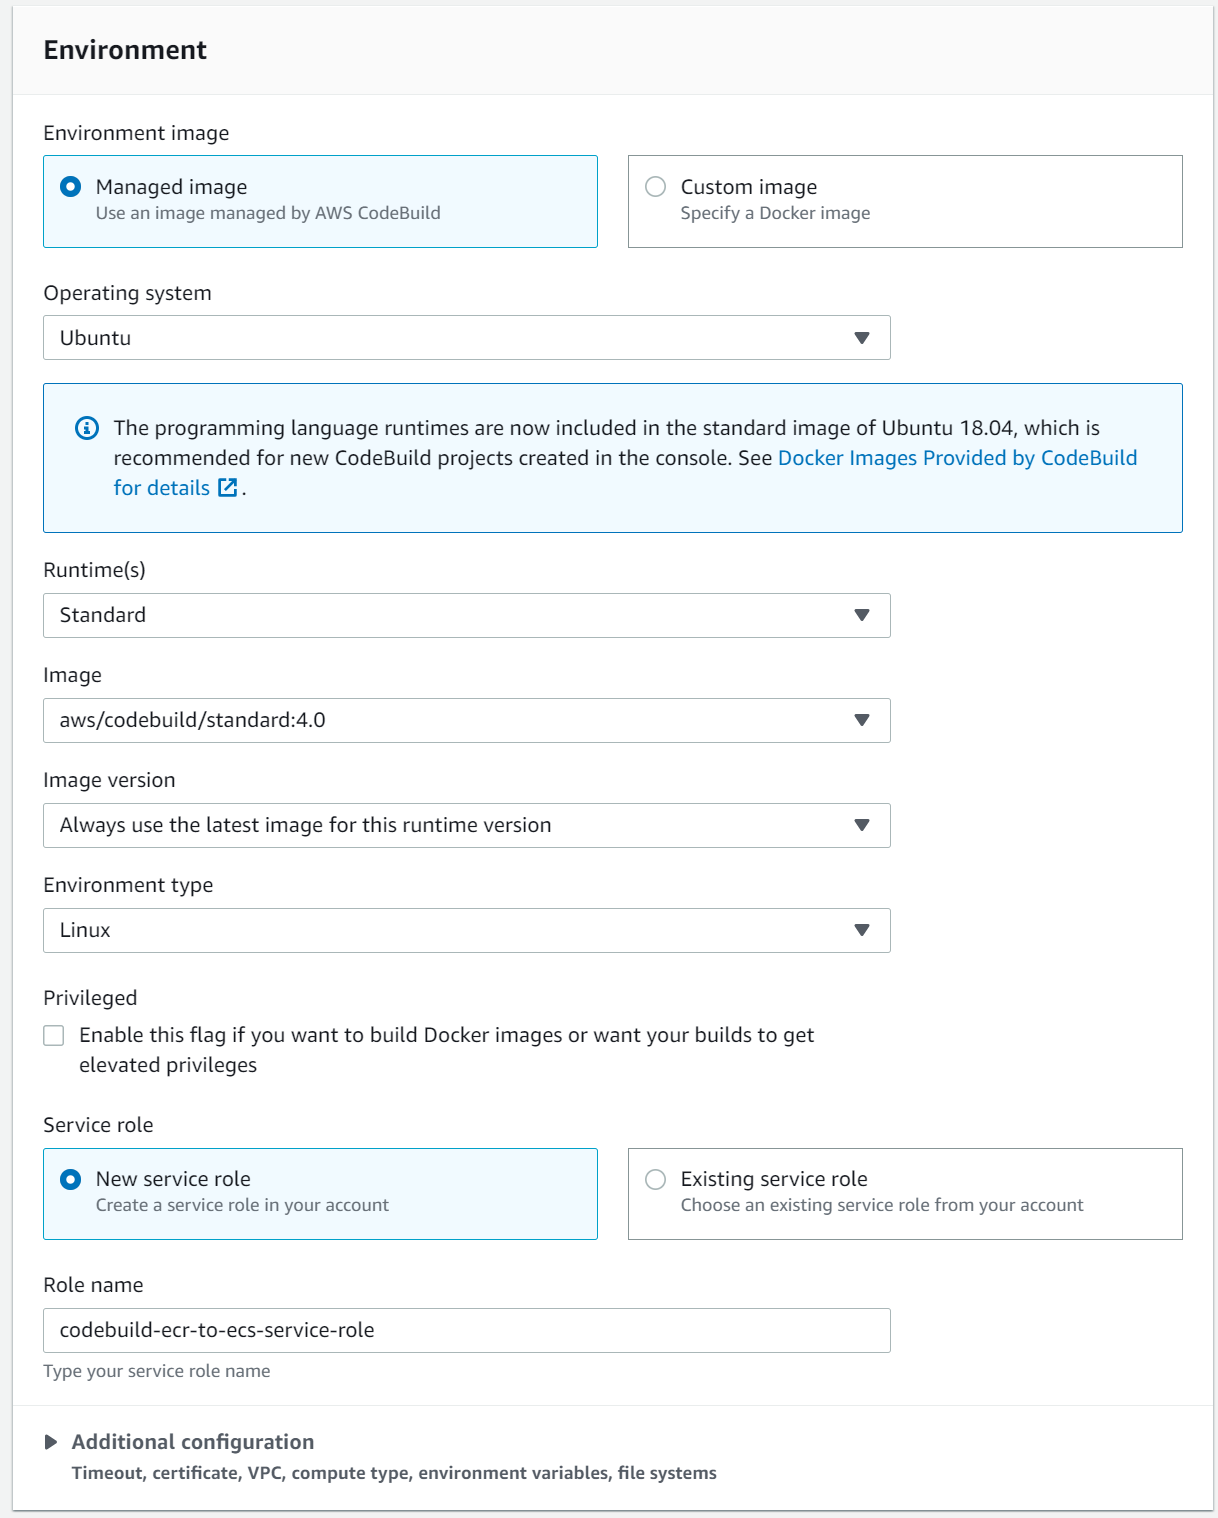
Give the project a name and set up the environment as follows:
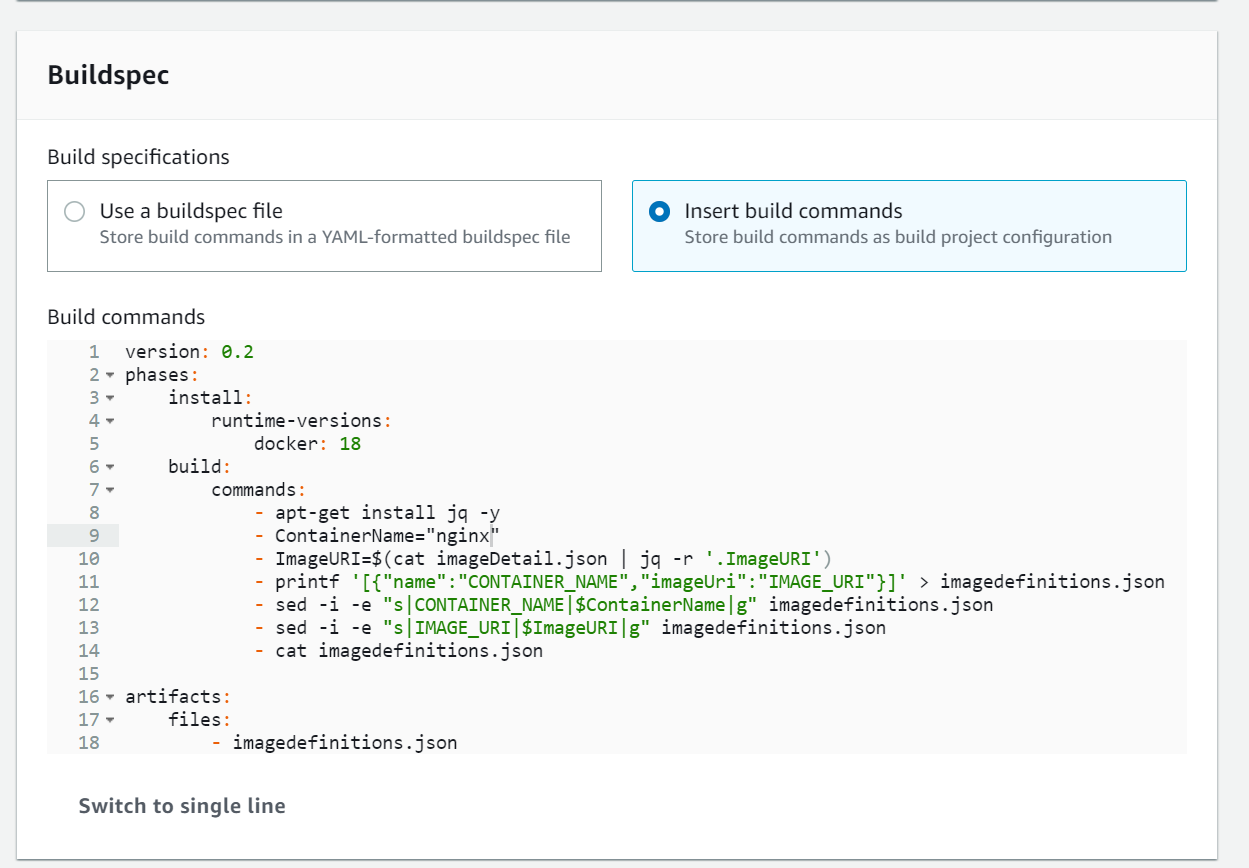
In the buildspec, you will need to have the [following](https://stackoverflow.com/questions/58849736/did-not-find-the-image-definition-file-imagedefinitions-json):
```yaml
version: 0.2
phases:
install:
runtime-versions:
docker: 18
build:
commands:
- apt-get install jq -y
- ContainerName="nginx"
- ImageURI=$(cat imageDetail.json | jq -r '.ImageURI')
- printf '[{"name":"CONTAINER_NAME","imageUri":"IMAGE_URI"}]' > imagedefinitions.json
- sed -i -e "s|CONTAINER_NAME|$ContainerName|g" imagedefinitions.json
- sed -i -e "s|IMAGE_URI|$ImageURI|g" imagedefinitions.json
- cat imagedefinitions.json
artifacts:
files:
- imagedefinitions.json
```
Be careful with the `ContainerName`. If you used a different name in your container definition while setting up your ECS cluster, you will need to use that name instead.
Finally, the build stage should look like this:
In the deploy stage, add the ECS cluster definitions you created earlier:
<center>
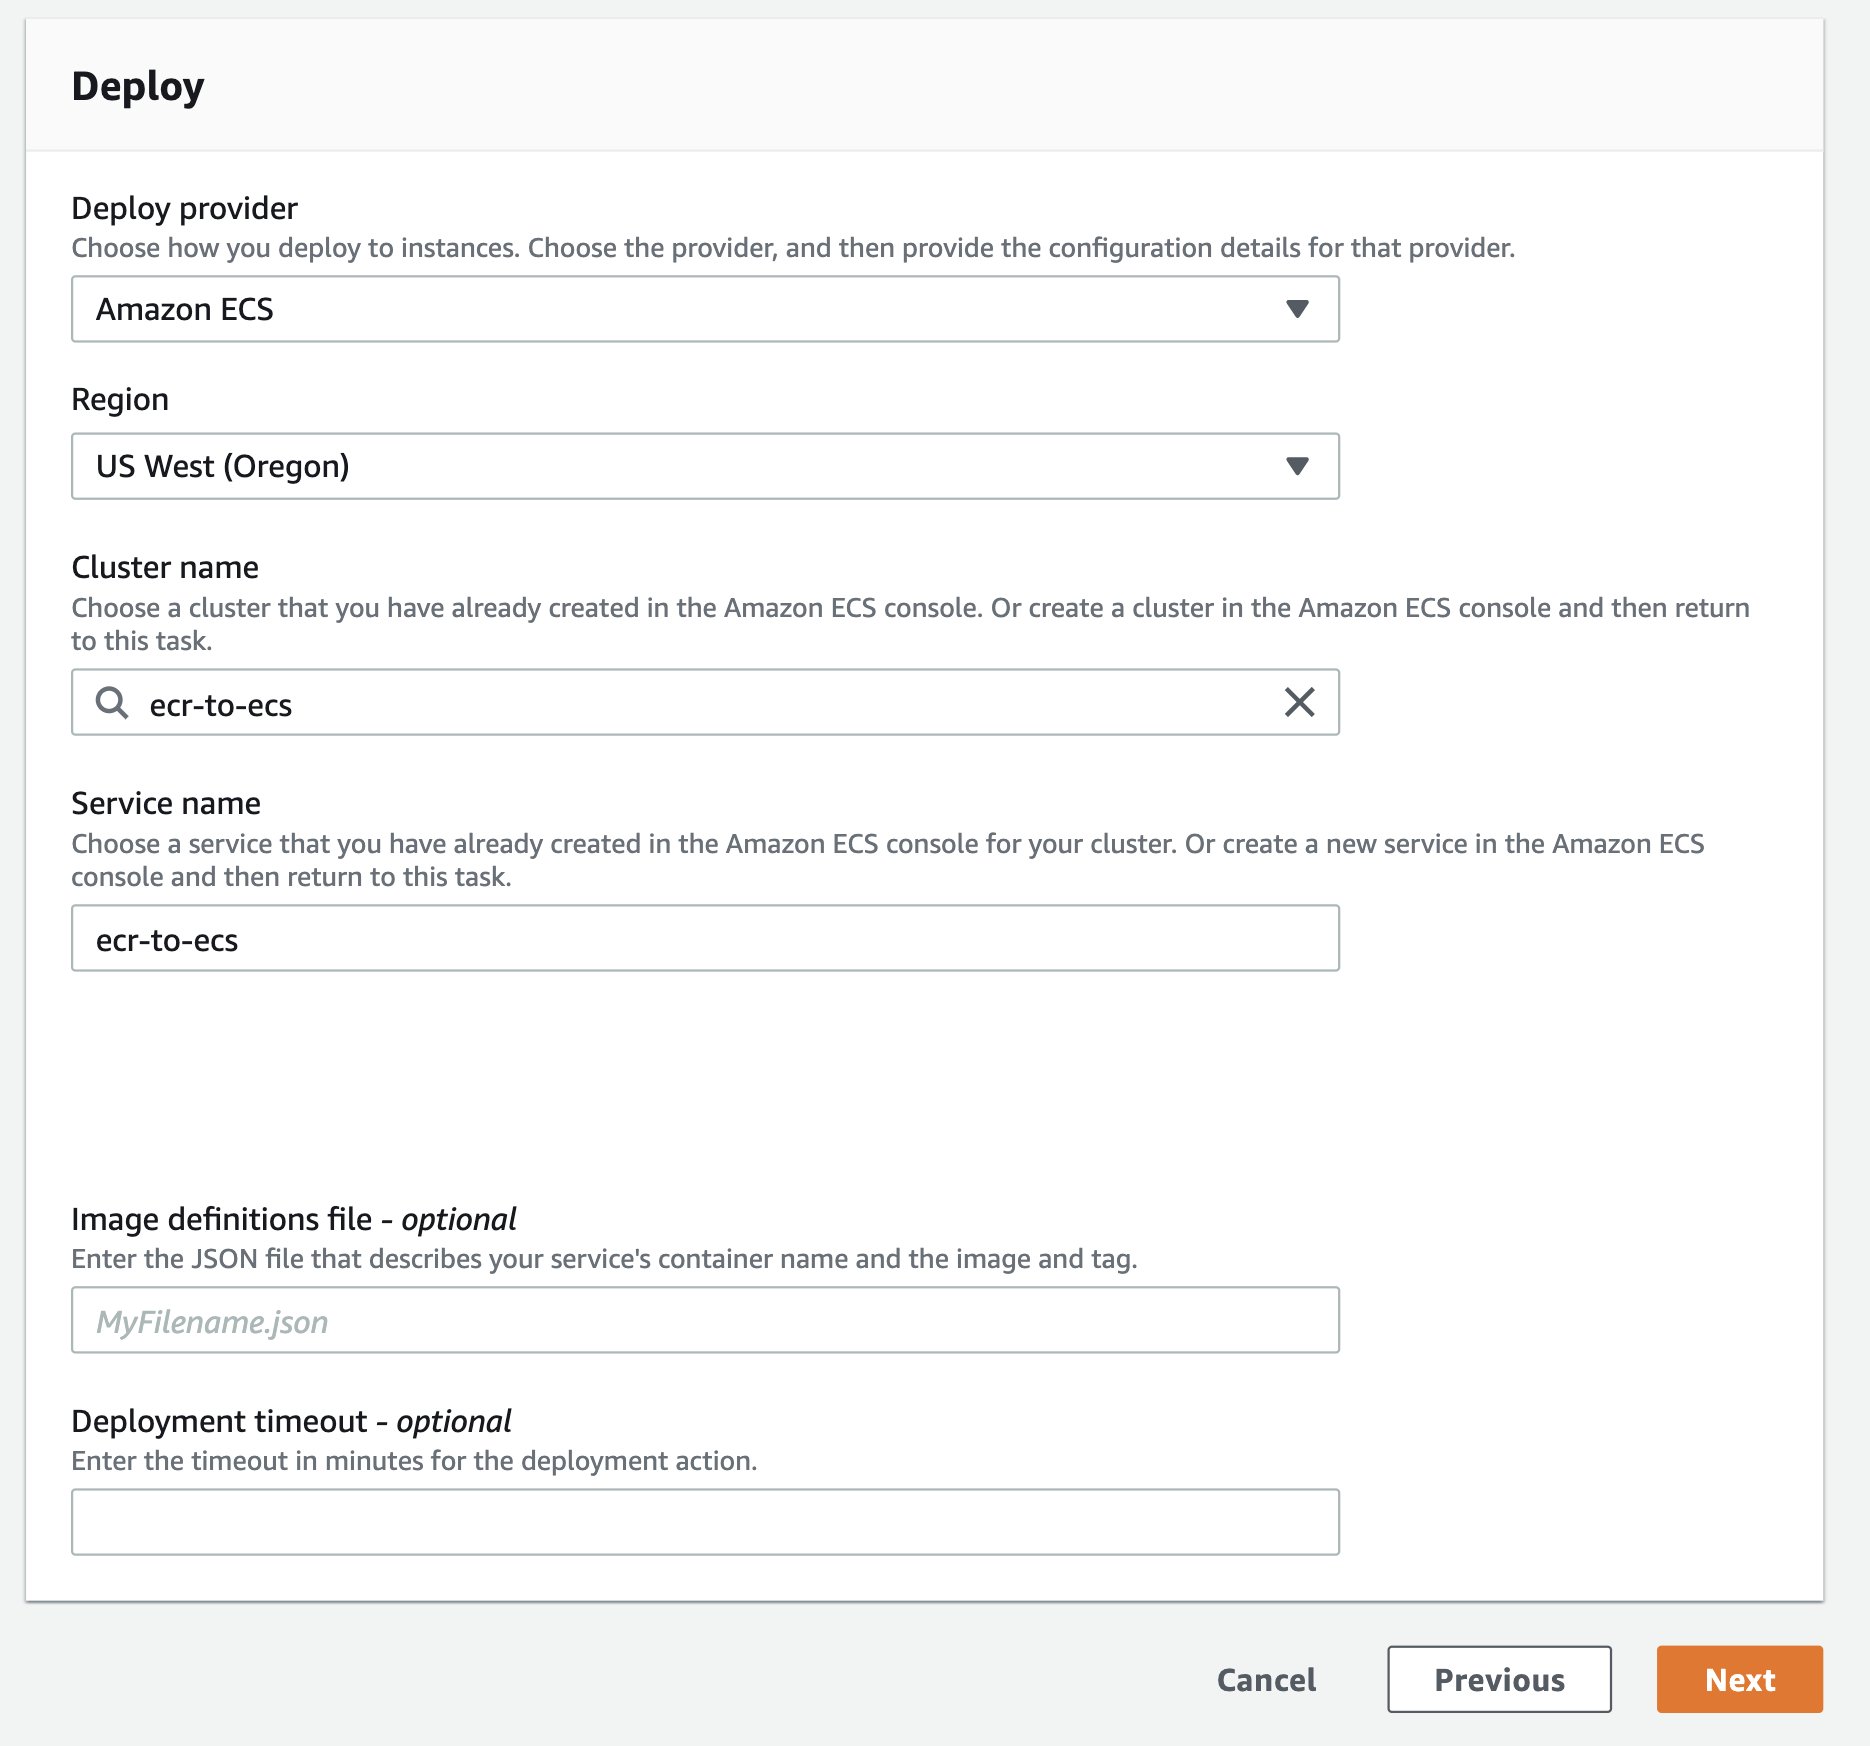
</center>
Click ‘Next’ and ‘Create the pipeline’ to finish.
The pipeline will now run and after it is finished, you should see something similar to this:
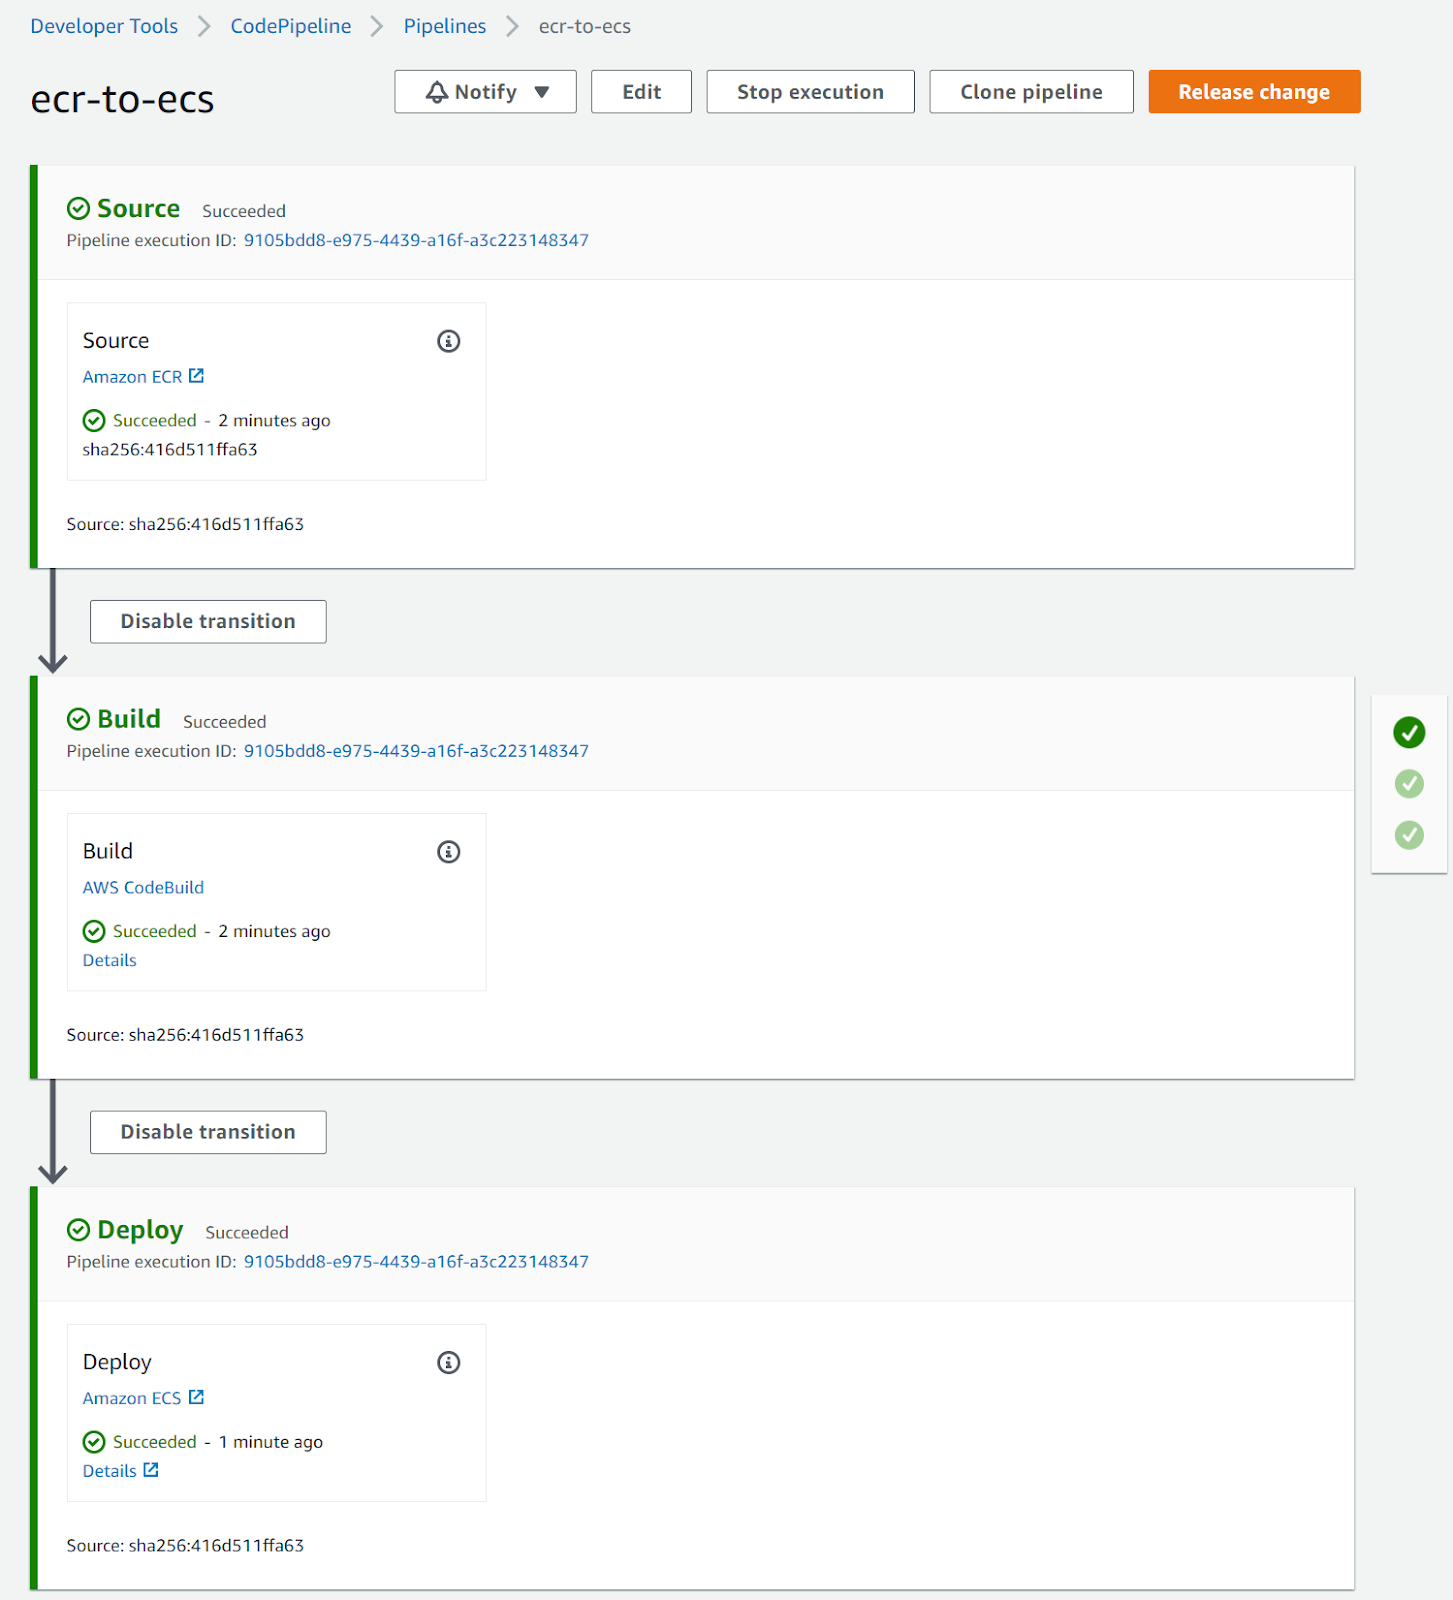
Hold your applause -- this pipeline hasn’t done anything interesting yet. After all, your setup was already fetching an image and booting up correctly before you set this up. The difference, however, is that now whenever you upload a new image to ECR with the `latest` tag, it will automatically be deployed. You can test this by updating your application and checking that it has changed.
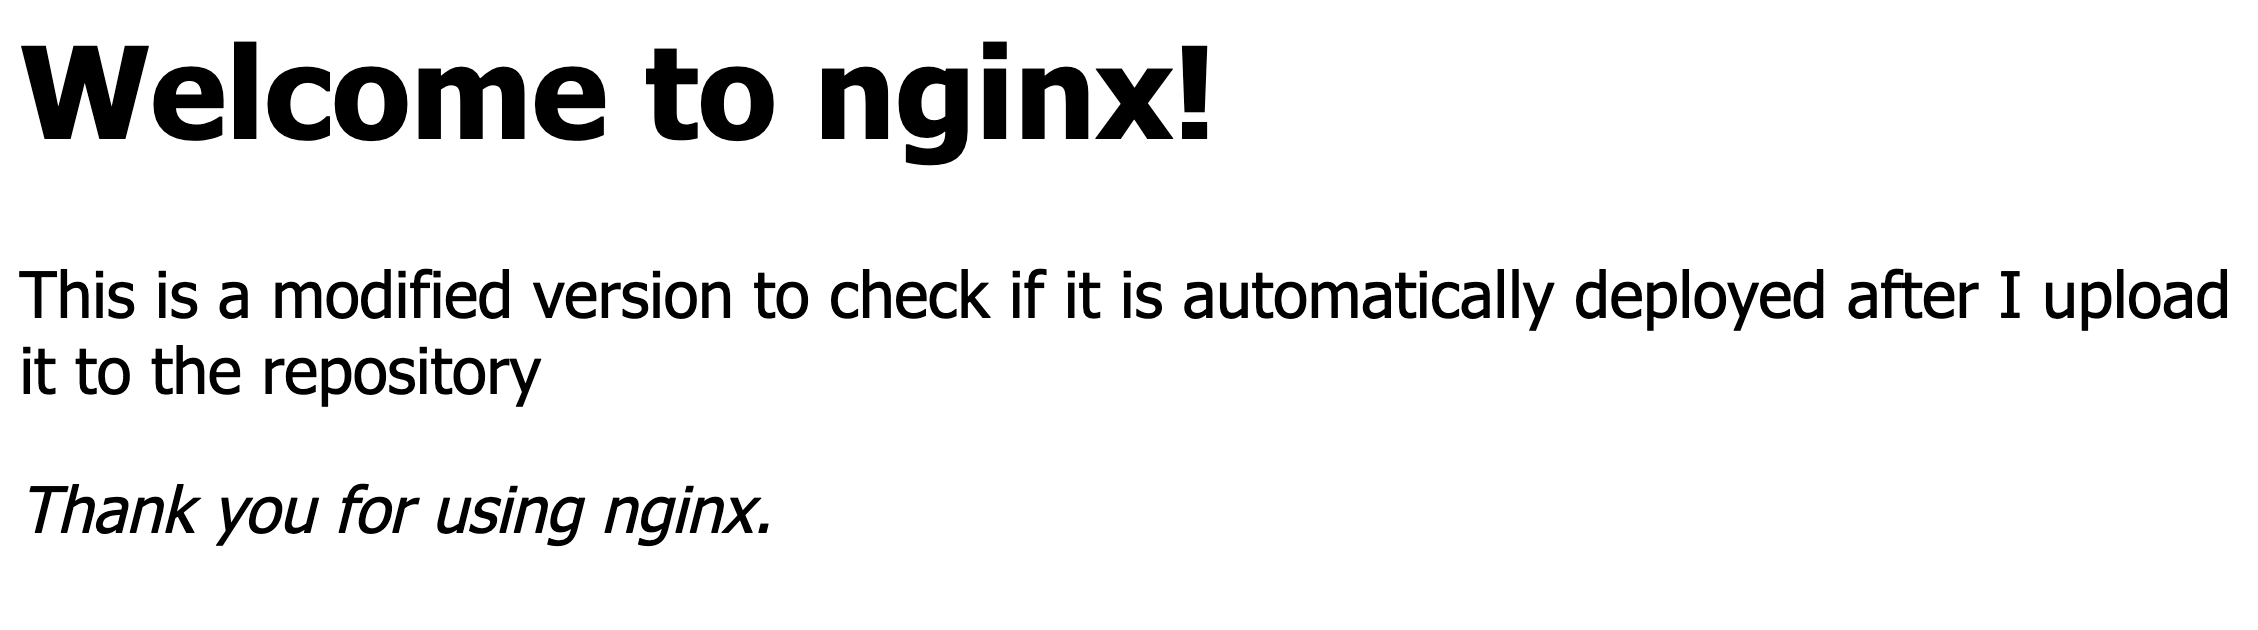
In my case, I updated the static file that the Docker image was serving and, after creating a new release in my repo (which triggers the action to upload to ECR), it was automatically deployed:
There are a lot of improvements that you can implement on this setup, but this will serve as a solid basis. If you don’t have an overwhelming number of tasks to run, this is a cost effective way to deploy high availability services. For example, you will want to play with blue/green deployments to avoid the small downtime introduced when the new container is starting up.
If you follow the instructions in this blog post and the [previous one](https://monadical.com/posts/set-up-ci-workflow.html), you should have a fully functional continuous deployment pipeline. This will reduce the need for someone to manually deploy updates and services. Your team will be able to focus on improving your applications and won’t have to worry about how to update them every time you need a new version out.
You can also check the [part three](https://monadical.com/posts/set-up-ci-workflow-part-three.html), where I briefly explain how to setup a different container, along with some basic testing and linting for your project.
---
<center>
<img src="https://monadical.com/static/logo-black.png" style="height: 80px"/><br/>
Monadical.com | Full-Stack Consultancy
*We build software that outlasts us*
</center>
---