<center>
# How to mint and reveal NFTs with Candy Machine V2
<big>
</big>
*Written by Kevin Guevara and Juan Diego García. Originally published 2022-02-09 on the [Monadical blog](https://monadical.com/blog.html).*
</center>
Metaplex’s first version of Candy Machine had a few too many problems, such as restricting users and reusing the same NFT images. To help users solve these issues, another version of the program has recently been released: Candy Machine v2. This updated version is equipped with a new tool suite that users can use to resolve limitations they’ve encountered in the program. This is great news, but it also means that we’re going to have to learn how to use v2’s new tools. So, we might as well start right now!
In this tutorial, I’m going to explain how to create a “mint and wait for reveal” Candy Machine. This will allow users to mint “closed” NFTs and wait for them to be “revealed” at a later date. Delaying the reveal adds an element of luck and excitement to the minting experience, making it a great way to gamify your Candy Machine.
In order to do this, you’ll need to drop a Candy Machine v2 with two of the new settings configurations: [whitelistMintSettings](https://github.com/metaplex-foundation/docs/blob/main/docs/candy-machine-v2/02-configuration.md#whitelist-settings) and [hiddenSettings](https://github.com/metaplex-foundation/docs/blob/main/docs/candy-machine-v2/02-configuration.md#hidden-settings).
With these configurations, you will be able to deploy a Candy Machine that can only be minted by specific users, uses one asset in the creation, and can be minted as often as needed. Once deployed, these features will allow you to simulate a wait for a reveal feature and mint blank NFTs.
## Create your Candy Machine.
### 1. Creating your development environment
Before you do anything, you need to install [SOLANA CLI](https://docs.solana.com/es/cli/install-solana-cli-tools), [SPL-TOKEN](https://spl.solana.com/token) and [CANDY MACHINE V2](https://github.com/metaplex-foundation/docs/blob/main/docs/candy-machine-v2/01-getting-started.md). All of the provided links contain installation instructions.
### 2. Prepare your folder structure.
Next, folders and files need to be created. For now, you can just create an “assets” folder with this structure:
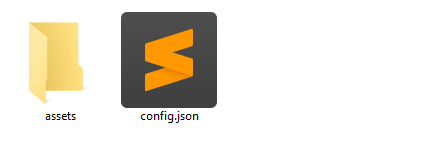
The assets folder is where you will save the metadata used in the Candy Machine. Usually, you would allocate all the images that you are going to mint here. Today, you’ll be taking a different approach.
**config.json** is the file that you’ll use to define your Candy Machine configuration. For now, populate it with this blank configuration:
```
{
"price": 1.0,
"number": 10,
"gatekeeper": null,
"solTreasuryAccount": "<YOUR WALLET ADDRESS>",
"splTokenAccount": null,
"splToken": null,
"goLiveDate": "25 Dec 2021 00:00:00 GMT",
"endSettings": null,
"whitelistMintSettings": null,
"hiddenSettings": null,
"storage": "arweave-sol",
"ipfsInfuraProjectId": null,
"ipfsInfuraSecret": null,
"awsS3Bucket": null,
"noRetainAuthority": false,
"noMutable": false
}
```
### 3. Define your custom token.
*Note: If you are using an existing SPL-TOKEN, you can use that instead and skip this step.*
*Note 2: This token would only be used to whitelist wallets that have this token. User will still need to pay the Minting price in SOL.*
If you are going to create a whitelist, you need to find a way to differentiate the allowed users from the blocked users. In this version of Candy Machine, you can do this by using the [SPL-TOKEN ](https://spl.solana.com/token). This token behaves like a whitelist ticket, permitting token owners to mint the Candy Machine, while denying access to those who don’t own tokens.
```
# CREATE THE TOKEN
$ spl-token create-token — decimals 0 > token-output.txt
# CREATE THE ACCOUNT THAT ARE GOING TO USE THAT TOKEN.
$ spl-token create-account <TOKEN> > account-treasury.txt
# MINT AN AMOUNT OF TOKENS TO THAT ACCOUNT
$ spl-token mint <TOKEN> 1000 <ACCOUNT>
```
The spl-token uses solana-cli's configuration file default. If you want to use Mainnet, you will need to use **-u mainnet-beta** or update your config file.
Save this file. You are going to need it later!
### 4. Create your master edition.
Before you do anything, make sure that you are executing Metaplex in the correct network (either mainnet, testnet or devnet).
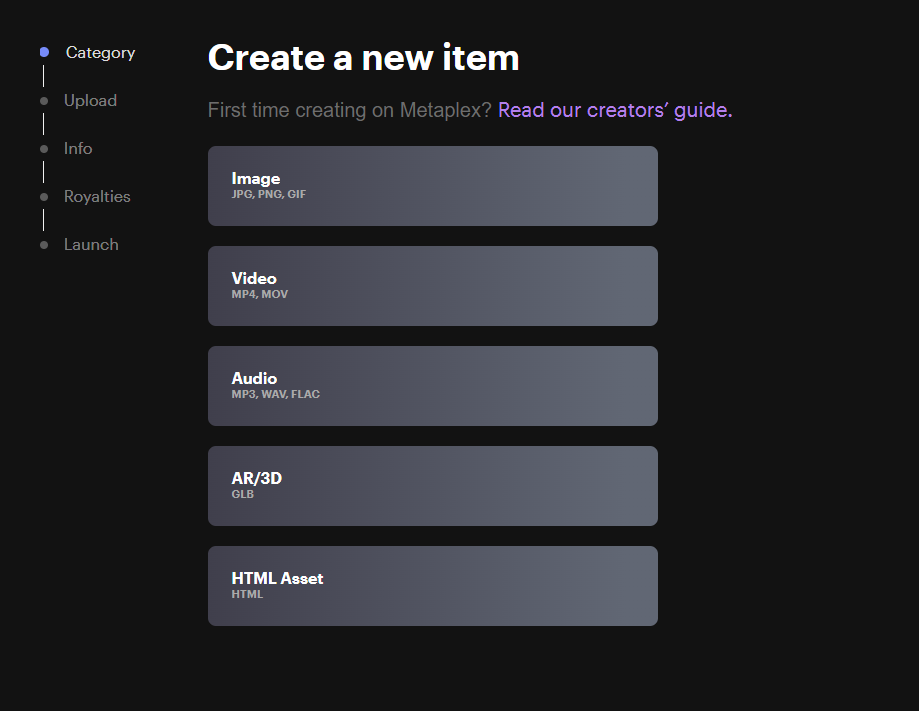
If you only need to use one asset in the creation, upload the asset to arweave by creating a master edition NFT and extracting the aerwave uri.
To do this, I am going to use the Metaplex interface, with this image as the master token:

> For security and standards purposes, you must use the same wallet that you will use to create your Candy Machine with. If you need a tutorial on how to export your Phantom wallet to your Solana-cli, take a look at [this one](https://monadical.com/posts/export-phantom-wallet.html).
1. Create your asset as an NFT.
<br/>
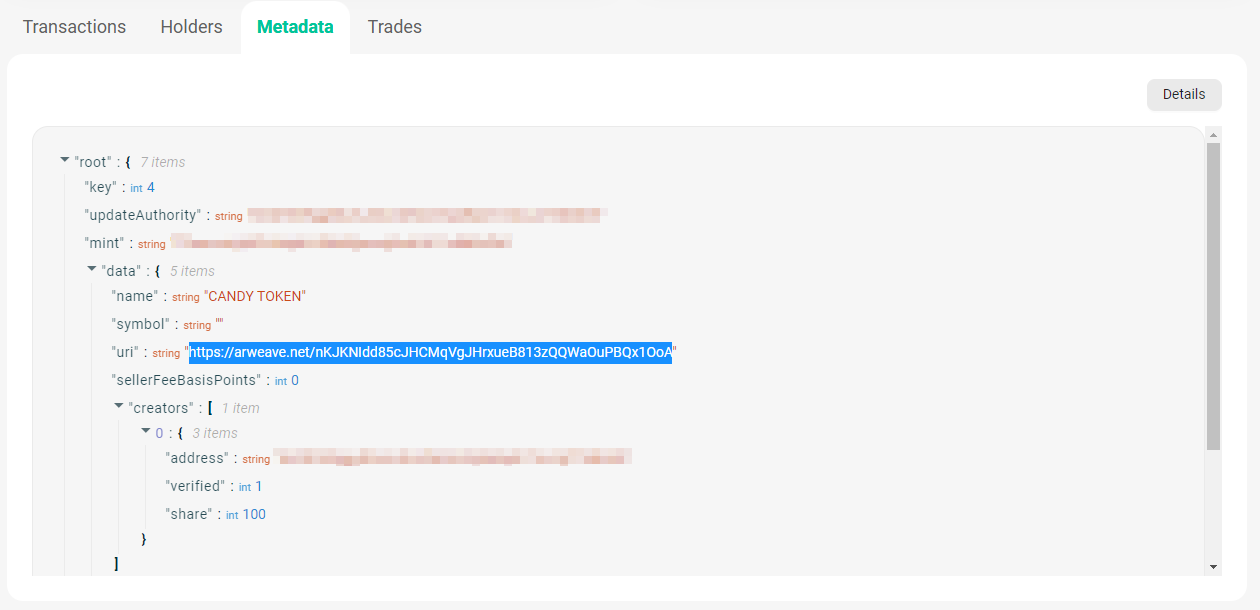
2. With your master token in your wallet, go to Phantom and open your NFT in Solscan.<br/>
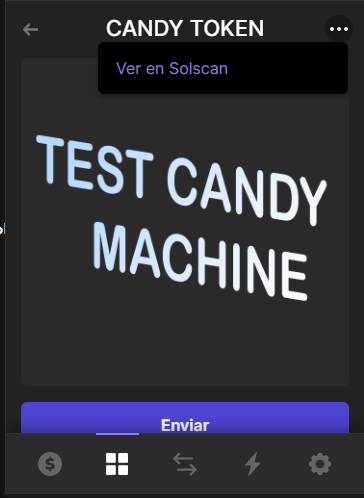
In the metadata, extract the Arweave URI. <br/>
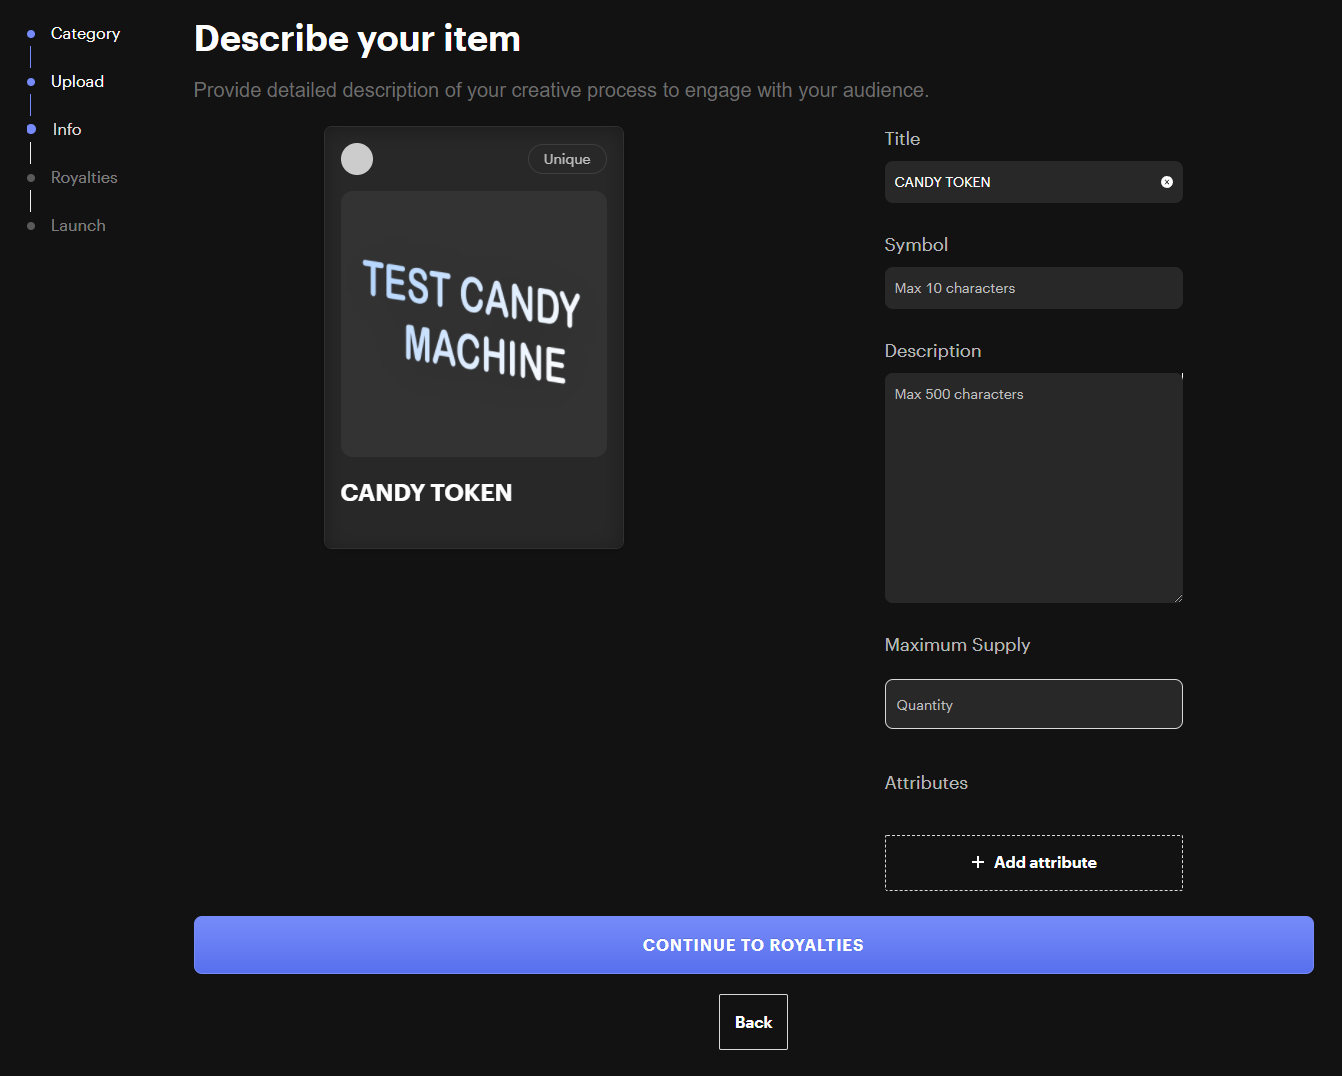
### 5. Prepare your assets.
As the documentation says,
> Your assets consist of a collection of images (e.g., .png) and metadata (.json) files organized in a 1:1 mapping - i.e., each image has a corresponding metadata file.
In this example I’m using only one asset, so I’m going to have an assets folder like this:
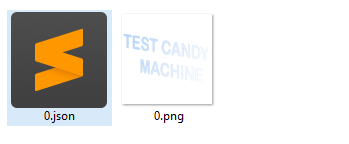
In 0.json I need to specify my NFT metadata, pointing to my 0.png file.
```
{
"name": "CANDY TOKEN",
"symbol": "",
"description": "",
"seller_fee_basis_points": 500,
"image": "0.png",
"attributes": [
{"trait_type": "Layer-1", "value": "0"},
{"trait_type": "Layer-2", "value": "0"},
{"trait_type": "Layer-3", "value": "0"},
{"trait_type": "Layer-4", "value": "1"}
],
"properties": {
"creators": [{"address": "<YOUR WALLET ADDRESS>", "share": 100}],
"files": [{"uri": "0.png", "type": "image/png"}]
},
"collection": {"name": "numbers", "family": "numbers"}
}
```
Be sure that the creator address is the same address that you used to create your master edition NFT, because we will be using that data for the Candy Machine.
### 6. Edit your config.json file.
I’m now going to create a Candy Machine with the following features:
- Contains 50 NFTS that are the same file, at a price of 0.0001.
- Uses a white list that burns the token every time you use it.
- Has a “go live” date of Jan 15, 2022.
If you want to work on more complex scenarios, check out the [official documentation](https://github.com/metaplex-foundation/docs/blob/main/docs/candy-machine-v2/02-configuration.md).
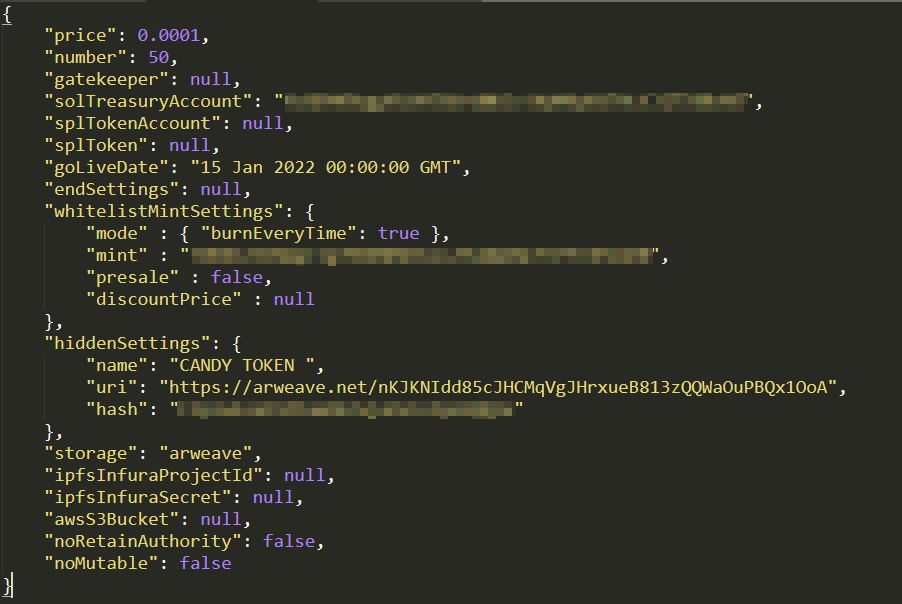
At this point, your config.json file should look like this:
```
{
"price": 0.0001,
"number": 50,
"gatekeeper": null,
"solTreasuryAccount": "<YOUR WALLET ADDRESS>",
"splTokenAccount": null,
"splToken": null,
"goLiveDate": "15 Jan 2022 00:00:00 GMT",
"endSettings": null,
"whitelistMintSettings": {
"mode" : { "burnEveryTime": true },
"mint" : "<YOUR TOKEN ADDRESS>",
"presale" : false,
"discountPrice" : null
},
"hiddenSettings": {
"name": "<YOUR NFT NAME> ",
"uri": "<THE ARWAVE URI>",
"hash": "<ALEATORY 32 CHARACTERS STRING>"
},
"storage": "arweave",
"ipfsInfuraProjectId": null,
"ipfsInfuraSecret": null,
"awsS3Bucket": null,
"noRetainAuthority": false,
"noMutable": false
}
```
As you can see, I’m using [whitelistMintSettings](https://github.com/metaplex-foundation/docs/blob/main/docs/candy-machine-v2/02-configuration.md#whitelist-settings) and [hiddenSettings](https://github.com/metaplex-foundation/docs/blob/main/docs/candy-machine-v2/02-configuration.md#hidden-settings). Refer to the official document if you wish to make some changes to the configuration.
This is what my config.json file looks like after completing the steps so far: <br/>
In this configuration, each user that mints is going to receive an NFT with this name:<YOUR NFT NAME> #<EDITION NUMBER>
You can add a white or blank space at the end of your NFT name to make it prettier.
### 7. Upload your Candy Machine.
> Remember, all of these commands should be executed using the correct RPC. (Mainet, DevNet or your custom RPC). You can verify this by running ```solana config get```. This will also use the wallet you imported for CLI.
Open a console in your Candy Machine folder and write this command:
```ts-node <YOUR METAPLEX FOLDER>/js/packages/cli/src/candy-machine-v2-cli.ts upload -e devnet -k <PATH_TO_KEYPAIR> -cp config.json -c <YOUR CANDY MACHINE NAME> ./assets```
If you receive a message like:
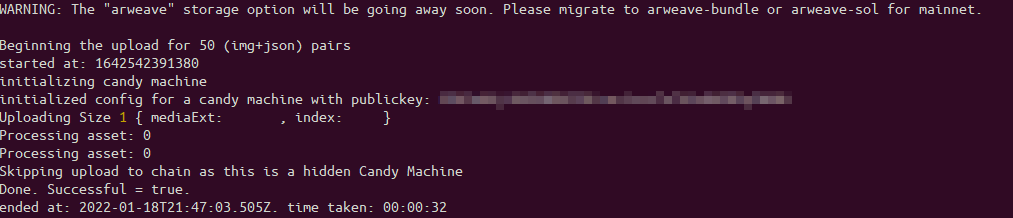
Congrats, your candy machine should be live! You can access the Candy machine address using
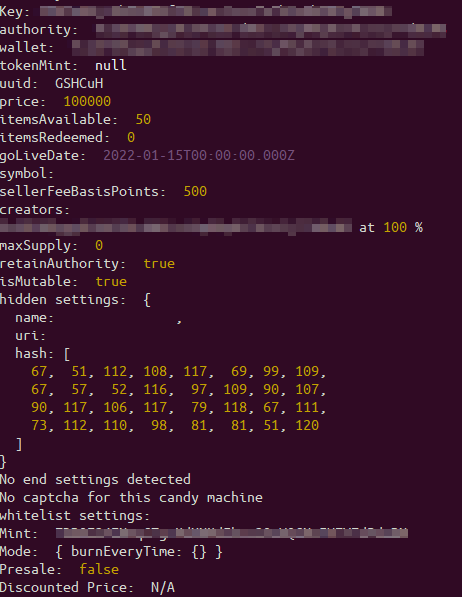
```ts-node <YOUR METAPLEX FOLDER>/js/packages/cli/src/candy-machine-v2-cli.ts show -e devnet -k <PATH_TO_KEYPAIR> -cp config.json -c <YOUR CANDY MACHINE NAME>```
And should recieve something like this:
If you don’t receive this, take a look at the error. For example, your console might be showing this error:
'(node:107) UnhandledPromiseRejectionWarning:Error: Invalid public key input'
If you’re having trouble with an error, review the pubkeys of your config.json when you try to upload your Candy Machine. There, you will find a .cache folder that contains all the Candy Machine info. Delete this folder and retry uploading.
### 8. Test your Candy Machine.
If you are working on DevNet, use Metaplex to test your Candy Machine.
For this, Metaplex provides a basic UI. It works pretty well for testing purposes.
```
#GO TO THIS FOLDER
<YOUR METAPLEX FOLDER>/js/packages/candy-machine-ui
#UPDATE THE .ENV FILE
nano .env
REACT_APP_CANDY_MACHINE_ID=<YOUR CANDY MACHINE ID>
REACT_APP_SOLANA_NETWORK=<NETWORK devnet OR mainnet>
REACT_APP_SOLANA_RPC_HOST=<YOUR SOLANA RPC>
#INSTALL AND RUN THE PROJECT
yarn install
yarn start
```
Go to localhost:3000 and connect your wallet. Once you’ve done that, you should be able to see a UI like this:
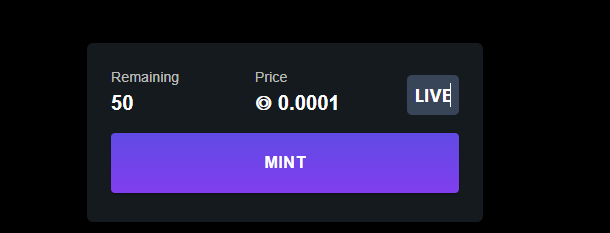
You should now be able to mint NFTs. Remember, users can only mint an NFT if they have a token.
Without token 
With token 
## Reveal your NFTS.
The Candy Machine I created has two problems. Firstly, the creator needs to verify every NFT created with the Candy Machine. This is a laborious and time-consuming task. Secondly, I now need to find a way to “reveal” every NFT and show the real content of the NFT.
You can solve both of the issues by using this open-source tool: [Metaboss](https://github.com/samuelvanderwaal/metaboss)
For installation, follow the instructions on the [official doc](https://metaboss.rs/overview.html)
### 1. Indentify your Candy Machine NFTS.
If you want to update the metadata or sign a specific NFT, you’ll need mints. Mints are unique keys that allow you to identify an NFT.
To get mints, run this command in Metaboss with your Candy Machine ID and your network:To get mints, run this command in Metaboss with your Candy Machine ID and your network:
```
metaboss -r <SOLANA_RPC> snapshot mints --candy-machine-id <CANDY_MACHINE_ID> --v2 --output <OUTPUT_DIR>
```
Open the output file. There you should see an array of public keys. Those are the mint keys of your Candy Machine.
If the results are empty, check the command parameters and try again.
### 2. Generate new metadata.
You need to generate the metadata from the revealed NFTs. To do that, generate a JSON file with the configuration for each NFT that you wish to update.
```
{
"mint_account": "MINT_ADDRESS",
"nft_data":
{
"name": NFT_NAME,
"symbol": "",
"uri": ARWEAVE_REVEALED_METADATA_LINK,
"seller_fee_basis_points": SELLER_FEE_BASIS_POINTS,
"creators": [
{
"address": "<YOUR_CANDY_MACHINE_CREATOR_ADDRESS>",
"verified": true,
"share": 0
},
{
"address": "<CREATOR_ADDRESS>",
"verified": true,
"share": 100
},
]
}
}
```
For ARWEAVE_REVEALED_METADATA_LINK you can replicate [step 4](https://docs.monadical.com/uu8SYKPyTMOsN_xxDKQrrA?both#4-Create-your-master-edition). The MINT_ADDRESS is the identification found in the [previous step](https://docs.monadical.com/uu8SYKPyTMOsN_xxDKQrrA?both#4-Create-your-master-edition).
### 2.1 Generate new metadata and using different assets.
If you’d like to reveal different NFTs in different stages, let’s say 20% one day and 80% the next day, you will need one metadata link for each image that you use in your NFTS. You can use the repo presented below to achieve that.
Clone [this repo](https://github.com/Monadical-SAS/CandyMachineCommonScripts) and take a look at *config.json*. In this file, specify how many divisions you want, and the parameters for each one.
| Attribute | Description |
| ------ | ------ |
| Name | The name of the token. |
|Seller_fee_basis_points| The value for the seller fee. |
|Quantity| Property that refers to the amount of tokens that are going to be selected. |
|Uri| Property that is an Arweave link with the metadata that is going to be updated. |
|Creators| A list of values for each creator: address, verify and share. |
Remember that your first creator should always be the Candy Machine creator address, with the second being your wallet address.
Create a *data.json file* with all the mints that you want to update, and run the script.
The data.json file is the one generated in the previous step.
Note that the summation of **quantity** cannot be greater than the Candy Machine number.
Open a console in the repository folder, and run this command:
```python generate_files.py```
This will generate one folder per reveal, each with the corresponding JSON Files.
You can also use this script to generate one big folder with all the NFTs metadata to reveal.
### 3. Update the NFT assets.
This is the reveal part. To do this, you need to update the metadata of the minted NFTs.
To update the metadata of several NFTs, run the following command:
```
metaboss update data-all --keypair <PATH_TO_KEYPAIR> --data-dir <PATH_TO_DATA_DIR>
```
You can get more information about this command [here](https://metaboss.rs/update.html). You must use the same format as step 2. Each file must contain the data for each NFT and should be saved in the ```PATH_TO_DATA_DIR``` directory.
### 4. Sign all the NFTS.
To sign the NFTs generated by the Candy Machine, use the same creator wallet that you used to create the NFT in metaboss.
Once you’ve completed that step, you can run this command:
```
metaboss -r <SOLANA_RPC> sign all --keypair <YOUR_KEYPAIR_FILE> --candy-machine-id <CANDY_MACHINE_ID> --v2
```
After running the command, you should see the following message:

Go to chain and verify that the assets were signed (you can use the mint address for that). If it is not working, be sure that you are using the correct RPC and the correct Candy Machine id.
Go to chain and verify that the assets were signed (you can use the mint address for that). If it is not working, be sure that you are using the correct RPC and the correct Candy Machine id.
That’s it! Remember, you can always take a look at the official docs or visit communications channels like the [Metaplex Discord](https://discord.com/invite/metaplex) or their [Twitter](https://twitter.com/metaplex) if you have any questions.
Wanting more? Check out [Monadical’s blog](https://monadical.com/blog.html) for other programming tutorials, and [Metaplex’s blog](https://www.metaplex.com/blog) for Metaplex updates and tutorials.

Kevin Guevara
is a Monadical of Monadical