<center>
# Revolutionize Animation: Build a Digital Human with Large Language Models
<big>
**A Step-by-Step Guide to Creating Your Next AI-Powered Avatar**
</big>
*Written by Alejandro Sánchez Yalí with Jenalee Prentice. Originally published 2024-07-03
on the [Monadical blog](https://monadical.com/blog.html).*
</center>
## Introduction
There's a new generation of avatars on the block, commonly known as digital humans or AI avatars<a id="01">[<sup>1](#1)</a>. These avatars have earned this somewhat serious name because they simulate human appearance and behavior in a remarkably realistic manner. For instance, they're often designed with the imperfect traits, like an uneven skin tone or asymmetrical face. They also mimic human’s natural language skills by simulating movements and nonverbal cues through sentiment analysis generated by Large Language Models (LLMs)<a id="02">[<sup>2](#2)</a>.
During 2023, the convergence of 2D and 3D modelling technologies with AI tools like Generative Adversarial Networks (GANs), Text-To-Speech (TTS), Speech-To-Text (STT), and LLMs brought these avatars into our lives, potentially redefining our interaction with computers.
Take, for instance, [Victoria Shi](https://cybernews.com/news/ukraine-appoints-ai-avatar-spokesperson/), the digital Ukrainian minister of foreign affairs, who saves the Ukraine time and resources by providing essential updates on consular affairs. Or, the AI avatars used by companies to interact with customers across various industries such as [financial consultation](https://www.deepbrain.io/solutions/finance), [educational support](https://praktika.ai/), [media engagement](https://www.digitalhumans.com/case-studies/digital-einstein), [video games](https://inworld.ai/), and [health and wellness](https://www.digitalhumans.com/case-studies/groov).
## Tutorial Overview
To better understand the potential of AI avatars, this tutorial will teach you how to build one from A to Z. Whether you're a passionate gamer, an entrepreneur seeking innovation, or a future AI-avatar investor, this tutorial will provide you with all the tools you need to create and understand how these fascinating digital avatars work.
In my previous tutorial, [Kraken the Code: How to Build a Talking Avatar](https://monadical.com/posts/how-to-build-a-talking-avatar-with-azure-cognitive-langchain-and-openai.html), I explained how to implement a 2D-talking avatar. This time, we'll raise the stakes and learn how to implement a 3D-talking AI avatar with enhanced features.
The final code of this tutorial can be found in this repository: [Digital Human](https://github.com/asanchezyali/talking-avatar-with-ai/tree/article-1.0).
## Key Elements of Our AI Avatar
By the end of this tutorial, we'll have created an AI avatar that stands out amongst its counterparts. This will be achieved by using [GLTF models](https://es.wikipedia.org/wiki/GlTF), [Mixamo](https://www.mixamo.com/) and LLMs to animate and enhance our avatar's lip synchronization and communication abilities. In other words, we aim to build an avatar that looks and sounds like a human when conversing. Let's look at the specific features that we'll incorporate into our avatar to reach this objective:
- **Hyper-realistic appearance:** AI avatars are becoming increasingly realistic. Although they are often created in a studio and then synthesized using machine learning programs, it's becoming easier and faster to create digital avatars using only [GLTF models](https://es.wikipedia.org/wiki/GlTF), photos, or videos recorded by oneself ([see Meshcapade editor](https://me.meshcapade.com/editor)). For our tutorial, we will use an avatar in GLTF format generated by [Ready Player Me](https://readyplayer.me/) rendered through React.js with [React Three Fiber](https://docs.pmnd.rs/react-three-fiber/getting-started/introduction).
- **Natural body movements:** To generate some body movements of the avatar, we will use [Mixamo](https://www.mixamo.com/). As for synchronizing voice with smooth and natural mouth movements, we will use [Rhubarb lip-sync](https://github.com/DanielSWolf/rhubarb-lip-sync/releases). It is a CLI command that generates [phonemes](https://en.wikipedia.org/wiki/Phoneme) locally, and then we use it to synchronize mouth movements with voice.
- **Text-to-speech (TTS):** Text-to-speech (TTS) technology has come a long way since the early days of voice assistants like the [Microsoft Agent](https://en.wikipedia.org/wiki/Microsoft_Agent) and [DECtalk](https://en.wikipedia.org/wiki/DECtalk) in the 1990s. Nowadays, TTS can produce realistic voices in all languages. It can generate a digital human with convincing, natural speech if combined with lip synchronization. In this case, we will use [ElevenLabs](https://elevenlabs.io/), a multi-language text-to-speech service.
- **Speech-to-text (STT):** Speech recognition is a critical feature that allows users to interact with digital avatars through voice commands. For this, we will use [Whisper](https://platform.openai.com/docs/guides/speech-to-text), an OpenAI Speech-to-Text (STT) API. This system transforms the user's voice into text so AI can hear it appropriately.
- **Information processing and understanding:** By leveraging large language models (LLMs) such as GPT-4, we can enhance the AI avatar’s ability to process and understand information. LLMs are trained on vast amounts of data and can provide contextually relevant responses, enhancing interaction between users and digital avatars.
- **Response latency:** The interaction between humans and AI avatars is still not as smooth as a real human interaction. In this case, our avatar will still have high latency– a feature we'll improve upon in a future post.
## Project Setup
The architecture of our system has two directories: the `frontend` directory, which is in charge of rendering the avatar, and the `backend` directory, which is responsible for coordinating all the artificial intelligence services.
```shell
digital-human
├── backend
└── frontend
```
We start by developing a React project from scratch inside the `frontend` directory, using Tailwind CSS and Vite as support. We assume that the reader has previous experience with React. However, if you need guidance on how to start a project with React, Tailwind CSS, and Vite, we suggest you consult the following post: [How to Setup Tailwind CSS in React JS with VS Code](https://dev.to/david_bilsonn/how-to-setup-tailwind-css-in-react-js-with-vs-code-59p4).
After installing the React project, update the structure to resemble the following:
```shell
├── index.html
├── package.json
├── postcss.config.js
├── public
│ ├── animations
│ │ ├── angry.fbx
│ │ ├── defeated.fbx
│ │ ├── dismissing_gesture.fbx
│ │ ├── happy_idle.fbx
│ │ ├── idle.fbx
│ │ ├── sad_idle.fbx
│ │ ├── surprised.fbx
│ │ ├── talking.fbx
│ │ ├── talking_one.fbx
│ │ ├── talking_two.fbx
│ │ └── thoughtful_head_shake.fbx
│ ├── favicon.ico
│ ├── models
│ │ ├── animations.glb
│ │ ├── animations.gltf
│ │ ├── animations_data.bin
│ │ ├── avatar.fbm
│ │ ├── avatar.fbx
│ │ └── avatar.glb
│ └── vite.svg
├── src
│ ├── App.jsx
│ ├── components
│ │ ├── Avatar.jsx
│ │ ├── ChatInterface.jsx
│ │ └── Scenario.jsx
│ ├── constants
│ │ ├── facialExpressions.js
│ │ ├── morphTargets.js
│ │ └── visemesMapping.js
│ ├── hooks
│ │ └── useSpeech.jsx
│ ├── index.css
│ └── main.jsx
├── tailwind.config.js
├── vite.config.js
└── yarn.lock
```
And we install the following dependencies:
```shell
$ yarn add three
$ yarn add @types/three
$ yarn add @react-three/fiber
$ yarn add @react-three/drei
$ yarn add --dev leva
```
As for the backend, we're going to structure it as follows:
```shell
├── audios/
├── bin
│ ├── CHANGELOG.md
│ ├── LICENSE.md
│ ├── README.adoc
│ ├── extras
│ │ ├── AdobeAfterEffects
│ │ ├── EsotericSoftwareSpine
│ │ └── MagixVegas
│ ├── include
│ │ ├── gmock
│ │ └── gtest
│ ├── lib
│ │ ├── cmake
│ │ ├── libgmock.a
│ │ ├── libgmock_main.a
│ │ ├── libgtest.a
│ │ ├── libgtest_main.a
│ │ └── pkgconfig
│ ├── res
│ │ └── sphinx
│ ├── rhubarb
│ └── tests
│ └── resources
├── index.js
├── modules
│ ├── defaultMessages.mjs
│ ├── elevenLabs.mjs
│ ├── lip-sync.mjs
│ ├── openAI.mjs
│ ├── rhubarbLipSync.mjs
│ └── whisper.mjs
├── package.json
├── tmp
├── utils
│ ├── audios.mjs
│ └── files.mjs
└── yarn.lock
```
And we install the following dependencies:
```shell
yarn add elevenlabs-node
yarn add langchain
yarn add @langchain/openai
yarn add zod
```
In the `frontend/src/App.js`, we will implement the following base code:
```javascript
// frontend/src/App.jsx
import { Loader } from "@react-three/drei";
import { Canvas } from "@react-three/fiber";
import { Leva } from "leva";
import { Scenario } from "./components/Scenario";
import { ChatInterface } from "./components/ChatInterface";
function App() {
return (
<>
<Loader />
<Leva collapsed />
<ChatInterface />
<Canvas shadows camera={{ position: [0, 0, 0], fov: 10 }}>
<Scenario />
</Canvas>
</>
);
}
export default App;
```
In the above code, we have set up the main components of a React application integrating 3D graphics using [Three.js](https://threejs.org/) along with the `@react-three/fiber` library. We started by importing Loader from `@react-three/drei` to handle the visualization of loading 3D resources, ensuring a smooth user experience during the application startup.
To represent the 3D scene, we used the Canvas component from `@react-three/fiber`, which serves as a container for all the 3D visual elements. In this case, the Canvas has shadows enabled (`shadows`), and the camera is configured with an initial position of `[0, 0, 0]` and a field of view `(fov)` of 10. The camera has been set to be at the scene's center, providing a neutral initial view for the user.
Additionally, we have integrated [`LEVA`](https://github.com/pmndrs/leva), a tool that provides a control panel for manipulating variables in real time without changing the code.
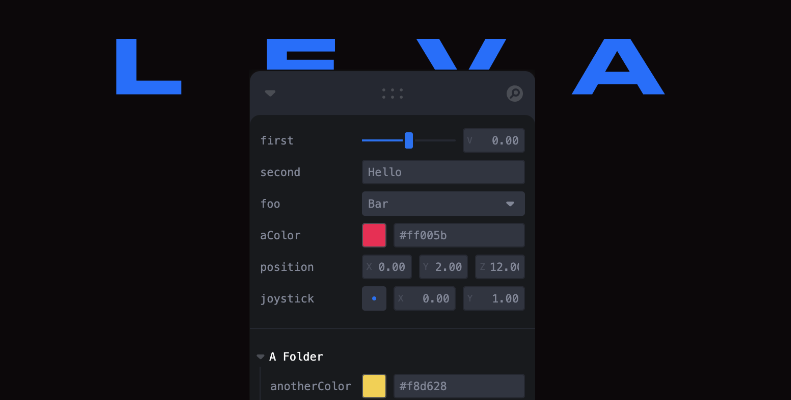
**<center>Figure 1. LEVA control panel.</center>**
The `Scenario` component represents the core of our 3D scene, where all objects, lights, and specific environment configurations are placed. This component looks like:
```javascript
// frontend/src/components/Scenario.jsx
import { CameraControls, Environment } from "@react-three/drei";
import { useEffect, useRef } from "react";
export const Scenario = () => {
const cameraControls = useRef();
useEffect(() => {
cameraControls.current.setLookAt(0, 2.2, 5, 0, 1.0, 0, true);
}, []);
return (
<>
<CameraControls ref={cameraControls} />
<Environment preset="sunset" />
</>
);
};
```
In the `Scenario` component, we have utilized some elements provided by the `@react-three/drei` library, a set of helpful abstractions for `react-three-fiber`. Below are the elements used in the `Scenario` component:
- **`<CameraControls>`**: This component handles camera controls, allowing users to interact with the 3D view. For example, the user could orbit around an object and zoom in or out.
- **`<Environment>`**: This component sets the scene's environment. By using the `sunset` preset, it automatically adds lighting and a background that simulates a sunset. The `sunset` preset helps improve the visual appearance of the scene without the need to manually configure lights and the background. .
The `Scenario` component returns a JSX fragment containing these three elements. When rendered, this component sets up camera controls, defines the environment, and adds contact shadows to the 3D scene. It also prepares the scene for other 3D components (such as models, additional lights, etc.) to be added and presented with an already established basic appearance and controls.
## The Avatar
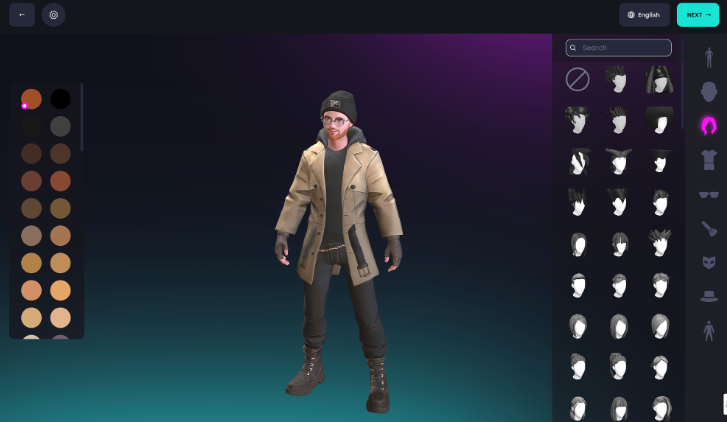
**<center>Figure 2. The avatar editor of Ready Player Me.</center>**
The next step is to obtain an avatar to integrate it into our `Scenario` component. We will access the page [Ready Player Me](https://readyplayer.me/) and create our avatar to do this. No registration is required.
On this site, we can customize our avatars by adjusting gender, skin tone, accessories, hair style and colour, face shape, eye shape, and clothing.
Once your avatar is ready, we copy the avatar link and modify it as follows, adding the query parameters `morphTargets=ARKit, Oculus Visemes`:
```javascript
https://models.readyplayer.me/YOUR_AVATAR_ID.glb?morphTargets=ARKit,Oculus Visemes
```
By adding the query parameters, we can download the .glb file with the attributes to animate the avatar's mouth, eyes, and overall face. [Here](https://docs.readyplayer.me/ready-player-me/api-reference/rest-api/avatars/get-3d-avatars#morphtargets), you can consult the rest of the query parameters that we can use. Once our avatar is downloaded, we place it in the `public/model` directory with a name of your choice. In my case, I have called it `avatar.glb`.
With the `avatar.glb` file, we go to [gltf.pmnd.rs](https://gltf.pmnd.rs/) to create our React component for our avatar. If you decide to use TypeScript, it is necessary to specify that you also need the corresponding types.
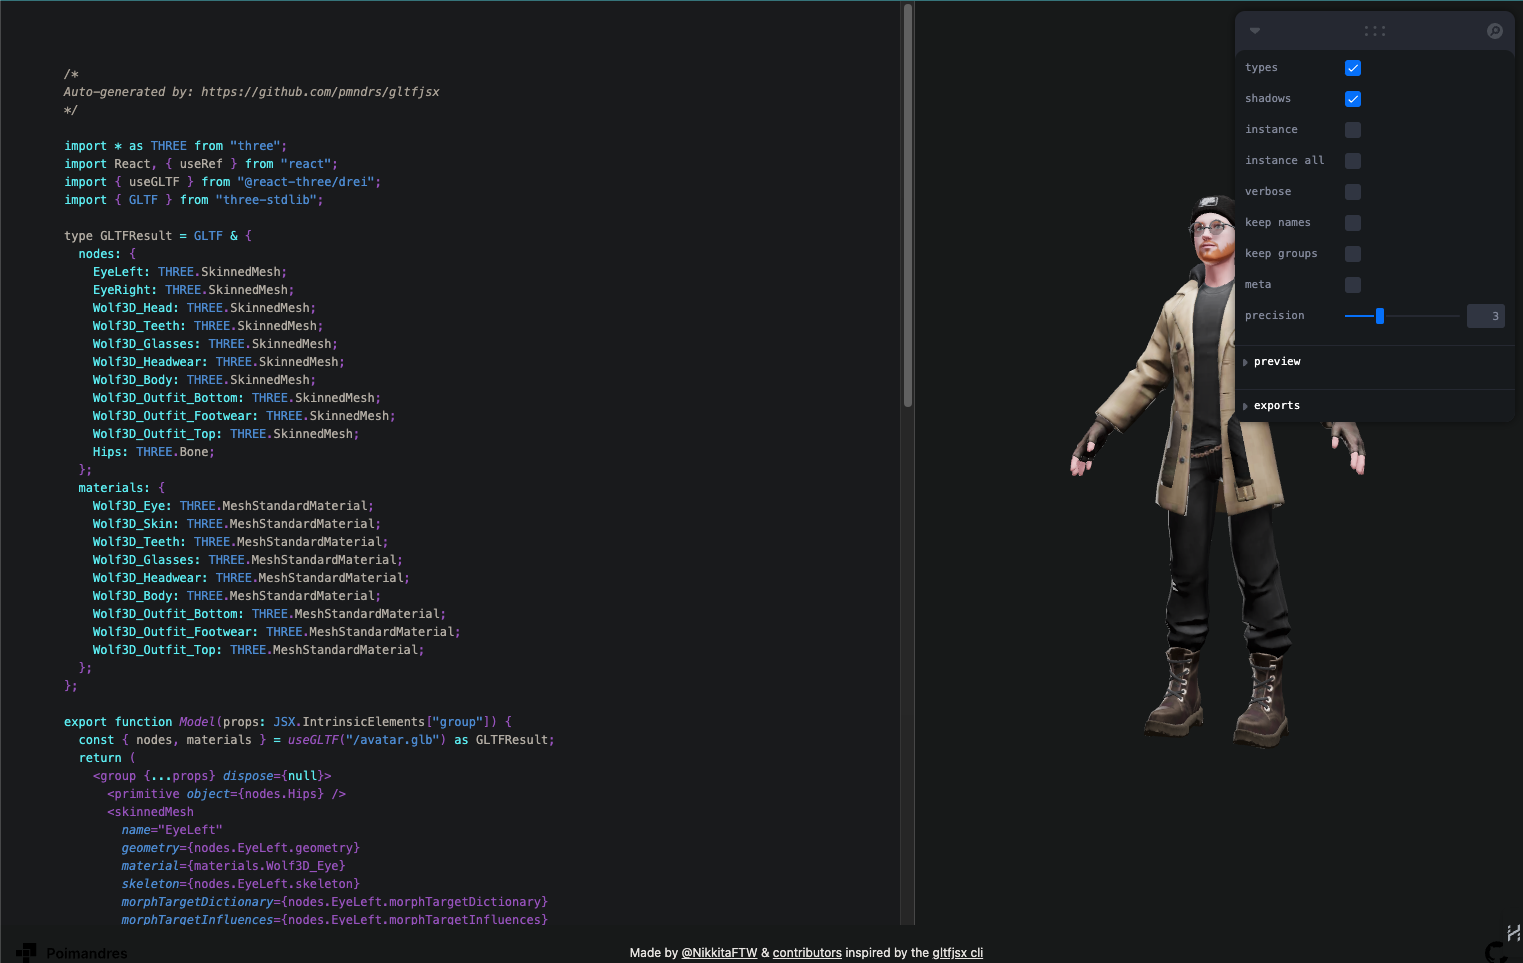
**<center>Figure 3. GLTF editor to generate React.js components.</center>**
Since we're not using TypeScript in our case, the generated code for our avatar would be as follows:
```javascript
// frontend/src/components/Avatar.jsx
import React, { useRef } from "react";
import { useGLTF } from "@react-three/drei";
export function Avatar(props) {
const { nodes, materials } = useGLTF("/models/avatar.glb");
return (
<group {...props} dispose={null}>
<primitive object={nodes.Hips} />
<skinnedMesh
name="EyeLeft"
geometry={nodes.EyeLeft.geometry}
material={materials.Wolf3D_Eye}
skeleton={nodes.EyeLeft.skeleton}
morphTargetDictionary={nodes.EyeLeft.morphTargetDictionary}
morphTargetInfluences={nodes.EyeLeft.morphTargetInfluences}
/>
<skinnedMesh
name="EyeRight"
geometry={nodes.EyeRight.geometry}
material={materials.Wolf3D_Eye}
skeleton={nodes.EyeRight.skeleton}
morphTargetDictionary={nodes.EyeRight.morphTargetDictionary}
morphTargetInfluences={nodes.EyeRight.morphTargetInfluences}
/>
<skinnedMesh
name="Wolf3D_Head"
geometry={nodes.Wolf3D_Head.geometry}
material={materials.Wolf3D_Skin}
skeleton={nodes.Wolf3D_Head.skeleton}
morphTargetDictionary={nodes.Wolf3D_Head.morphTargetDictionary}
morphTargetInfluences={nodes.Wolf3D_Head.morphTargetInfluences}
/>
<skinnedMesh
name="Wolf3D_Teeth"
geometry={nodes.Wolf3D_Teeth.geometry}
material={materials.Wolf3D_Teeth}
skeleton={nodes.Wolf3D_Teeth.skeleton}
morphTargetDictionary={nodes.Wolf3D_Teeth.morphTargetDictionary}
morphTargetInfluences={nodes.Wolf3D_Teeth.morphTargetInfluences}
/>
<skinnedMesh
geometry={nodes.Wolf3D_Glasses.geometry}
material={materials.Wolf3D_Glasses}
skeleton={nodes.Wolf3D_Glasses.skeleton}
/>
<skinnedMesh
geometry={nodes.Wolf3D_Headwear.geometry}
material={materials.Wolf3D_Headwear}
skeleton={nodes.Wolf3D_Headwear.skeleton}
/>
<skinnedMesh
geometry={nodes.Wolf3D_Body.geometry}
material={materials.Wolf3D_Body}
skeleton={nodes.Wolf3D_Body.skeleton}
/>
<skinnedMesh
geometry={nodes.Wolf3D_Outfit_Bottom.geometry}
material={materials.Wolf3D_Outfit_Bottom}
skeleton={nodes.Wolf3D_Outfit_Bottom.skeleton}
/>
<skinnedMesh
geometry={nodes.Wolf3D_Outfit_Footwear.geometry}
material={materials.Wolf3D_Outfit_Footwear}
skeleton={nodes.Wolf3D_Outfit_Footwear.skeleton}
/>
<skinnedMesh
geometry={nodes.Wolf3D_Outfit_Top.geometry}
material={materials.Wolf3D_Outfit_Top}
skeleton={nodes.Wolf3D_Outfit_Top.skeleton}
/>
</group>
);
}
useGLTF.preload("/models/avatar.glb");
```
The previous code contains a React component called `Avatar`, which loads and renders the 3D model `avatar.glb` using `Three.js` through the `@react-three/drei` library. This component uses the `useGLTF` hook to load a GLB file, a binary format of glTF (GL Transmission Format), a standard specification for the efficient distribution of 3D models.
The previous component does the following:
1. **Loading the 3D Model:** The `useGLTF` hook loads the 3D model from the provided path ("models/avatar.glb"). Once loaded, this hook returns two important objects: `nodes`, which contain all the nodes or elements of the model, and `materials`, which store the materials defined in the 3D model.
2. **Component Structure:** The Avatar component returns a `Three.js` <group> element group, which acts as a container for all child elements. This group receives any additional props passed to the Avatar component via {...props} and prevents the JavaScript garbage collector from removing the group when not in use by setting dispose={null}.
3. **Meshes with Skinning:** Inside the group, multiple <skinnedMesh> components are created, each representing a part of the avatar with its own geometry, material, and skeleton. Skinned meshes allow complex animations, such as facial expressions or character movement, as their vertices are linked to a bone system (skeleton).
4. **Morph Targets:** Some meshes include morphTargetDictionary and morphTargetInfluences, which are used for animations based on morph targets. These animations deform the mesh in a controlled way to create facial expressions or subtle movements.
5. **Preloading:** Finally, useGLTF.preload("models/avatar.glb") is used to preload the 3D model in the background as soon as possible, which can improve the user experience by reducing the waiting time when the Avatar component is first mounted.
The previous code defines an Avatar component that renders an interactive 3D avatar with movable parts and facial expressions. This avatar is ready to be integrated into a larger 3D scene or used as a standalone element within a web application.
Now, what we'll do is update our `Scenario` component as follows:
```javascript
// frontend/src/components/Scenario.jsx
import { CameraControls, Environment } from "@react-three/drei";
import { useEffect, useRef } from "react";
import { Avatar } from "./Avatar";
export const Scenario = () => {
const cameraControls = useRef();
useEffect(() => {
cameraControls.current.setLookAt(0, 2.2, 5, 0, 1.0, 0, true);
}, []);
return (
<>
<CameraControls ref={cameraControls} />
<Environment preset="sunset" />
<Avatar />
</>
);
};
```
And we place our avatar far away from the camera:
```javascript
//frontend/src/components/Avatar.js
// Omitted code for simplicity
<group {...props} dispose={null} position={[0, -0.65, 0]}>
// Omitted code for simplicity
```
The result should look something like this:
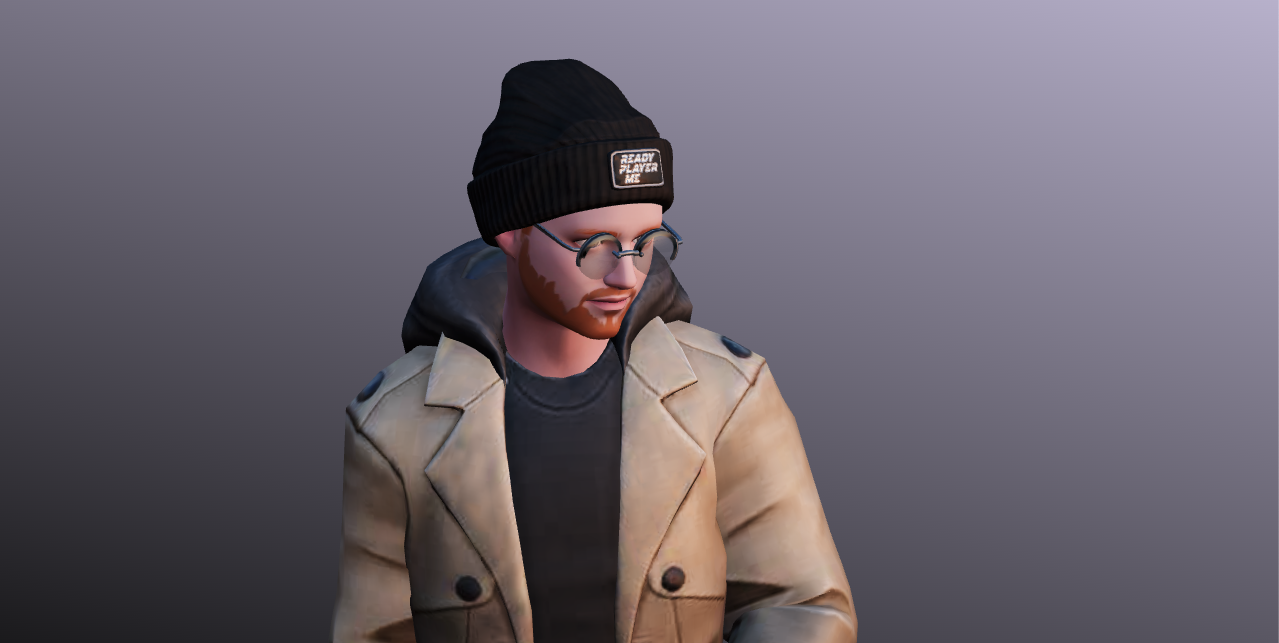
**<center>Figure 4. Preview of the rendered avatar.
.</center>**
## Animations
As we mentioned earlier, one of the fundamental features of AI avatars is their body movements. To meet this requirement, we will perform two tasks in this section:
1. Use [Mixamo](https://www.mixamo.com/#/) to animate the whole body, and to add movements such as dancing, waving, running, etc.
2. Add a natural blink to the eyes to make the eyes more realistic.
### Body Movements with Mixamo Animations
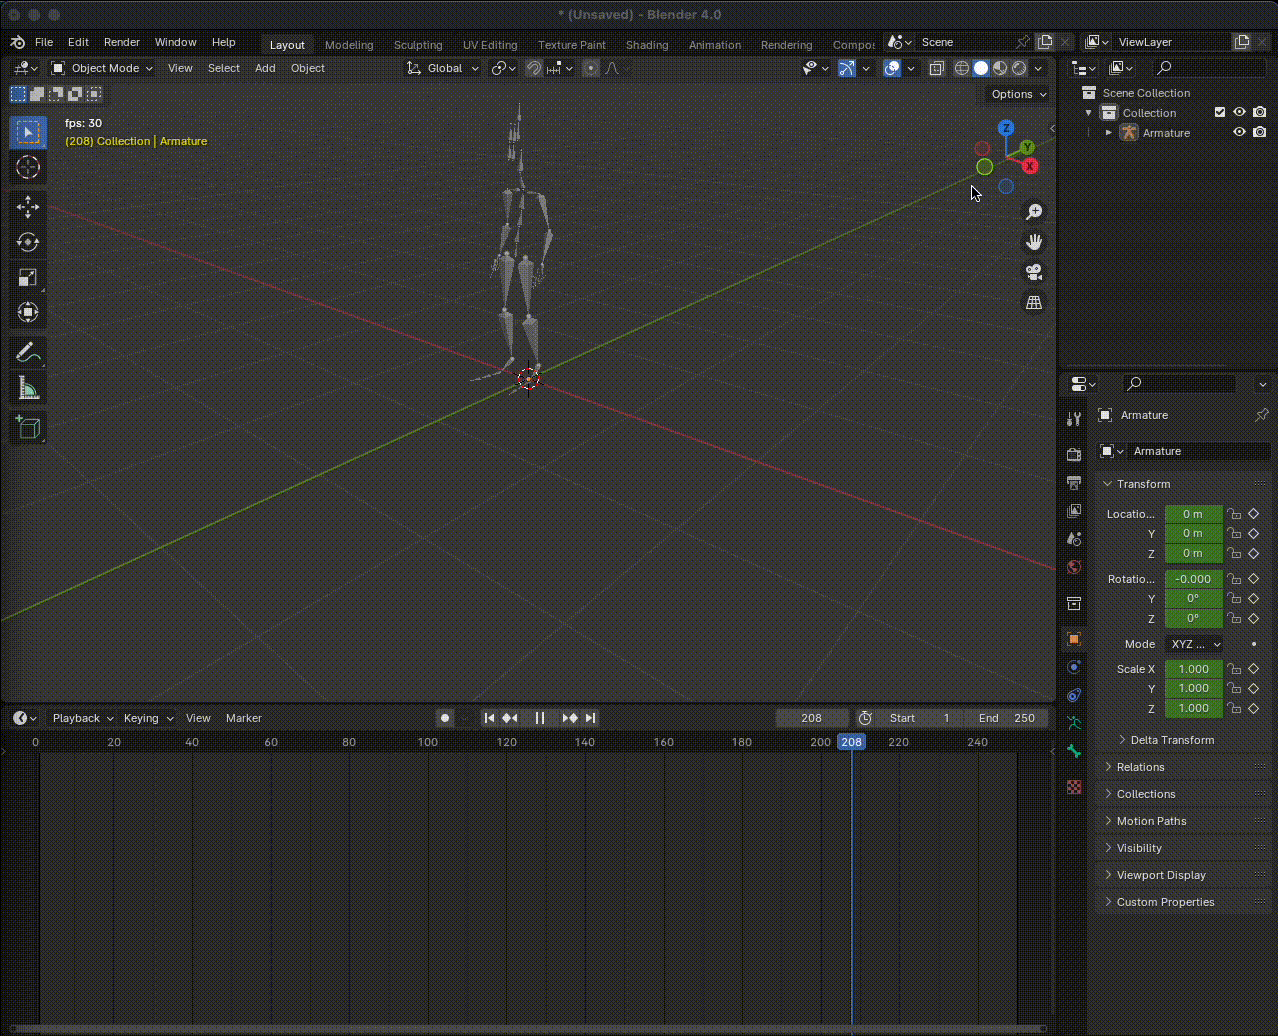
To use Mixamo, we must first convert our `avatar.glb` model into a `.fbx` file format. To do this, we will use [Blender](https://www.blender.org/), by following these steps:
1. Install Blender on our computer.
2. Create a new general-type project:
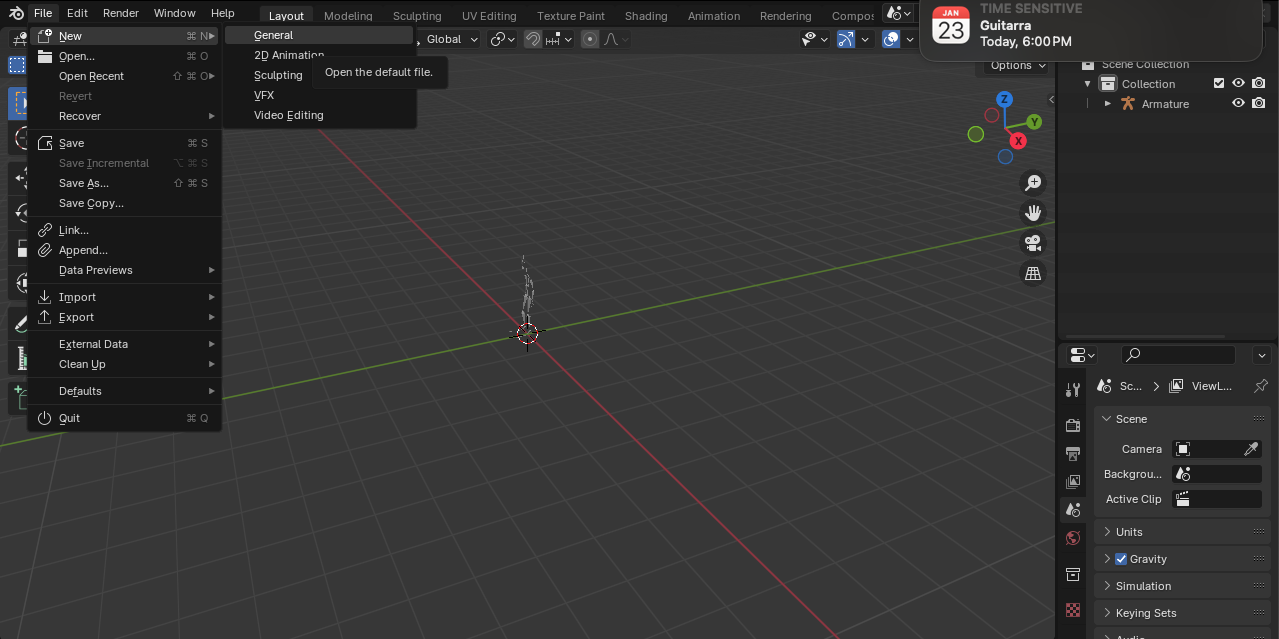
**<center>Figure 5. Start a new General type project.
.</center>**
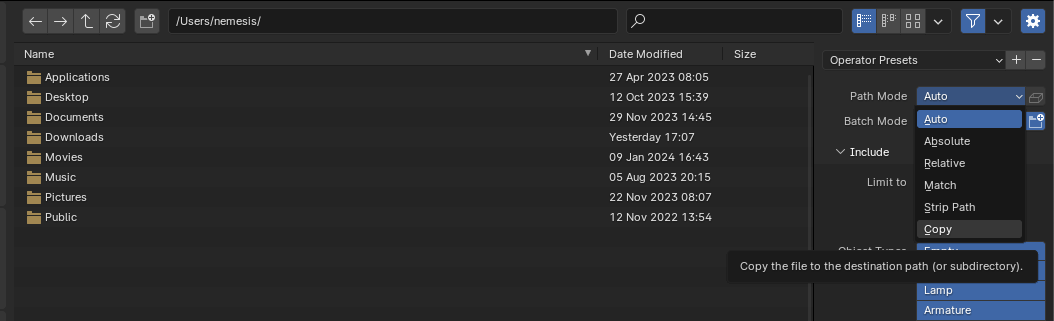
3. Remove all the elements from the scene and import the `avatar.glb` file:
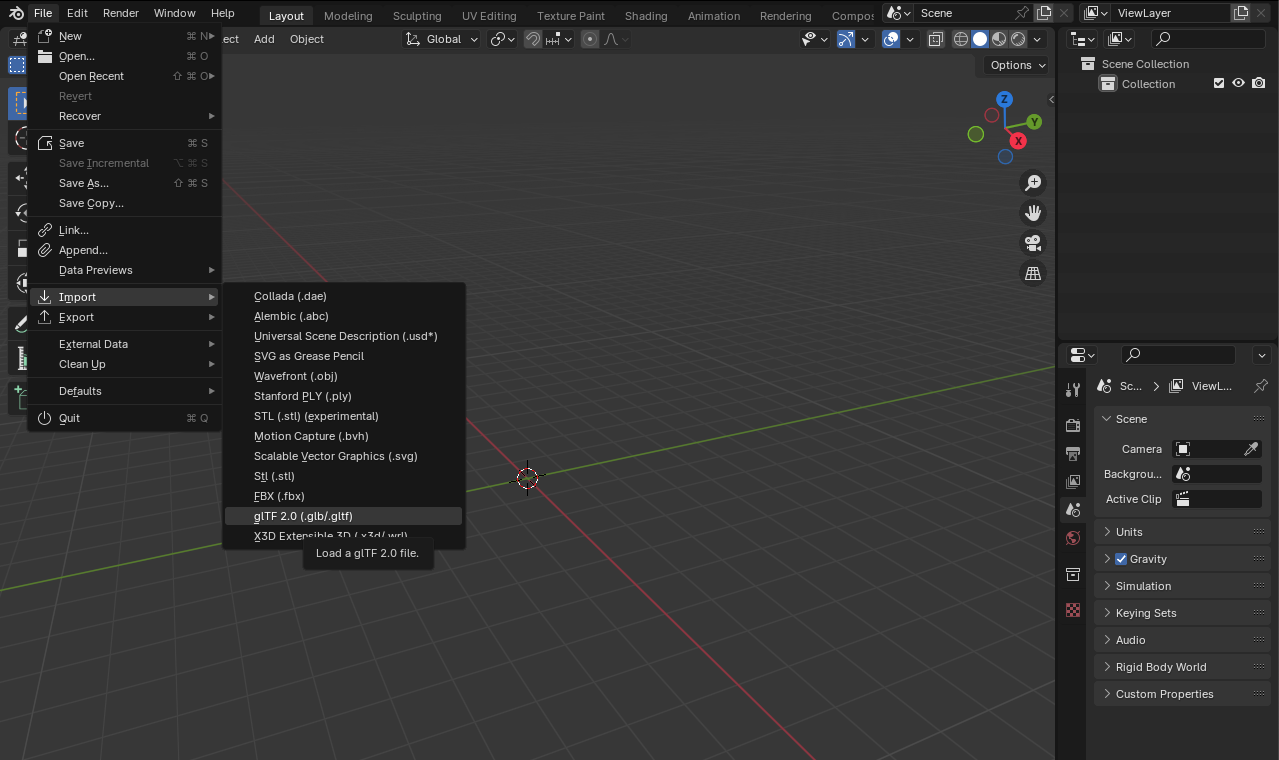
**<center>Figure 6. Import a .glb/.gltf file.</center>**
When selecting our file, we adjust the `Bone Dir` parameter in `Temperance`, as shown in the image:
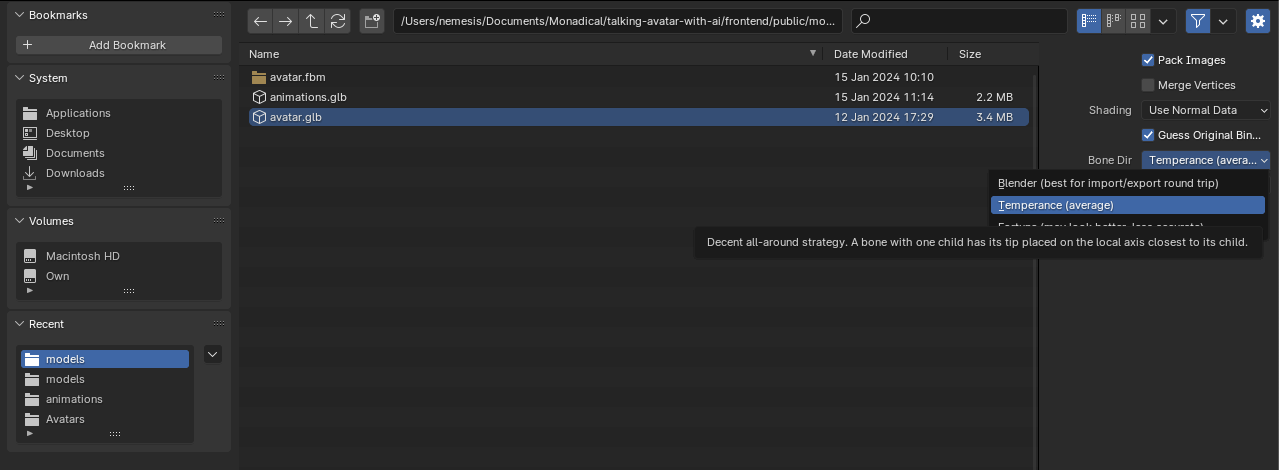
**<center>Figure 6. Set the Bone Dir parameter to Temperance.</center>**
If done correctly, our avatar should look like this in Blender:
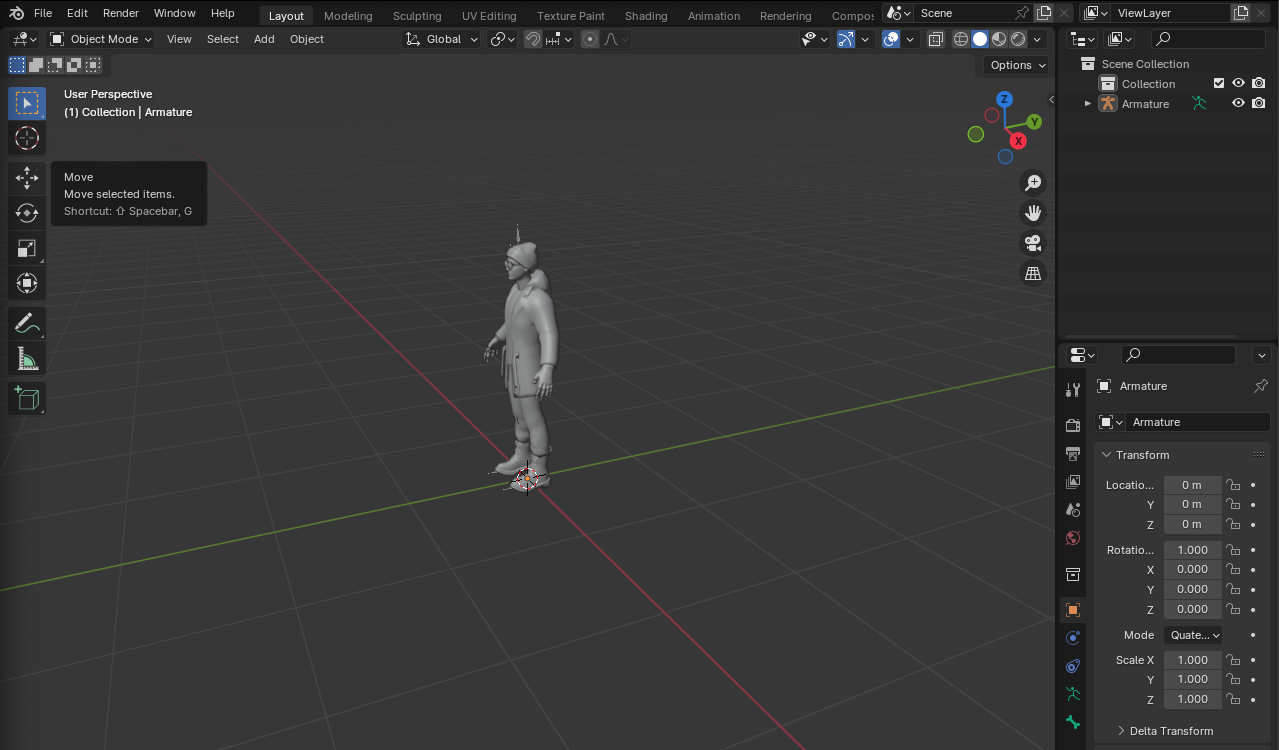
**<center>Figure 6. GLFT model in Blender.</center>**
4. Export the file in `.fbx` format.
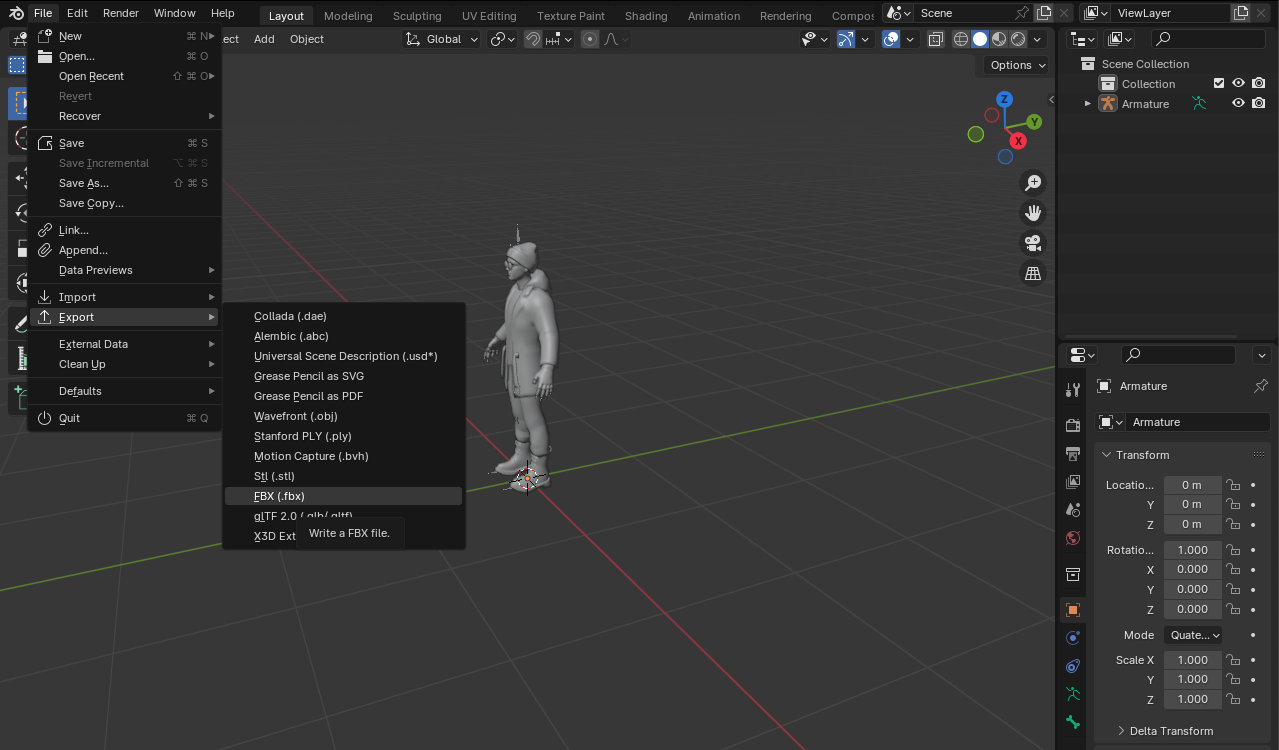
**<center>Figure 7. Export in FBX format. </center>**
We must ensure that the Path Mode parameter is set to `copy`:
**<center>Figure 8. Set the Path Mode parameter to `copy`.</center>**
And finally, we export them to our `frontend/public/models` directory.
Now that we have our model in FBX format, let's go to https://www.mixamo.com/, register, and upload the `avatar.fbx` file. Here, we will find a variety of animations in which we can animate our avatar. Remember, the idea here is to make our avatar act as realistically as possible.
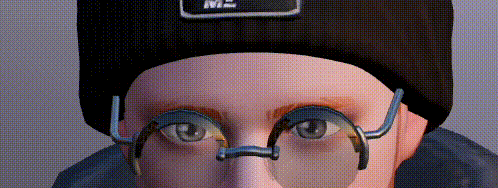
As shown in the GIF, I've taught my digital avatar to dance hip-hop:
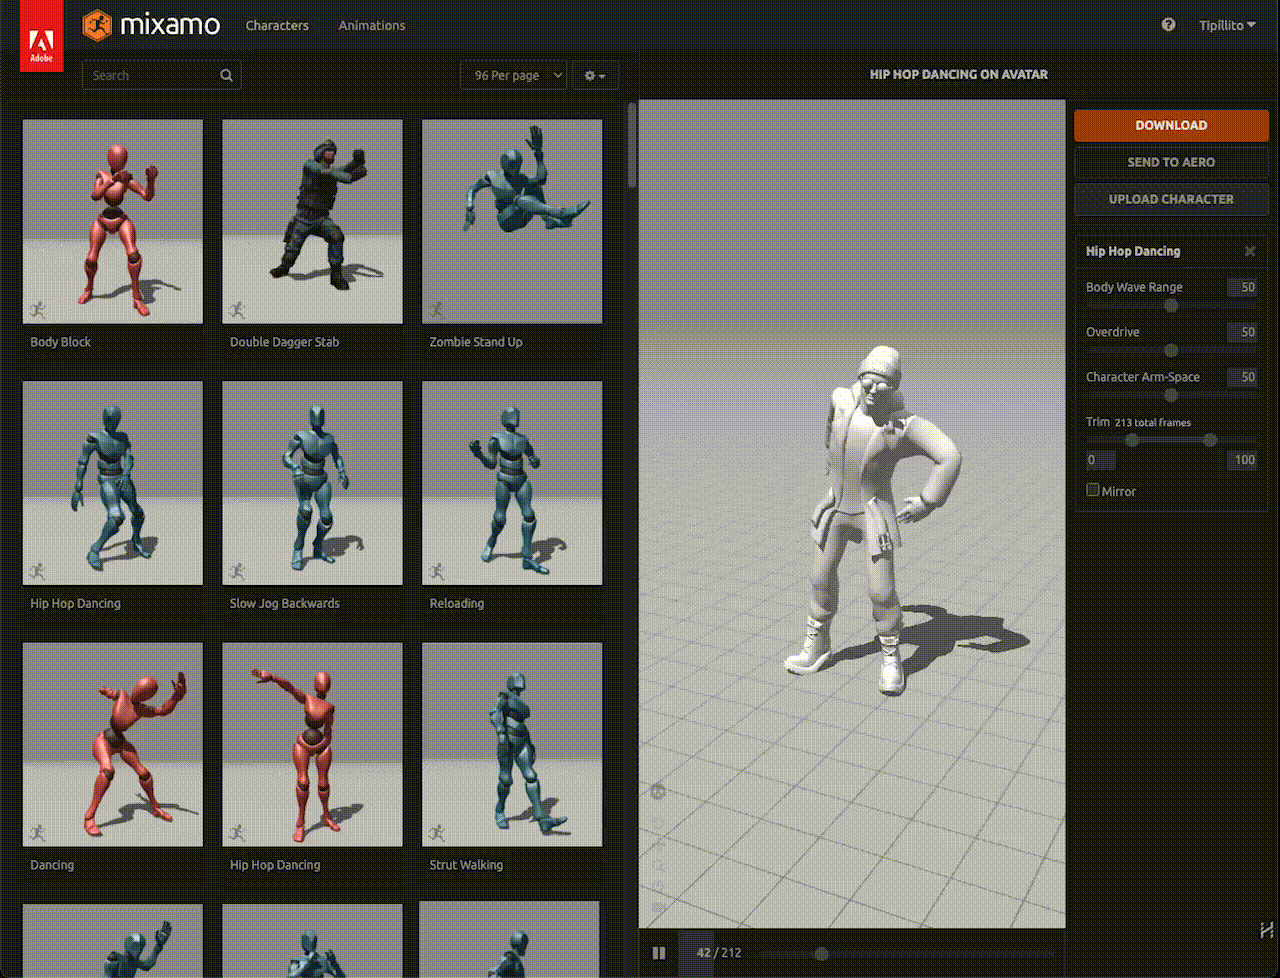
**<center>Figure 9. Felix, the digital human in this post, is showing his best hip-hop moves.</center>**
Before we continue, I want to explain the relation between these animations with OpenAI GPT or any other language model we wish to implement. In the backend, we are going to implement an OpenAI GPT integration module for these animations. This module will handle the synchronization between the generated responses and the corresponding animations, ensuring that the avatar's movements and facial expressions match the context and flow of the conversation.
By doing this, we improve the overall user experience, making interactions feel more natural. The code for this module looks like this:
```javascript
// backend/modules/openAI.mjs
import { ChatOpenAI } from "@langchain/openai";
import { ChatPromptTemplate } from "@langchain/core/prompts";
import { StructuredOutputParser } from "langchain/output_parsers";
import { z } from "zod";
import dotenv from "dotenv";
dotenv.config();
const template = `
You are Felix, a world traveler.
You will always respond with a JSON array of messages, with a maximum of 3 messages:
\n{format_instructions}.
Each message has properties for text, facialExpression, and animation.
The different facial expressions are: smile, sad, angry, surprised, funnyFace, and default.
The different animations are: Idle, TalkingOne, TalkingThree, SadIdle, Defeated, Angry,
Surprised, DismissingGesture and ThoughtfulHeadShake.
`;
const prompt = ChatPromptTemplate.fromMessages([
["ai", template],
["human", "{question}"],
]);
const model = new ChatOpenAI({
openAIApiKey: process.env.OPENAI_API_KEY || "-",
modelName: process.env.OPENAI_MODEL || "davinci",
temperature: 0.2,
});
const parser = StructuredOutputParser.fromZodSchema(
z.object({
messages: z.array(
z.object({
text: z.string().describe("Text to be spoken by the AI"),
facialExpression: z
.string()
.describe(
"Facial expression to be used by the AI. Select from: smile, sad, angry, surprised, funnyFace, and default"
),
animation: z
.string()
.describe(
`Animation to be used by the AI. Select from: Idle, TalkingOne, TalkingThree, SadIdle,
Defeated, Angry, Surprised, DismissingGesture, and ThoughtfulHeadShake.`
),
})
),
})
);
const openAIChain = prompt.pipe(model).pipe(parser);
export { openAIChain, parser };
```
In this code, we use `@langchain/openai` to create an interactive chat system that incorporates animated responses and facial expressions using OpenAI's artificial intelligence. In the `template` variable, we instruct the AI to act as a character named Felix, a world traveler. We also specify that Felix should always respond with a JSON array containing messages. The responses should follow a specific format in which each element has defined properties for the text that Felix will say, its facial expression, and the animation or movement it will perform.
The facial expressions that Felix can use in responding are a smile, sadness (`sad`), anger (`angry`), surprise (`surprised`), funny face (`funnyFace`), and a default expression (`default`). These expressions humanize the responses generated by the AI. In addition, we detail some animations that Felix can execute while responding, such as `Idle, TalkingOne, TalkingThree, SadIdle, Defeated, Angry, Surprised, DismissingGesture` and `ThoughtfulHeadShake`. These animations make the interaction more dynamic and entertaining, providing an additional element that accompanies the generated text:
```javascript
const parser = StructuredOutputParser.fromZodSchema(
z.object({
messages: z.array(
z.object({
text: z.string().describe("Text to be spoken by the AI"),
facialExpression: z
.string()
.describe(
"Facial expression to be used by the AI. Select from: smile, sad, angry, surprised, funnyFace, and default"
),
animation: z
.string()
.describe(
`Animation to be used by the AI. Select from: Idle, TalkingOne, TalkingThree, SadIdle,
Defeated, Angry, Surprised, DismissingGesture, and ThoughtfulHeadShake.`
),
})
),
})
);
```
We use the `zod` library to implement a schema that validates the response's structure to ensure the response always has the desired JSON array. This schema acts as a template that defines the response's structure and content.
If you want to learn more about how to make LLMs respond to your questions with a particular data structure, I recommend you read the article: [How to Make LLMs Speak Your Language](https://monadical.com/posts/how-to-make-llms-speak-your-language.html).
Up to this point, it’s important to note that Felix will reply to a user not just by sending out generated text, but with appropriate facial expression for the situation being discussed. To ensure that these elements adhere to a predefined standard, we have used a `zod` scheme. This scheme acts as a template that defines what the response should be in terms of its structure and content.
Each time Felix generates a response, it goes through a validation process with `zod`.`zod` inspects the response and checks that each part complies with the rules set in the schema. The response is sent to Azure Cognitive Speech Service if everything is in order. But if something doesn't match, `zod` identifies the problem, allowing it to be corrected before proceeding. In this way, confusion or misunderstandings from a poorly formed response are avoided.
Now that we understand the reasoning behind animations from [Mixamo](https://www.mixamo.com/), let's explore ways to incorporate them into our model.
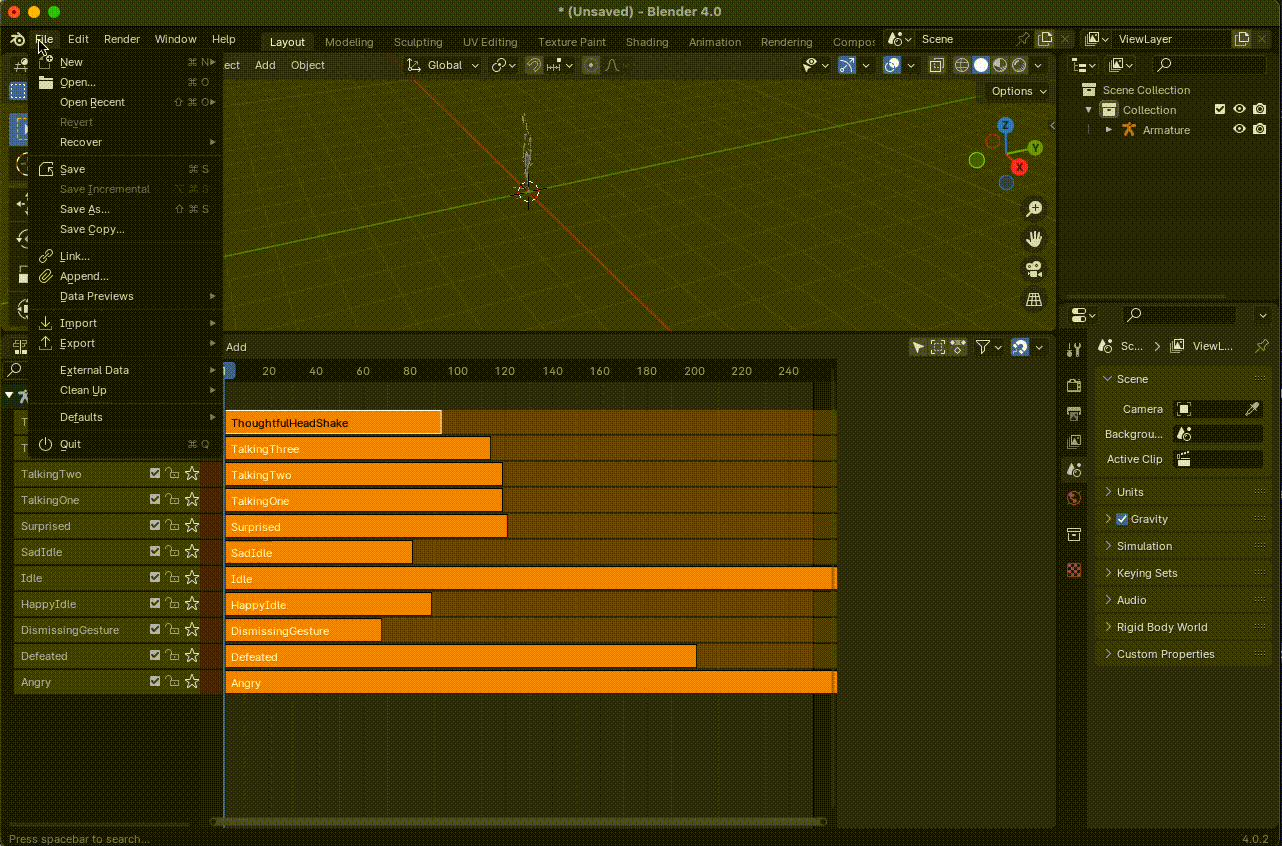
We will first select a set of animations coherent with the personality we want to give our avatar. In my case, I have chosen ten of them:
1. **Defeated:** Showing frustration after a loss
2. **Angry:** Standing angrily
3. **Idle:** Stopped, doing nothing
4. **Happy idle:** Happy idle
5. **Surprised:** Finding something and wiggling fingers
6. **Thoughtful headshake:** Shaking head not thoughtfully
7. **Dismissing Gesture:** Dismissing with backhand
8. **Talking One:** Talking with two hands
9. **Talking Two:** Talking with one hand
10. **Sad idle:** Standing in a sad disposition
When you have chosen your animations, we must download each one of them without skin, as we can see in the following image:
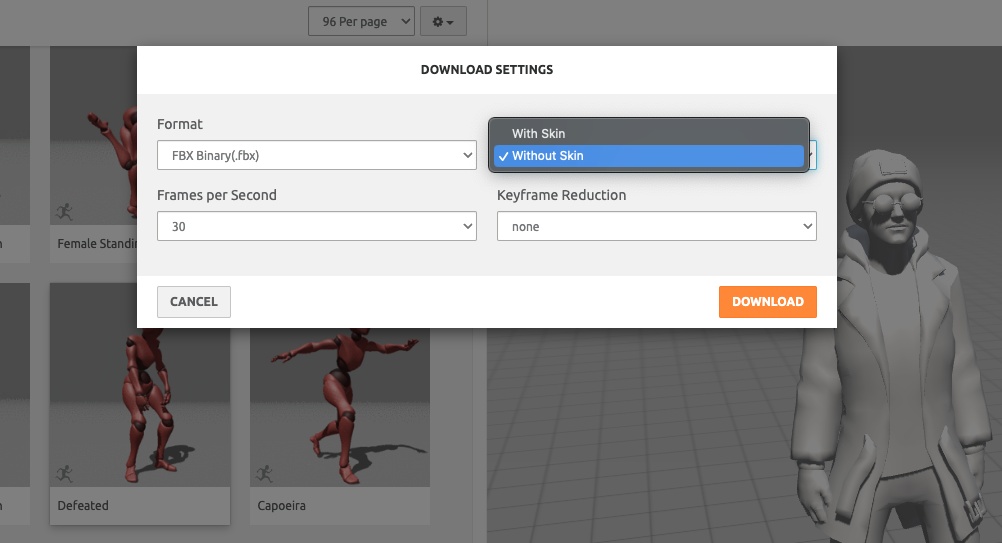
**<center>Figure 10. Download animations without skin.</center>**
This way, we ensure that we only download the animation data and locate them in a folder we can easily access. In my case, I decided to place them in the project's `frontend/public animations` directory.
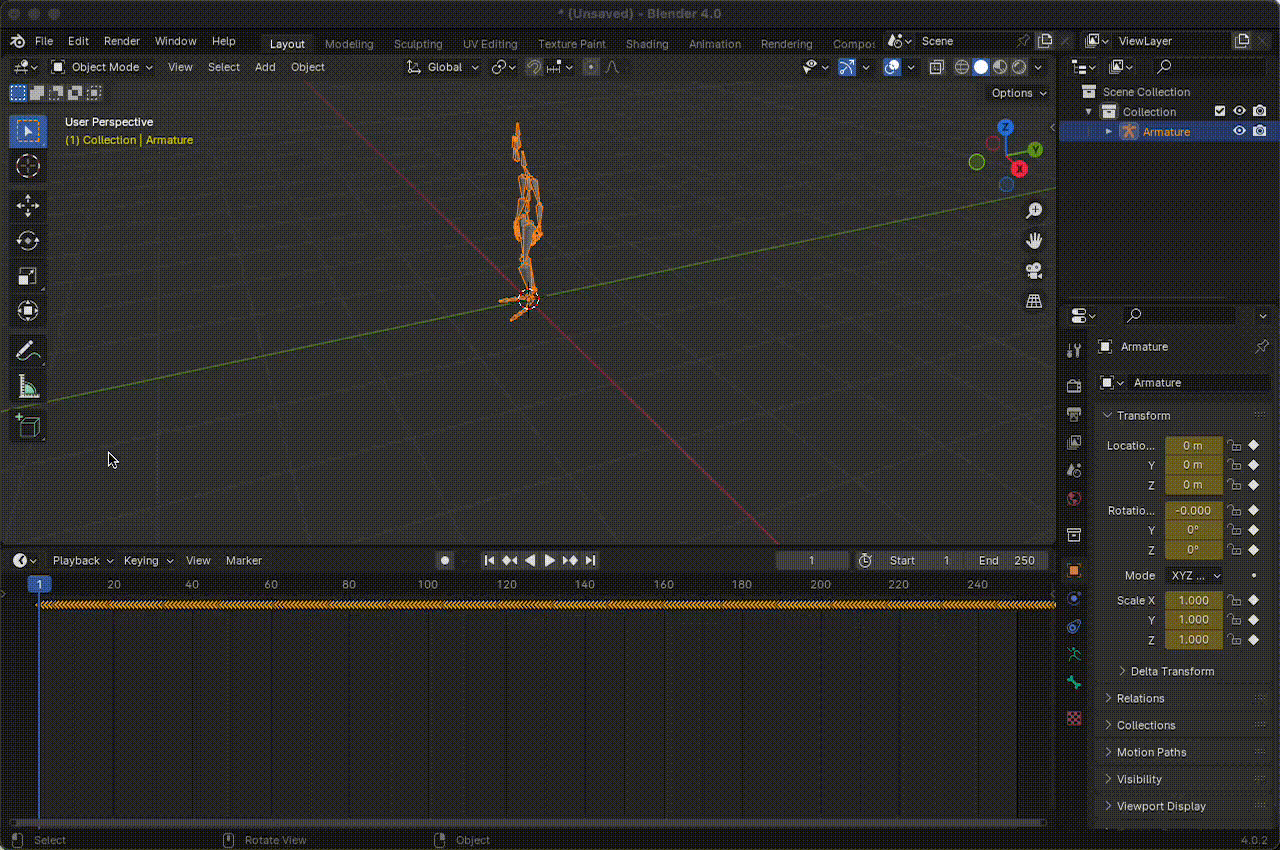
Next, in Blender, we create a new general-type project, delete all the default elements, and import one of the animations as an FBX file:
**<center>Figure 11. Preview of a Mixamo animation. You must press the space key on your keyboard to run or stop it.</center>**
If we have imported it well, our animation should look like a skeleton of triangular bones. To see how the animation works, press the key to play or stop the animation.
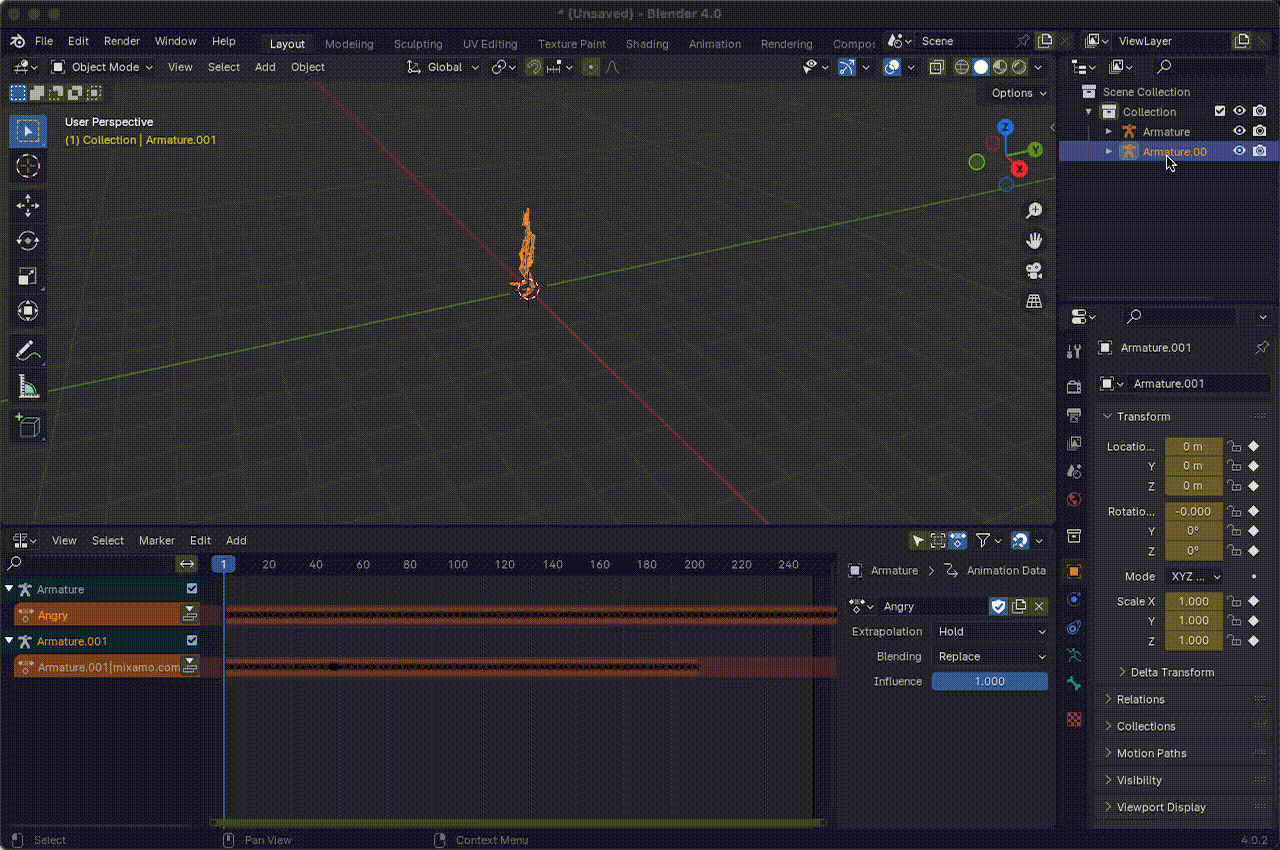
Then, in the `Nonlinear Animation` section, we can edit the animation's name, which by default appears similar to something like `Armature|mixamo.com|Layer0`. The idea is to use names related to emotions or feelings associated with the animation so that when we integrate the LLM, it can construct messages and use these emotions to express its feelings.
**<center> Figure 12. Change the name of the animations.</center>**
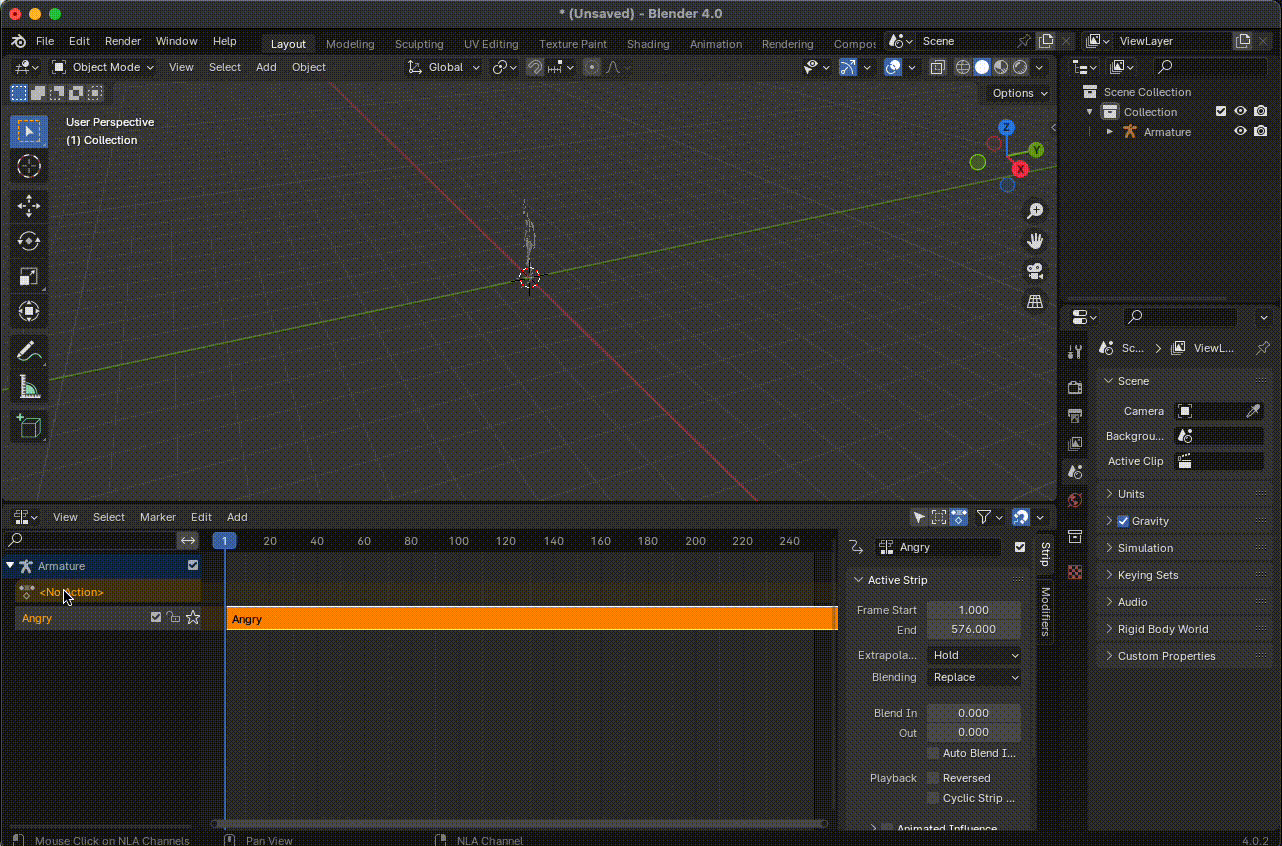
The next step will be to add the other animations as follows:
1. Import the animation as an FBX file.
2. Disassemble the `armature` by deleting the animation hierarchy.
**<center>Figure 13. Disarticulate the armature.</center>**
3. Add a new action and rename the animation. Use names in `CamelCase` or `snake_case` format.
**<center> Figure 14. Add a new animation.</center>**
4. Repeat the previous steps with each animation you want to add to
your avatar.
**<center> Figure 15. Export the animation package in glTF 2.0 format.</center>**
Once our animation package is ready, we must export it as a `.glb` file and place it in the `public/models/` directory. By implementing them in our code, it is enough to do the following in the `Avatar.js` component:
```javascript
// frontend/src/components/Avatar.jsx
import { useAnimations, useGLTF } from "@react-three/drei";
const { animations } = useGLTF("/models/animations.glb");
const group = useRef();
const { actions, mixer } = useAnimations(animations, group);
const \[animation, setAnimation\] = useState(
animations.find((a) =\> a.name === "Idle") ? "Idle" :
animations\[0\].name);
useEffect(() =\> {
actions\[animation\]
.reset()
.fadeIn(mixer.stats.actions.inUse === 0 ? 0 : 0.5)
.play();
return () =\> actions\[animation\].fadeOut(0.5);
}, \[animation\]);
```
In the above code snippet, we use `useGLTF` to load the animations from `models` `animations.glb`. `useGLTF` returns an object containing the `animations` property, which we extract for easier use. Then, we define a reference with `useRef` to refer to the 3D group that contains the model. In our case, it would be the group provided by the Avatar.jsx component.
```javascript
// frontend/src/components/Avatar.jsx
\<group {...props} dispose={null} ref={group} position={\[0, -0.65,
0\]}\>
```
With the `useAnimations` hook, we connect the loaded animations with our 3D model, which is kept in the group reference. And finally, we implement a `useEffect` to ensure that the animation plays or changes each time the `animation` state changes. When the state changes, `reset()` restarts the animation, `fadeIn()` is used to smooth the transition to the new animation, and `play()` starts the animation.
When the effect is finished, `fadeOut()` is used to smooth the transition out of the current animation.
In summary, this code loads an animation file, connects it to a 3D model, and controls what animation is activated based on the application's state.
### Update Function for Morphological Traits
In this section, we will implement a function called `lerpMorphTarget` in the Avatar.jsx component. In game development and 3D animations, `lerp` is a commonly used term that means "linear interpolation" - a process that allows for a smooth transition between two points or values. In this case, "MorphTarget" refers to a feature of 3D models representing different states or shapes they can adopt. The code for our function will look like this:
```javascript
// frontend/src/components/Avatar.jsx
const lerpMorphTarget = (target, value, speed = 0.1) => {
scene.traverse((child) => {
if (child.isSkinnedMesh && child.morphTargetDictionary) {
const index = child.morphTargetDictionary[target];
if (index === undefined || child.morphTargetInfluences[index] === undefined) {
return;
}
child.morphTargetInfluences[index] = THREE.MathUtils.lerp(child.morphTargetInfluences[index], value, speed);
}
});
};
```
The `lerpMorphTarget` function has three parameters: `target`, `value`, and `speed`. `target` identifies which morphological aspect we want to transform, `value` determines the magnitude of the transformation, and `speed` sets the speed at which the transformation is performed.
The function operates in the context of a `scene`, which could be a 3D scene. `scene.traverse` is a function that allows us to go through all the elements (children) of the scene.
The first condition, `if (child.isSkinnedMesh && child.morphTargetDictionary)`, checks if the `child` object is a SkinnedMesh object. A SkinnedMesh object is a type of 3D object that is deformable and transformable), and it has a morph target dictionary.
Next, it tries to get the index of the morph target we want to change from the `morphTargetDictionary`.The function stops if the reference to the `child` object or the morph target index does not exist.
If both references are valid, the function reassigns the respective morph target influence value using `THREE.MathUtils.lerp`, a linear interpolation method within the three.js library.
### Eye Blinking Feature
If we want our digital human to behave more realistically, adding natural eye blinking is necessary. To add eye blinking, we will animate the morphological elements `eyeBlinkLeft` and `eyeBlinkRight` in the `Avatar.jsx` component. We start by importing the `useFrame` hook from `@react-three/fiber`which allows us to update the scene or objects in the scene frame by frame:
```javascript
// frontend/src/components/Avatar.jsx
import { useFrame } from "@react-three/fiber";
```
We set the `blink` state to control the eyes' state:
// frontend/src/components/Avatar.jsx
```javascript
const [blink, setBlink] = useState(false);
```
Then we use the `useFrame` hook, which will check if the state of `blink` has changed from second to second and will update the state of the eyes in the avatar through the `lerpMorphTarget` function, generating the blinking of the eyes:
```javascript
// frontend/src/components/Avatar.jsx
useFrame(() => {
lerpMorphTarget("eyeBlinkLeft", blink ? 1 : 0, 0.5);
lerpMorphTarget("eyeBlinkRight", blink ? 1 : 0, 0.5);
});
```
As you can see, if we don't update the `blink` state, the eyes will never blink. To accomplish this, we implement the following `useEffect`, where we randomly change the state of `blink` in a threshold of 1 second to 5 seconds, generating natural blinking.
```javascript
// frontend/src/components/Avatar.jsx
useEffect(() => {
let blinkTimeout;
const nextBlink = () => {
blinkTimeout = setTimeout(() => {
setBlink(true);
setTimeout(() => {
setBlink(false);
nextBlink();
}, 200);
}, THREE.MathUtils.randInt(1000, 5000));
};
nextBlink();
return () => clearTimeout(blinkTimeout);
}, []);
```
In this way, we get a charming look for our avatar:
**<center> Figure 16. Felix showing off his sensual look.</center>**
### Facial Expressions with Leva Library
As mentioned before, [Leva](https://sbcode.net/react-three-fiber/leva/) is a library to control all the avatar's features, such as eyes, eyebrows, mouth, hands, feet, etc. In this case, we will use it to create a set of facial expressions and debug our code. The first thing we'll do is import `useControls` and `button` to configure the control panel that will allow us to modify all the attributes of our avatar:
```javascript
// frontend/src/components/Avatar.jsx
import { button, useControls } from "leva";
```
Then, according to the Ready Player Me documentation, we define an array with all the [morphTargets](https://docs.readyplayer.me/ready-player-me/api-reference/avatars/morph-targets/apple-arkit) and the [visemes](https://docs.readyplayer.me/ready-player-me/api-reference/avatars/morph-targets/oculus-ovr-libsync) in the `frontend/src/constants/morphTargets.js` file:
```javascript
\\ frontend/src/constants/morphTargets.js
const morphTargets = [
"mouthOpen",
"viseme_sil",
"viseme_PP",
"viseme_FF",
"viseme_TH",
"viseme_DD",
"viseme_kk",
"viseme_CH",
"viseme_SS",
"viseme_nn",
"viseme_RR",
"viseme_aa",
"viseme_E",
"viseme_I",
"viseme_O",
"viseme_U",
"mouthSmile",
"browDownLeft",
"browDownRight",
"browInnerUp",
"browOuterUpLeft",
"browOuterUpRight",
"eyeSquintLeft",
"eyeSquintRight",
"eyeWideLeft",
"eyeWideRight",
"jawForward",
"jawLeft",
"jawRight",
"mouthFrownLeft",
"mouthFrownRight",
"mouthPucker",
"mouthShrugLower",
"mouthShrugUpper",
"noseSneerLeft",
"noseSneerRight",
"mouthLowerDownLeft",
"mouthLowerDownRight",
"mouthLeft",
"mouthRight",
"eyeLookDownLeft",
"eyeLookDownRight",
"eyeLookUpLeft",
"eyeLookUpRight",
"eyeLookInLeft",
"eyeLookInRight",
"eyeLookOutLeft",
"eyeLookOutRight",
"cheekPuff",
"cheekSquintLeft",
"cheekSquintRight",
"jawOpen",
"mouthClose",
"mouthFunnel",
"mouthDimpleLeft",
"mouthDimpleRight",
"mouthStretchLeft",
"mouthStretchRight",
"mouthRollLower",
"mouthRollUpper",
"mouthPressLeft",
"mouthPressRight",
"mouthUpperUpLeft",
"mouthUpperUpRight",
"mouthSmileLeft",
"mouthSmileRight",
"tongueOut",
"eyeBlinkLeft",
"eyeBlinkRight",
];
export default morphTargets;
```
In this code fragment, we manipulate the avatar's facial expressions and Morph Targets. These parameters allow you to change the model's emotional expression and facial features in real-time.
The code defines two control panels using the `useControls` function:
1. **FacialExpresions:** This section shows all the animations loaded in the model. In the control panel, we can find selectors to choose between the different options that we have predefined. The `setAnimation` function updates the animation. There are two additional buttons on this panel. The `setupMode` button toggles the setup mode, and `logMorphTargetValues` logs the current values of MorphTarget influences in the console.
2. **MorphTarget:** Provides sliders for each predefined MorphTarget. MorphTargets are used in 3D animation to deform the avatar's mesh. The controllers on this panel will allow us to manipulate these deformations in real-time. The value of each slider ranges from 0 (no influence) to 1 (total influence). When sliding the control, the function defined in `onChange`, `lerpMorphTarget`, is called with the corresponding MorphTarget and the new value.
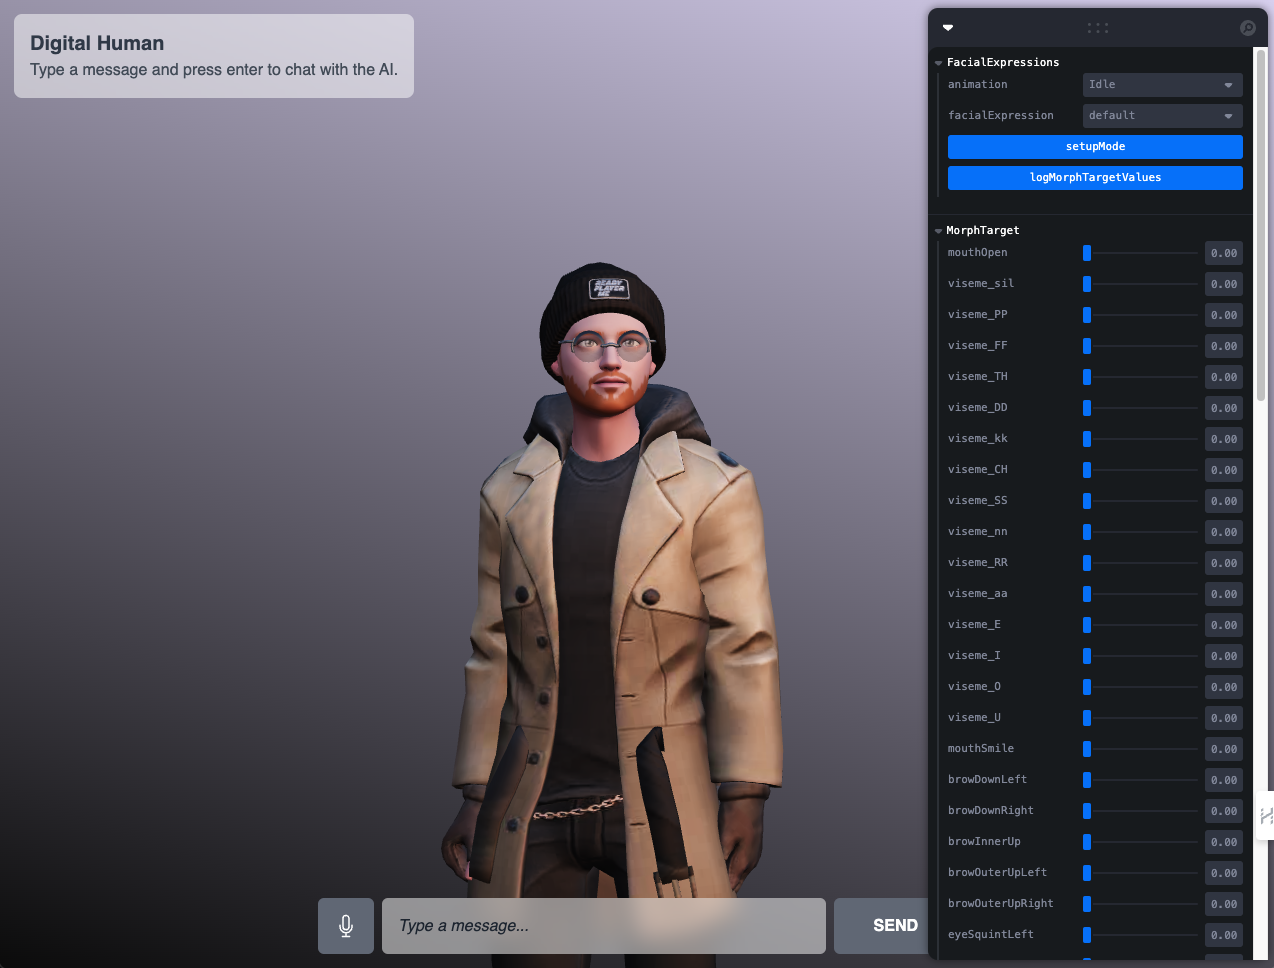
**<center>Figure 17. CAM panel implemented in the avatar interface.</center>**
This user interface provides an intuitive way to experiment with the avatar's animation and movements in real-time, greatly enhancing its accessibility and ability to manipulate these complex functionalities.
From this interface, you can customize your avatar's facial expressions. Simply enable the editing model with the `setMode` button, then adjust all the parameters of those Morph Targets that we want to transform and then by clicking on `logMorphTargetValues`, we can see in the console the object of the facial expression that we have created. For example, in the following image, I have adjusted the values so that Felix looks somewhat surprised:
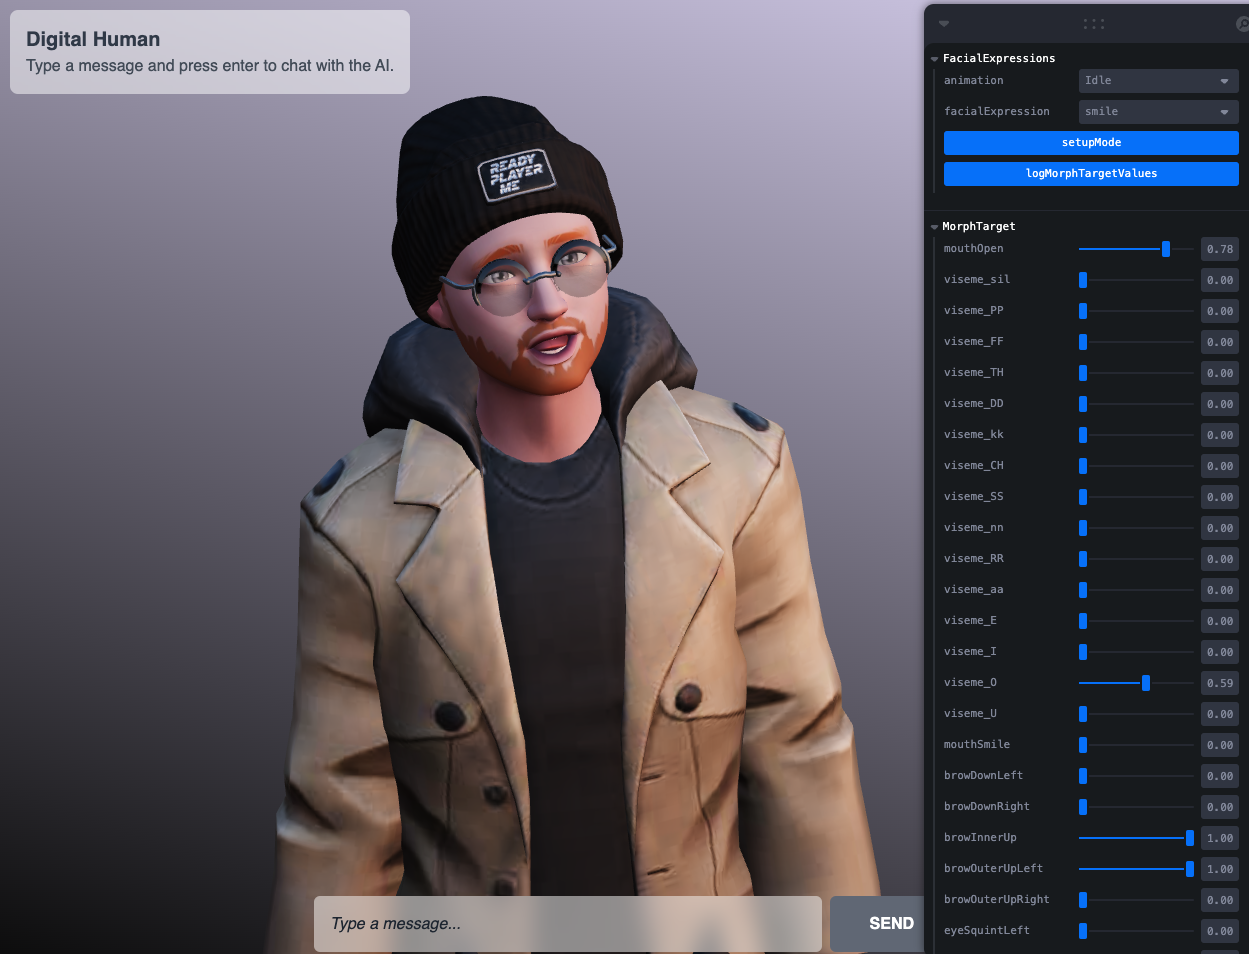
**<center>Figure 18. Adjusting morphological parameters.</center>**
By clicking on `logMorphTargetValues`, the object logged in the console is:
```javascript
{
"mouthOpen": 0.5038846174508553,
"viseme_O": 0.48860157907883556,
"browDownLeft": 0.28300077033602955,
"browInnerUp": 0.6585272447570272,
"browOuterUpLeft": 0.7215888575281937,
"eyeSquintLeft": 0.3999999999999997,
"eyeSquintRight": 0.43999999999999967,
"noseSneerLeft": 0.1700000727403596,
"noseSneerRight": 0.14000002836874043,
"mouthPressLeft": 0.6099999999999992,
"mouthPressRight": 0.4099999999999997
}
```
Once you have customized all the facial expressions you want your avatar to use when speaking, you must save them in a file. In my case, I placed them in the `constant/facialExpressions.js` directory:
```javascript
\\ frontend/src/constants/facialExpressions.js
const facialExpressions = {
default: {},
smile: {
browInnerUp: 0.17,
eyeSquintLeft: 0.4,
eyeSquintRight: 0.44,
noseSneerLeft: 0.1700000727403593,
noseSneerRight: 0.14000002836874015,
mouthPressLeft: 0.61,
mouthPressRight: 0.41000000000000003,
},
funnyFace: {
jawLeft: 0.63,
mouthPucker: 0.53,
noseSneerLeft: 1,
noseSneerRight: 0.39,
mouthLeft: 1,
eyeLookUpLeft: 1,
eyeLookUpRight: 1,
cheekPuff: 0.9999924982764238,
mouthDimpleLeft: 0.414743888682652,
mouthRollLower: 0.32,
mouthSmileLeft: 0.35499733688813034,
mouthSmileRight: 0.35499733688813034,
},
sad: {
mouthFrownLeft: 1,
mouthFrownRight: 1,
mouthShrugLower: 0.78341,
browInnerUp: 0.452,
eyeSquintLeft: 0.72,
eyeSquintRight: 0.75,
eyeLookDownLeft: 0.5,
eyeLookDownRight: 0.5,
jawForward: 1,
},
surprised: {
eyeWideLeft: 0.5,
eyeWideRight: 0.5,
jawOpen: 0.351,
mouthFunnel: 1,
browInnerUp: 1,
},
angry: {
browDownLeft: 1,
browDownRight: 1,
eyeSquintLeft: 1,
eyeSquintRight: 1,
jawForward: 1,
jawLeft: 1,
mouthShrugLower: 1,
noseSneerLeft: 1,
noseSneerRight: 0.42,
eyeLookDownLeft: 0.16,
eyeLookDownRight: 0.16,
cheekSquintLeft: 1,
cheekSquintRight: 1,
mouthClose: 0.23,
mouthFunnel: 0.63,
mouthDimpleRight: 1,
},
crazy: {
browInnerUp: 0.9,
jawForward: 1,
noseSneerLeft: 0.5700000000000001,
noseSneerRight: 0.51,
eyeLookDownLeft: 0.39435766259644545,
eyeLookUpRight: 0.4039761421719682,
eyeLookInLeft: 0.9618479575523053,
eyeLookInRight: 0.9618479575523053,
jawOpen: 0.9618479575523053,
mouthDimpleLeft: 0.9618479575523053,
mouthDimpleRight: 0.9618479575523053,
mouthStretchLeft: 0.27893590769016857,
mouthStretchRight: 0.2885543872656917,
mouthSmileLeft: 0.5578718153803371,
mouthSmileRight: 0.38473918302092225,
tongueOut: 0.9618479575523053,
},
};
export default facialExpressions;
```
Remember that in the template we used with OpenAI, we asked GPT to return a facial expression:
```javascript
\\ backend/modules/openAI.mjs
const parser = StructuredOutputParser.fromZodSchema(
z.object({
messages: z.array(
z.object({
text: z.string().describe("text to be spoken by the AI"),
facialExpression: z
.string()
.describe(
"facial expression to be used by the AI. Select from: smile, sad, angry, surprised, funnyFace, and default"
),
animation: z
.string()
.describe(
"animation to be used by the AI. Select from: Talking-1, Talking-2, Talking-3, Thriller and Rapping"
),
})
),
})
);
```
So, later, we will use facial expressions based on the response generated by the OpenAI API.
## Speech and Lip-Sync
This section will explain how to implement the speech and lip synchronization system using the following APIs: OpenAI GPT, Eleven Labs TTS API, and Rhubarb Lip Sync.
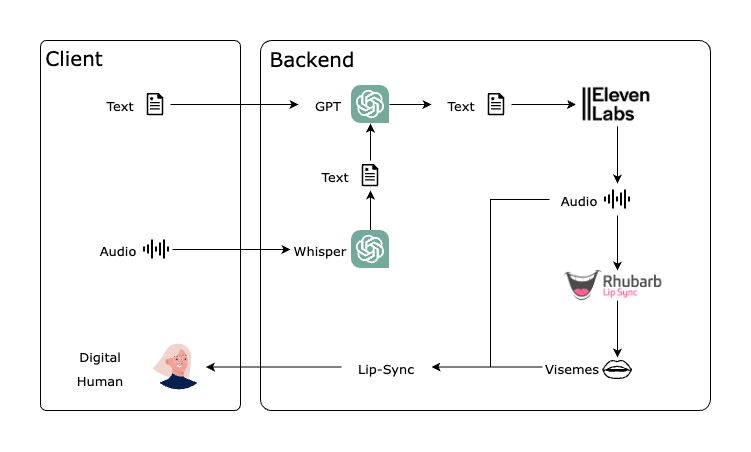
**<center>Figure 19. The general structure of our project’s logic.</center>**
There will be two main workflows based on the user input being in text or audio form:
**Workflow with text input:**
1. The user enters text.
2. The text is sent to the OpenAI GPT API for processing.
3. The response from GPT is sent to the Eleven Labs TTS API to generate audio.
4. The audio is sent to Rhubarb Lip Sync to generate viseme metadata.
5. The visemes synchronize the digital human's lips with the audio.
**Workflow with audio input:**
1. The user enters audio.
2. The audio is sent to the OpenAI Whisper API to generate text.
3. The generated text is sent to the OpenAI GPT API for processing.
4. The response from GPT is sent to the Eleven Labs TTS API to generate audio.
5. The audio is sent to Rhubarb Lip Sync to generate viseme metadata.
6. The visemes synchronize the digital human's lips with the audio.
### Client Text and Audio
We will use the following hook to handle text, audio, and backend responses: a React context and multiple states to manage voice recording and send it to the backend. Then, through the Whisper API, we will transform the audio into text, allowing the OpenAI GPT API to process it and provide a response that we can further process with the ElevenLabs API and Rhubarb Lip-Sync to generate lip synchronization for the avatar, thus producing a more human-like response on the client side.
```javascript
\\ frontend/src/hooks/useSpeech.jsx
import { createContext, useContext, useEffect, useState } from "react";
const backendUrl = "http://localhost:3000";
const SpeechContext = createContext();
export const SpeechProvider = ({ children }) => {
const [recording, setRecording] = useState(false);
const [mediaRecorder, setMediaRecorder] = useState(null);
const [messages, setMessages] = useState([]);
const [message, setMessage] = useState();
const [loading, setLoading] = useState(false);
let chunks = [];
const initiateRecording = () => {
chunks = [];
};
const onDataAvailable = (e) => {
chunks.push(e.data);
};
const sendAudioData = async (audioBlob) => {
const reader = new FileReader();
reader.readAsDataURL(audioBlob);
reader.onloadend = async function () {
const base64Audio = reader.result.split(",")[1];
setLoading(true);
const data = await fetch(`${backendUrl}/sts`, {
method: "POST",
headers: {
"Content-Type": "application/json",
},
body: JSON.stringify({ audio: base64Audio }),
});
const response = (await data.json()).messages;
setMessages((messages) => [...messages, ...response]);
setLoading(false);
};
};
useEffect(() => {
if (typeof window !== "undefined") {
navigator.mediaDevices
.getUserMedia({ audio: true })
.then((stream) => {
const newMediaRecorder = new MediaRecorder(stream);
newMediaRecorder.onstart = initiateRecording;
newMediaRecorder.ondataavailable = onDataAvailable;
newMediaRecorder.onstop = async () => {
const audioBlob = new Blob(chunks, { type: "audio/webm" });
try {
await sendAudioData(audioBlob);
} catch (error) {
console.error(error);
alert(error.message);
}
};
setMediaRecorder(newMediaRecorder);
})
.catch((err) => console.error("Error accessing microphone:", err));
}
}, []);
const startRecording = () => {
if (mediaRecorder) {
mediaRecorder.start();
setRecording(true);
}
};
const stopRecording = () => {
if (mediaRecorder) {
mediaRecorder.stop();
setRecording(false);
}
};
// TTS logic
const tts = async (message) => {
setLoading(true);
const data = await fetch(`${backendUrl}/tts`, {
method: "POST",
headers: {
"Content-Type": "application/json",
},
body: JSON.stringify({ message }),
});
const response = (await data.json()).messages;
setMessages((messages) => [...messages, ...response]);
setLoading(false);
};
const onMessagePlayed = () => {
setMessages((messages) => messages.slice(1));
};
useEffect(() => {
if (messages.length > 0) {
setMessage(messages[0]);
} else {
setMessage(null);
}
}, [messages]);
return (
<SpeechContext.Provider
value={{
startRecording,
stopRecording,
recording,
tts,
message,
onMessagePlayed,
loading,
}}
>
{children}
</SpeechContext.Provider>
);
};
export const useSpeech = () => {
const context = useContext(SpeechContext);
if (!context) {
throw new Error("useSpeech must be used within a SpeechProvider");
}
return context;
};
```
In the previous code, we find the following:
**Imports and initial configurations**
```javascript
\\ frontend/src/hooks/useSpeech.jsx
import { createContext, useContext, useEffect, useState } from "react";
const backendUrl = "http://localhost:3000";
const SpeechContext = createContext();
```
First, we import the necessary React functions for our code: `createContext`, `useContext`, `useEffect`, and `useState`. These functions will allow us to structure our hook and manage its state. Then, we set our server's URL to 'backendUrl' and finish the snippet by creating our context, 'SpeechContext'.
**SpeechProvider and initial states**
```javascript
\\ frontend/src/hooks/useSpeech.jsx
export const SpeechProvider = ({ children }) => {
const [recording, setRecording] = useState(false);
const [mediaRecorder, setMediaRecorder] = useState(null);
const [messages, setMessages] = useState([]);
const [message, setMessage] = useState();
const [loading, setLoading] = useState(false);
let chunks = [];
```
Now, we set up our main component, `SpeechProvider`. Additionally, we initialize a series of states using `useState`. These states include `recording` to track if the recording is ongoing, `mediaRecorder` to store our media recording object, `messages` to maintain a list of voice messages, `message` for the current voice message, `loading` to indicate if something is loading, and `chunks` to store recorded audio chunks.
**Essential Recording Functions**
```javascript
\\ frontend/src/hooks/useSpeech.jsx
const initiateRecording = () => {
chunks = [];
};
const onDataAvailable = (e) => {
chunks.push(e.data);
};
const sendAudioData = async (audioBlob) => {
const reader = new FileReader();
reader.readAsDataURL(audioBlob);
reader.onloadend = async function () {
const base64Audio = reader.result.split(",")[1];
setLoading(true);
try {
const data = await fetch(`${backendUrl}/sts`, {
method: "POST",
headers: {
"Content-Type": "application/json",
},
body: JSON.stringify({ audio: base64Audio }),
});
const response = (await data.json()).messages;
setMessages((messages) => [...messages, ...response]);
} catch (error) {
console.error('Error:', error);
} finally {
setLoading(false);
}
};
};
```
Next, we set up our recording functions. `initiateRecognition` clears itself for each new recording, `onDataAvailable` collects the recording chunks, and `sendAudioData` sends all these chunks as a Blob to the server to convert them into text.
**MediaRecorder Configuration**
```javascript
\\ frontend/src/hooks/useSpeech.jsx
useEffect(() => {
if (typeof window !== "undefined") {
navigator.mediaDevices
.getUserMedia({ audio: true })
.then((stream) => {
const newMediaRecorder = new MediaRecorder(stream);
newMediaRecorder.onstart = initiateRecording;
newMediaRecorder.ondataavailable = onDataAvailable;
newMediaRecorder.onstop = async () => {
const audioBlob = new Blob(chunks, { type: "audio/webm" });
try {
await sendAudioData(audioBlob);
} catch (error) {
console.error(error);
alert(error.message);
}
};
setMediaRecorder(newMediaRecorder);
})
.catch((err) => console.error("Error accessing microphone:", err));
}
}, []);
```
Here, we use `useEffect` to set up our `MediaRecorder` once the `SpeechProvider` is mounted in the DOM. We bind our recording functions to trigger when `MediaRecorder` starts or stops recording.
**Recording Control Functions**
```javascript
\\ frontend/src/hooks/useSpeech.jsx
const tts = async (message) => {
setLoading(true);
const data = await fetch(`${backendUrl}/tts`, {
method: "POST",
headers: {
"Content-Type": "application/json",
},
body: JSON.stringify({ message }),
});
const response = (await data.json()).messages;
setMessages((messages) => [...messages, ...response]);
setLoading(false);
};
const onMessagePlayed = () => {
setMessages((messages) => messages.slice(1));
};
useEffect(() => {
if (messages.length > 0) {
setMessage(messages[0]);
} else {
setMessage(null);
}
}, [messages]);
```
The code provides a `tts` function pointing to the endpoint in the backend that can process the text directly and generate the audio and visemes used in the avatar's lip synchronization. Meanwhile, `onMessagePlayed` simply removes a message once it has been played. When the `messages` list changes, the `useEffect` sets the current message.
**Providing the Context**
```javascript
\\ frontend/src/hooks/useSpeech.jsx
return (
<SpeechContext.Provider
value={{
startRecording,
stopRecording,
recording,
tts,
message,
onMessagePlayed,
loading,
}}
>
{children}
</SpeechContext.Provider>
);
};
export const useSpeech = () => {
const context = useContext(SpeechContext);
if (!context) {
throw new Error("useSpeech must be used within a SpeechProvider");
}
return context;
};
```
Finally, `SpeechContext.Provider` is returned, passing all the necessary functions and states for child components to manipulate and access speech functionalities.
With this, we have a `SpeechProvider` component that allows users to record their voice, send it to the server to be processed by the OpenAI API, and thus engage in a conversation with it.
### Chat Interface and SpeechProvider Integration
To integrate the SpeechProvider, we will use the following interface:
```javascript
\\ frontend/src/components/ChatInterface.jsx
import { useRef } from "react";
import { useSpeech } from "../hooks/useSpeech";
export const ChatInterface = ({ hidden, ...props }) => {
const input = useRef();
const { tts, loading, message, startRecording, stopRecording, recording } = useSpeech();
const sendMessage = () => {
const text = input.current.value;
if (!loading && !message) {
tts(text);
input.current.value = "";
}
};
if (hidden) {
return null;
}
return (
<div className="fixed top-0 left-0 right-0 bottom-0 z-10 flex justify-between p-4 flex-col pointer-events-none">
<div className="self-start backdrop-blur-md bg-white bg-opacity-50 p-4 rounded-lg">
<h1 className="font-black text-xl text-gray-700">Digital Human</h1>
<p className="text-gray-600">
{loading ? "Loading..." : "Type a message and press enter to chat with the AI."}
</p>
</div>
<div className="w-full flex flex-col items-end justify-center gap-4"></div>
<div className="flex items-center gap-2 pointer-events-auto max-w-screen-sm w-full mx-auto">
<button
onClick={recording ? stopRecording : startRecording}
className={`bg-gray-500 hover:bg-gray-600 text-white p-4 px-4 font-semibold uppercase rounded-md ${
recording ? "bg-red-500 hover:bg-red-600" : ""
} ${loading || message ? "cursor-not-allowed opacity-30" : ""}`}
>
<svg
xmlns="http://www.w3.org/2000/svg"
fill="none"
viewBox="0 0 24 24"
strokeWidth={1.5}
stroke="currentColor"
className="w-6 h-6"
>
<path
strokeLinecap="round"
strokeLinejoin="round"
d="M12 18.75a6 6 0 0 0 6-6v-1.5m-6 7.5a6 6 0 0 1-6-6v-1.5m6 7.5v3.75m-3.75 0h7.5M12 15.75a3 3 0 0 1-3-3V4.5a3 3 0 1 1 6 0v8.25a3 3 0 0 1-3 3Z"
/>
</svg>
</button>
<input
className="w-full placeholder:text-gray-800 placeholder:italic p-4 rounded-md bg-opacity-50 bg-white backdrop-blur-md"
placeholder="Type a message..."
ref={input}
onKeyDown={(e) => {
if (e.key === "Enter") {
sendMessage();
}
}}
/>
<button
disabled={loading || message}
onClick={sendMessage}
className={`bg-gray-500 hover:bg-gray-600 text-white p-4 px-10 font-semibold uppercase rounded-md ${
loading || message ? "cursor-not-allowed opacity-30" : ""
}`}
>
Send
</button>
</div>
</div>
);
};
```
We won't go into detail on the previous code since it's quite standard. In addition to this, we need to update the file `frontend/src/index.js` as follows:
```javascript
\\ frontend/src/index.js
import React from "react";
import ReactDOM from "react-dom/client";
import App from "./App";
import { SpeechProvider } from "./hooks/useSpeech";
import "./index.css";
ReactDOM.createRoot(document.getElementById("root")).render(
<React.StrictMode>
<SpeechProvider>
<App />
</SpeechProvider>
</React.StrictMode>
);
```
### OpenAI GPT API with LangChain
The OpenAI GPT API will serve as the brain of our avatar. Once Felix receives a text from the client, he will respond using the following predefined prompt:
```javascript
\\ backend/modules/openAI.mjs
const template = `
You are Felix, a world traveler.
You will always respond with a JSON array of messages, with a maximum of 3 messages:
\n{format_instructions}.
Each message has properties for text, facialExpression, and animation.
The different facial expressions are: smile, sad, angry, surprised, funnyFace, and default.
The different animations are: Idle, TalkingOne, TalkingThree, SadIdle, Defeated, Angry,
Surprised, DismissingGesture and ThoughtfulHeadShake.
`;
```
Once the interaction with Felix has started, the OpenAI GPT API generates a series of responses. Specifically, these responses will consist of an array with a limit of three sentences designed as follows:
```javascript
{
"text": "Felix's response",
"facialExpression": "Facial expression of Felix when he begins to speak",
"animation": "Animations used to generate body movements"
}
```
The concept behind splitting the response into three sentences is to prevent Felix from constantly using the same facial expressions and body movements when speaking, giving him a more realistic appearance. Overall, this process is controlled by the following code:
```javascript
\\ backend/modules/openAI.mjs
import { ChatOpenAI } from "@langchain/openai";
import { ChatPromptTemplate } from "@langchain/core/prompts";
import { StructuredOutputParser } from "langchain/output_parsers";
import { z } from "zod";
import dotenv from "dotenv";
dotenv.config();
const template = `
You are Felix, a world traveler.
You will always respond with a JSON array of messages, with a maximum of 3 messages:
\n{format_instructions}.
Each message has properties for text, facialExpression, and animation.
The different facial expressions are: smile, sad, angry, surprised, funnyFace, and default.
The different animations are: Idle, TalkingOne, TalkingThree, SadIdle, Defeated, Angry,
Surprised, DismissingGesture and ThoughtfulHeadShake.
`;
const prompt = ChatPromptTemplate.fromMessages([
["ai", template],
["human", "{question}"],
]);
const model = new ChatOpenAI({
openAIApiKey: process.env.OPENAI_API_KEY || "-",
modelName: process.env.OPENAI_MODEL || "davinci",
temperature: 0.2,
});
const parser = StructuredOutputParser.fromZodSchema(
z.object({
messages: z.array(
z.object({
text: z.string().describe("Text to be spoken by the AI"),
facialExpression: z
.string()
.describe(
"Facial expression to be used by the AI. Select from: smile, sad, angry, surprised, funnyFace, and default"
),
animation: z
.string()
.describe(
`Animation to be used by the AI. Select from: Idle, TalkingOne, TalkingThree, SadIdle,
Defeated, Angry, Surprised, DismissingGesture, and ThoughtfulHeadShake.`
),
})
),
})
);
const openAIChain = prompt.pipe(model).pipe(parser);
export { openAIChain, parser };
```
The code performs four primary tasks:
1. It uses the `dotenv` library to load the necessary environment variables for interacting with the OpenAI API.
2. It defines a "prompt" template using the ChatPromptTemplate class from `@langchain/core/`prompts. This template guides the conversation as a predefined script for the chat.
3. It configures the chat model using the `ChatOpenAI` class, which relies on OpenAI's `davinci` model if the environment variables have not been configured previously.
4. It parses the output, designing the response generated by the AI in a specific format that includes details about the facial expression and animation to use, which is crucial for a realistic interaction with Felix.
In summary, the code connects LangChain with the OpenAI GPT API, sends the predefined prompt, interprets the response, and passes it to the ElevenLab TTS API to convert it into coherent speech, completing the cycle of human-avatar interaction.
### OpenAI and Whisper API Setup
As the reader may have noticed, the previous component can only process text. So if the user decides to use the microphone, the audio must be processed beforehand. In other words, we need to transcribe the audio. For this, we will use the Whisper service offered by OpenAI with the following implementation:
```javascript
\\ backend/modules/whisper.mjs
import { OpenAIWhisperAudio } from "langchain/document_loaders/fs/openai_whisper_audio";
import { convertAudioToMp3 } from "../utils/audios.mjs";
import fs from "fs";
import dotenv from "dotenv";
dotenv.config();
const openAIApiKey = process.env.OPENAI_API_KEY;
async function convertAudioToText({ audioData }) {
const mp3AudioData = await convertAudioToMp3({ audioData });
const outputPath = "/tmp/output.mp3";
fs.writeFileSync(outputPath, mp3AudioData);
const loader = new OpenAIWhisperAudio(outputPath, { clientOptions: { apiKey: openAIApiKey } });
const doc = (await loader.load()).shift();
const transcribedText = doc.pageContent;
fs.unlinkSync(outputPath);
return transcribedText;
}
export { convertAudioToText };
```
The main purpose of this code is to convert audio to text. To achieve this, it first converts the audio to MP3 format, then uses the OpenAI Whisper API to transcribe the audio to text, and finally, it cleans up by creating and deleting temporary files as needed.
### ElevenLabs API Voice Generation
Once we are sure that the user input (text or audio) has been passed through the OpenAI GPT API and has generated a response, acting according to the flow described above, the response is a text that we must convert into audio. For this, we use the TTS service of [ElevenLabs API](https://elevenlabs.io/) through the following service:
```javascript
\\ backend/modules/elenvenLabs.mjs
import ElevenLabs from "elevenlabs-node";
import dotenv from "dotenv";
dotenv.config();
const elevenLabsApiKey = process.env.ELEVEN_LABS_API_KEY;
const voiceID = process.env.ELEVEN_LABS_VOICE_ID;
const modelID = process.env.ELEVEN_LABS_MODEL_ID;
const voice = new ElevenLabs({
apiKey: elevenLabsApiKey,
voiceId: voiceID,
});
async function convertTextToSpeech({ text, fileName }) {
await voice.textToSpeech({
fileName: fileName,
textInput: text,
voiceId: voiceID,
stability: 0.5,
similarityBoost: 0.5,
modelId: modelID,
style: 1,
speakerBoost: true,
});
}
export { convertTextToSpeech, voice };
```
In the previous fragment, a function called `convertTextToSpeech` has been implemented, which utilizes the Text-To-Speech (TTS) service of ElevenLabs to convert text into audio.
Specifically:
1. The `elevenlabs-node` library is imported to interact with the ElevenLabs API, and `dotenv` is used to load environment variables from a `.env` file:
```javascript
\\ backend/modules/elenvenLabs.mjs
import ElevenLabs from "elevenlabs-node";
import dotenv from "dotenv";
dotenv.config();
```
2. The necessary credentials to authenticate with the ElevenLabs service are obtained from the environment variables. These credentials include the ElevenLabs API Key, the voice ID, and the model ID:
```javascript
\\ backend/modules/elenvenLabs.mjs
const elevenLabsApiKey = process.env.ELEVEN_LABS_API_KEY;
const voiceID = process.env.ELEVEN_LABS_VOICE_ID;
const modelID = process.env.ELEVEN_LABS_MODEL_ID;
```
3. An instance of ElevenLabs is created by passing the credentials obtained earlier:
```javascript
\\ backend/modules/elenvenLabs.mjs
const voice = new ElevenLabs({
apiKey: elevenLabsApiKey,
voiceId: voiceID,
});
```
4. The function `convertTextToSpeech` takes an object as an argument containing the text to be converted into audio and the name of the output file:
```javascript
\\ backend/modules/elenvenLabs.mjs
async function convertTextToSpeech({ text, fileName }) {
await voice.textToSpeech({
fileName: fileName,
textInput: text,
voiceId: voiceID,
stability: 0.5,
similarityBoost: 0.5,
modelId: modelID,
style: 1,
speakerBoost: true,
});
}
```
5. Within the `convertTextToSpeech` function, the `textToSpeech` method provided by the `ElevenLabs` instance to converts text into audio. Several parameters are passed, including the output file name, the text to be converted, the voice ID, stability, similarity boost, model ID, style, and speaker boost. The ID for all available voices in Eleven Labs can be accessed [here](https://api.elevenlabs.io/v1/voices). It's recommended to have the paid version. With the free version, the avatar doesn't work well due to an error caused by too many requests.
6. Finally, the `convertTextToSpeech` function and the `voice` instance are exported so that they can be used in other modules of the application:
```javascript
export { convertTextToSpeech, voice };
```
### Visemes from Rhubarb Lip-Sync Audio File
Let's start by saying that Rhubarb Lip-Sync is a command-line tool with which you can analyze an audio file to recognize what is being said and automatically generate the necessary information for lip synchronization. Rhubarb Lip-Sync can generate between six and nine mouth positions (visemes). The first six mouth shapes correspond to phonemes from A to F, which are the basic mouth shapes and, according to their documentation, are the minimum mouth positions that should be drawn to achieve successful animation.
In our case, we only need to implement a mapping between these visemes and the default ones provided by our avatar Felix, as you can check [here](https://docs.readyplayer.me/ready-player-me/api-reference/avatars/morph-targets/oculus-ovr-libsync). As an additional fact, these six mouth shapes were "invented" at [Hanna-Barbera](https://es.wikipedia.org/wiki/Hanna-Barbera) studios for programs like Scooby-Doo and The Flintstones. Since then, they have evolved into a de facto standard for 2D animation and have been widely used by studios such as Disney and Warner Bros.
In addition to the six basic mouth shapes, there are three extended mouth shapes: G, H, and X. These are optional. You can choose to use one or two or leave them out altogether.
To use Rhubarb Lip-Sync, we need to do the following:
1. Download the latest version according to our operating system from the official [Rhubarb Lip-Sync repository](https://github.com/DanielSWolf/rhubarb-lip-sync/releases).
2. Create in the backend a `/bin` directory and put all the contents of the unzipped `rhubarb-lip-sync.zip` inside it. Sometimes, the operating system requests permissions, so you need to enable them.
3. Install `ffmpeg` for [Mac OS](https://formulae.brew.sh/formula/ffmpeg), [Linux](https://ffmpeg.org/download.html) or [Windows](https://ffmpeg.org/download.html).
4. Implement the service `backend/modules/rhubarbLipSync.mjs` in the backend.
```javascript
// backend/modules/rhubarbLipSync.mjs
import { execCommand } from "../utils/files.mjs";
const getPhonemes = async ({ message }) => {
const time = new Date().getTime();
console.log(`Starting conversion for message ${message}`);
await execCommand(
{ command: `ffmpeg -y -i audios/message_${message}.mp3 audios/message_${message}.wav` }
// -y to overwrite the file
);
console.log(`Conversion done in ${new Date().getTime() - time}ms`);
await execCommand({
command: `./bin/rhubarb -f json -o audios/message_${message}.json audios/message_${message}.wav -r phonetic`,
});
// -r phonetic is faster but less accurate
console.log(`Lip sync done in ${new Date().getTime() - time}ms`);
};
export { getPhonemes };
```
This code imports the `execCommand` function from the `files.mjs` file in the `backend/utils` directory.
```javascript
// backend/utils/file.mjs
import { exec } from "child_process";
import { promises as fs } from "fs";
const execCommand = ({ command }) => {
return new Promise((resolve, reject) => {
exec(command, (error, stdout, stderr) => {
if (error) reject(error);
resolve(stdout);
});
});
};
```
Then, the `getPhonemes` function is defined to execute two commands using the `execCommand` function. The first command converts an MP3 audio file into a WAV file using the `ffmpeg` tool. Then, the second command is executed to run `rhubarb` from the `/bin` directory to determine the timestamps and phonemes produced during the audio playback. The result is saved in a JSON file, which has a structure like this:
```javascript
{
"metadata": {
"soundFile": "api_0.wav",
"duration": 2.69
},
"mouthCues": [
{ "start": 0.00, "end": 0.01, "value": "X" },
{ "start": 0.01, "end": 0.07, "value": "A" },
{ "start": 0.07, "end": 0.31, "value": "B" },
{ "start": 0.31, "end": 0.39, "value": "A" },
{ "start": 0.39, "end": 0.66, "value": "B" },
{ "start": 0.66, "end": 0.78, "value": "X" },
{ "start": 0.78, "end": 0.86, "value": "B" },
{ "start": 0.86, "end": 0.93, "value": "E" },
{ "start": 0.93, "end": 1.07, "value": "F" },
{ "start": 1.07, "end": 1.21, "value": "C" },
{ "start": 1.21, "end": 1.35, "value": "F" },
{ "start": 1.35, "end": 1.42, "value": "C" },
{ "start": 1.42, "end": 1.63, "value": "F" },
{ "start": 1.63, "end": 1.70, "value": "C" },
{ "start": 1.70, "end": 1.78, "value": "A" },
{ "start": 1.78, "end": 1.96, "value": "B" },
{ "start": 1.96, "end": 2.03, "value": "D" },
{ "start": 2.03, "end": 2.45, "value": "B" },
{ "start": 2.45, "end": 2.69, "value": "X" }
]
}
```
The result of these files will be used later for lip synchronization with the audio.
5. Implement in the frontend the file `frontend/src/constants/visemeMappings.js` with the following mapping:
```javascript
// frontend/src/constants/visemeMappings.js
const visemesMapping = {
A: "viseme_PP",
B: "viseme_kk",
C: "viseme_I",
D: "viseme_AA",
E: "viseme_O",
F: "viseme_U",
G: "viseme_FF",
H: "viseme_TH",
X: "viseme_PP",
};
export default visemesMapping;
```
Here, we aim to match the phonemes identified by Rhubarb Lip-sync with the corresponding morph targets of our avatar's visemes. For more details, you can refer to the section on mouth positions in [Rhubarb lip-sync](https://github.com/DanielSWolf/rhubarb-lip-sync?tab=readme-ov-file#mouth-shapes) and the Morph Targets corresponding to the visemes of the avatar in [Ready Player me](https://docs.readyplayer.me/ready-player-me/api-reference/avatars/morph-targets/oculus-ovr-libsync).
### Audio Lip-Sync
In our backend, we have the following code to carry out vocal synchronization with the audio:
```javascript
// backend/modules/lip-sync.mjs
import { convertTextToSpeech } from "./elevenLabs.mjs";
import { getPhonemes } from "./rhubarbLipSync.mjs";
import { readJsonTranscript, audioFileToBase64 } from "../utils/files.mjs";
const lipSync = async ({ messages }) => {
await Promise.all(
messages.map(async (message, index) => {
const fileName = `audios/message_${index}.mp3`;
await convertTextToSpeech({ text: message.text, fileName });
await getPhonemes({ message: index });
message.audio = await audioFileToBase64({ fileName });
message.lipsync = await readJsonTranscript({ fileName: `audios/message_${index}.json` });
})
);
return messages;
};
export { lipSync };
```
Here, we import crucial previously implemented functions, such as `convertTextToSpeech` and `getPhonemes`, `readJsonTranscript` and `audioFileToBase64`. The latter are responsible for:
1. `readJsonTranscript`: Reads information from a JSON file associated with lip synchronization. Its implementation is as follows:
```javascript
// backend/utils/files.mjs
const readJsonTranscript = async ({ fileName }) => {
const data = await fs.readFile(fileName, "utf8");
return JSON.parse(data);
};
```
2. `audioFileToBase64`: Converts an audio file into a Base64 encoded string, facilitating its transmission or efficient storage. Its implementation is as follows:
```javascript
// backend/utils/files.mjs
const audioFileToBase64 = async ({ fileName }) => {
const data = await fs.readFile(fileName);
return data.toString("base64");
};
```
The main `lipSync` function performs the following tasks:
1. Takes an array of `messages` objects as input, where each object contains text to be converted into speech.
2. Implements `Promise.all` to handle asynchronous operations simultaneously. Each message:
* Generates a unique audio file named `audios/message_${index}.mp3`, where the synthesized audio is stored.
* Uses `convertTextToSpeech` to synthesize the audio from the message text and save it with the generated file name.
* Calls `getPhonemes` to extract phonemes from the generated audio, which is useful for lip animation.
* Utilizes `audioFileToBase64` to convert the generated audio file into a Base64-encoded string stored in the `audio` property of the message object.
* Calls `readJsonTranscript` to read lip synchronization data associated with the audio file and stores it in the `lipsync` property of the message object.
3. Returns the modified `messages` array, containing each message object with its processed audio data and lip synchronization information.
Additionally, in the backend, we have also implemented this server:
```javascript
// backend/index.mjs
import cors from "cors";
import dotenv from "dotenv";
import express from "express";
import { openAIChain, parser } from "./modules/openAI.mjs";
import { lipSync } from "./modules/lip-sync.mjs";
import { sendDefaultMessages } from "./modules/defaultMessages.mjs";
import { convertAudioToText } from "./modules/whisper.mjs";
import { voice } from "./modules/elevenLabs.mjs";
dotenv.config();
const elevenLabsApiKey = process.env.ELEVEN_LABS_API_KEY;
const app = express();
app.use(express.json());
app.use(cors());
const port = 3000;
app.post("/tts", async (req, res) => {
const userMessage = await req.body.message;
if (await sendDefaultMessages({ userMessage })) return;
let openAImessages = await openAIChain.invoke({
question: userMessage,
format_instructions: parser.getFormatInstructions(),
});
openAImessages = await lipSync({ messages: openAImessages.messages });
res.send({ messages: openAImessages });
});
app.post("/sts", async (req, res) => {
const base64Audio = req.body.audio;
const audioData = Buffer.from(base64Audio, "base64");
const userMessage = await convertAudioToText({ audioData });
let openAImessages = await openAIChain.invoke({
question: userMessage,
format_instructions: parser.getFormatInstructions(),
});
openAImessages = await lipSync({ messages: openAImessages.messages });
res.send({ messages: openAImessages });
});
app.listen(port, () => {
console.log(`Felix are listening on port ${port}`);
});
```
This server makes use of all previously implemented functions and exposes two endpoints:
* `/tts`: Receives text that OpenAI processes. The generated response goes through lipSync to generate metadata for synchronization.
* `/sts`: Receives an audio transcribed by Whisper and then processed by OpenAI. The process from the previous item is repeated.
In both cases, the server returns an object called `messages` with the following structure:
```javascript
[
{
text: "I've been to so many places around the world, each with its own unique charm and beauty.",
facialExpression: 'smile',
animation: 'TalkingOne',
audio: '//uQx//uQxAAADG1DHeGEeipZLqI09Jn5AkRGhGiLv9pZ3QRTd3eIR7'
lipsync: { metadata: [Object], mouthCues: [Array] }
},
{
text: :"There were times when the journey was tough, but the experiences and the people I met along the way made it all worth it.",
facialExpression: 'thoughtful',
animation: 'TalkingOne',
audio: '//uQx//uQxAAADG1DHeGEeipZLqI09Jn5AkRGhGiLv9pZ3QRTd3eIR7'
lipsync: { metadata: [Object], mouthCues: [Array] }
},
{
text: :"And there's still so much more to see and explore. The world is a fascinating place!",
facialExpression: 'surprised',
animation: 'TalkingOne',
audio: '//uQx//uQxAAADG1DHeGEeipZLqI09Jn5AkRGhGiLv9pZ3QRTd3eIR7'
lipsync: { metadata: [Object], mouthCues: [Array] }
}
]
```
These objects contain the parameters `text`, `facialExpression`, `animation`, `audio` in Base64 format, and `lipsync`, which are metadata for lip synchronization. We will use all this information on the frontend side, as seen below.
Remember that on the frontend side, we have already implemented a hook called `useSpeech`, which makes use of the following context:
```javascript
{
text: "I've been to so many places around the world, each with its own unique charm and beauty.",
facialExpression: 'smile',
animation: 'TalkingOne',
audio: '//uQx//uQxAAADG1DHeGEeipZLqI09Jn5AkRGhGiLv9pZ3QRTd3eIR7`
lipsync: { metadata: [Object], mouthCues: [Array] }
}
```
The one we'll use in the Avatar.jsx component to finally achieve lip synchronization. To do this, we will update the code of the Avatar.jsx file as follows:
```javascript
// frontend/src/components/Avatar.jsx
import { useSpeech } from "../hooks/useSpeech";
import facialExpressions from "../constants/facialExpressions";
import visemesMapping from "../constants/visemesMapping";
import morphTargets from "../constants/morphTargets";
// omitted code for simplicity
export function Avatar(props) {
// omitted code for simplicity
const { message, onMessagePlayed } = useSpeech();
const [lipsync, setLipsync] = useState();
const [facialExpression, setFacialExpression] = useState("");
const [audio, setAudio] = useState();
const [animation, setAnimation] = useState(animations.find((a) => a.name === "Idle") ? "Idle" : animations[0].name);
useEffect(() => {
if (!message) {
setAnimation("Idle");
return;
}
setAnimation(message.animation);
setFacialExpression(message.facialExpression);
setLipsync(message.lipsync);
const audio = new Audio("data:audio/mp3;base64," + message.audio);
audio.play();
setAudio(audio);
audio.onended = onMessagePlayed;
}, [message]);
const lerpMorphTarget = (target, value, speed = 0.1) => {
scene.traverse((child) => {
if (child.isSkinnedMesh && child.morphTargetDictionary) {
const index = child.morphTargetDictionary[target];
if (index === undefined || child.morphTargetInfluences[index] === undefined) {
return;
}
child.morphTargetInfluences[index] = THREE.MathUtils.lerp(child.morphTargetInfluences[index], value, speed);
}
});
};
useFrame(() => {
const appliedMorphTargets = [];
if (message && lipsync) {
const currentAudioTime = audio.currentTime;
for (let i = 0; i < lipsync.mouthCues.length; i++) {
const mouthCue = lipsync.mouthCues[i];
if (currentAudioTime >= mouthCue.start && currentAudioTime <= mouthCue.end) {
appliedMorphTargets.push(visemesMapping[mouthCue.value]);
lerpMorphTarget(visemesMapping[mouthCue.value], 1, 0.2);
break;
}
}
}
Object.values(visemesMapping).forEach((value) => {
if (appliedMorphTargets.includes(value)) {
return;
}
lerpMorphTarget(value, 0, 0.1);
});
});
// omitted code for simplicity
```
In the provided code snippet, we update the React component, Avatar.jsx, representing an animated avatar. Here's a detailed explanation of what each part of the code does:
1. Necessary modules and resources are imported:
* `useSpeech`: A custom hook providing access to the current message being played.
* `facialExpressions`: A module containing predefined facial expressions for the avatar.
* `visemesMapping`: A module mapping visemes to avatar morphological targets.
* `morphTargets`: A module defining avatar morphological targets for different expressions and movements.
2. Inside the `Avatar` component, the result of `useSpeech` is destructured into `message` and `onMessagePlayed`, where `message` contains information about the current message being played, such as text, facial expression, animation, audio, and lip synchronization metadata.
3. States `lipsync`, `facialExpression`, `audio`, and `animation` are initialized using `useState`. These states store lip synchronization metadata, the current facial expression, the audio object of the message, and the current avatar animation.
4. `useEffect` is used to perform actions whenever the message changes. The avatar animation is set to "Idle" if there’s no message. Otherwise, states are updated with message information, an audio object is created, and the message’s audio is played. Additionally, an `onended` event is set on the audio to execute `onMessagePlayed` when the message audio ends.
5. The `lerpMorphTarget` function is defined to smooth transitions between avatar morphological targets.
6. `useFrame` is used to perform actions on each animation frame. In this case, corresponding visemes for the current message audio are calculated and applied. The "mouthCues" array in the lip synchronization metadata is iterated through to determine the active viseme based on the current audio playback time. Subsequently, transitions between applied and unapplied visemes are smoothed.
In summary, this update to the Avatar component ensures precise synchronization between the avatar's lip animation and the spoken message audio, providing a more realistic and immersive user experience. Thus, we have finished building our AI avatar! If you'd like the complete code for this post, you can find it [here](https://github.com/Monadical-SAS/digital-human).
## Conclusion
After building our AI avatar, we can conclude that:
1. Enhanced avatar technology powered by LLMs has the potential to create more interactive and engaging applications for users.
2. Minimizing response times is a critical area for improvement in AI avatars. The processes involved in transcribing audio, processing it, generating responses, converting them into audio, and identifying visemes for facial expressions often introduces high latency and impacts the fluidity of human to AI avatar interaction. Exploring advanced techniques such as parallel processing and caching anticipatory responses may provide insights into enhancing interactivity and the overall user experience.
In summary, AI avatars are here to stay as a rapidly growing market worth several billion dollars is exploring its potential in the education, video game, and customer service sectors. As we’ve learned through this tutorial, these human-like avatars promise to transform our interactions with computers. In the future, we expect to see even more exciting and sophisticated advancements as we continue developing these technologies.
If you found this tutorial useful, please share it with your friends and colleagues!
## References
1. How ChatGPT, Bard and other LLMs are signalling an evolution for AI digital humans: https://www.digitalhumans.com/blog/how-chatgpt-bard-and-other-llms-are-signaling-an-evolution-for-ai-digital-humans
2. UnneQ Digital Humans: https://www.digitalhumans.com/
3. LLMs: Building a Less Artificial and More Intelligent AI Human: https://www.linkedin.com/pulse/llms-building-less-artificial-more-intelligent-ai-human/
4. Building a digital person design best practices: https://fcatalyst.com/blog/aug2023/building-a-digital-person-design-best-practices
5. Navigating the Era of Digital Humans": An Initial Exploration of a Future Concept: https://www.linkedin.com/pulse/navigating-era-digital-humans-initial-exploration-future-koelmel-eqrje/
6. How to Setup Tailwind CSS in React JS with VS Code: https://dev.to/david_bilsonn/how-to-setup-tailwind-css-in-react-js-with-vs-code-59p4
7. Ex-Human: https://exh.ai/#home
8. Allosaurus: https://github.com/xinjli/allosaurus
9. Rhubarb Lip-Sync: https://github.com/DanielSWolf/rhubarb-lip-sync
10. Ready Player Me - Oculus OVR LipSync: https://docs.readyplayer.me/ready-player-me/api-reference/avatars/morph-targets/oculus-ovr-libsync
11. Ready Player Me - Apple Arkit: https://docs.readyplayer.me/ready-player-me/api-reference/avatars/morph-targets/apple-arkit
12. How to Build a 3D Chatbot with ChatGPT & ElevenLabs: https://www.youtube.com/watch?v=EzzcEL_1o9o&t=321s
## Footnotes
<a id="1">[1]</a> See [UneeQ](https://www.digitalhumans.com/blog/how-chatgpt-bard-and-other-llms-are-signaling-an-evolution-for-ai-digital-humans), [Wikipedia](https://en.wikipedia.org/wiki/Virtual_human), [Quantum Capture](https://www.quantumcapture.com/insights/meetquantum-gte8t), [Unreal Engine](https://www.unrealengine.com/en-US/explainers/digital-humans/how-do-you-create-a-digital-human), [ATRYTONE](https://atrytone.com/digital-humans-virtual-humans-differences-overview/), [Synthesia](https://www.synthesia.io/post/digital-humans) for more information on Digital Humans or AI Avatars. [🔙](#01)
<a id="2">[2]</a> See [How ChatGPT, Bard and other LLMs are signalling an evolution for AI digital humans](https://www.digitalhumans.com/blog/how-chatgpt-bard-and-other-llms-are-signaling-an-evolution-for-ai-digital-humans). [🔙](#02)